Open post

arrow 8×10 metal shed instructions

The Arrow 8×10 Metal Shed is a durable, galvanized steel storage solution ideal for outdoor spaces. It offers ample storage while being space-efficient and easy to assemble.

1.1 Overview of the Arrow 8×10 Metal Shed

The Arrow 8×10 Metal Shed is a high-quality, pre-engineered storage solution designed for durability and functionality. With a nominal size of 10×8 feet, it provides 74 square feet of storage space. The shed features a galvanized steel construction, weather-resistant design, and a sturdy frame. Its compact yet spacious interior makes it ideal for storing tools, equipment, or seasonal items. Easy to assemble and customize, it offers versatility for various outdoor storage needs.

1.2 Importance of Following Assembly Instructions

Following the assembly instructions for the Arrow 8×10 Metal Shed is crucial to ensure safety, proper structural integrity, and optimal performance. Deviating from the guidelines can lead to incorrect assembly, potential damage to parts, or safety hazards. Adhering to the manual helps prevent injuries, ensures a sturdy build, and maintains warranty validity. Always wear gloves and follow each step carefully to achieve a secure and functional shed.

Safety Precautions and Tools Needed

Wearing gloves and safety gear is essential. Ensure proper tools like drills, screwdrivers, and wrenches are available. Follow instructions carefully to avoid injuries and ensure successful assembly.

2.1 Essential Safety Guidelines

Always wear gloves and protective gear to prevent injuries. Handle sharp edges with care, as some parts may have rough surfaces. Ensure the area is clear of obstacles and assemble on a level surface. Follow the instructions precisely and use the correct tools to avoid accidents. Secure the shed with an anchoring kit to prevent wind damage. Regularly inspect the shed for stability and maintain it properly for longevity.

2;2 List of Required Tools and Materials

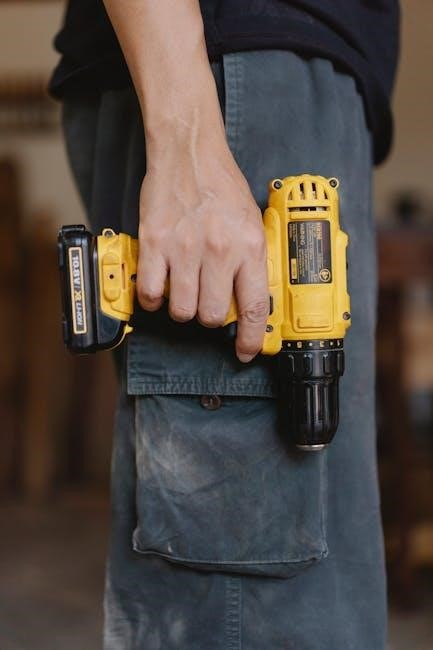
The following tools and materials are necessary for assembling the Arrow 8×10 Metal Shed: gloves, a drill, screwdriver, wrench, measuring tape, level, ladder, clamps, and a 1/4″ masonry drill bit. Ensure all parts are included and refer to the manual for specific hardware requirements. Additional materials like pressure-treated lumber may be needed for the base. Safety gear is essential to prevent injuries during assembly.

Preparing the Site

Ensure the site is level, clear of debris, and well-drained. Choose a flat area to simplify assembly and ensure proper shed stability. Organize the shed kit nearby for easy access during construction.

3.1 Choosing the Right Location

Select a flat, level area with proper drainage to ensure stability and prevent water accumulation. Ensure the site is clear of debris and obstructions for easy access during assembly. Choose a location that allows for good airflow and is close to where you will store materials. Avoid low-lying areas prone to water pooling to maintain the shed’s integrity and functionality.

3.2 Leveling the Ground

Ensure the ground is level and firm to provide a stable base for your shed. Clear the area of debris and vegetation. Check the ground with a spirit level; if uneven, use sand or gravel to create a flat surface. Proper leveling prevents structural damage and ensures smooth assembly. A well-prepared base is essential for the longevity and stability of your Arrow 8×10 Metal Shed.

3.3 Unloading and Organizing the Shed Kit

Carefully unload the Arrow 8×10 Metal Shed components to avoid damage. Check the parts list to ensure all items are included and undamaged. Organize the hardware and panels in a logical order to simplify assembly. Use a helper to manage larger panels, and store small parts in labeled containers. Keep the assembly manual nearby for quick reference during the process.

Foundation and Anchoring Options

The Arrow 8×10 Metal Shed requires a sturdy foundation for stability. Options include an Arrow Floor Frame Kit, a wood platform, or a concrete base. Anchoring kits ensure secure fastening to prevent wind damage, with solutions like earth anchors or galvanized steel systems. Choose the method that best suits your site and local building requirements.

4.1 Using an Arrow Floor Frame Kit

The Arrow Floor Frame Kit provides a pre-designed foundation system for the 8×10 Metal Shed, ensuring a level and secure base. Made from durable galvanized steel, it simplifies assembly by aligning perfectly with the shed’s dimensions. The kit includes all necessary hardware and is designed to prevent shifting or unevenness. Follow the manual for precise installation to ensure stability and proper anchoring. This method is ideal for DIY enthusiasts seeking a straightforward setup.

4.2 Building a Wood Platform Base

For a custom base, use pressure-treated 2×4 lumber to create a durable and moisture-resistant foundation. Ensure the platform is square and level, matching the shed’s dimensions. Secure the wood frame with screws and anchor the shed to the platform using galvanized fasteners. This method allows for a sturdy, personalized base that ensures stability and protects against wind damage. Follow safety guidelines for proper construction.

4.3 Anchoring the Shed to the Ground

Secure the shed using an Arrow Anchoring Kit or Earth Anchor Kit, designed for stability. These kits include heavy-duty galvanized steel anchors and corner gussets. For concrete, a specialized anchor system is available. Follow manufacturer instructions to ensure proper installation, preventing wind damage and ensuring the shed remains firmly grounded. Anchoring is essential for safety and durability, especially in windy areas.

Assembly Process

The assembly of the Arrow 8×10 Metal Shed is a systematic process. Start by constructing the frame, then attach the walls and roof panels, and finally secure the doors and hardware.

5.1 Constructing the Frame

Begin by assembling the base frame using the provided metal pieces. Ensure all connections are secure and properly aligned. Attach the side panels to the base, followed by the roof supports. Use the pre-drilled holes and necessary hardware to tighten everything firmly. Maintain a level and square structure throughout the process to ensure stability and proper fitting of subsequent components.

5.2 Installing the Walls and Roof Panels

Attach the wall panels to the frame, ensuring they align perfectly with the pre-drilled holes. Secure each panel using the provided screws, tightening firmly but avoiding overtightening. Once walls are in place, install the roof panels by aligning their edges with the wall tops. Use screws to fasten the roof securely, ensuring a watertight seal. Double-check all connections for stability and proper fit.

5.3 Attaching the Doors and Hardware

Begin by aligning the door panels with the pre-drilled holes on the frame. Secure the doors using the provided screws, tightening them gradually to avoid warping. Install the door handles and locking mechanism, ensuring they are tightly fastened for security. Double-check the alignment and operation of the doors, making adjustments as necessary for proper function and a secure fit.

Final Steps and Inspection

Tighten all bolts and screws to ensure structural integrity. Verify door alignment and proper function. Conduct a final inspection to ensure all components are securely fastened and the shed is level.

6.1 Securing the Shed with an Anchoring Kit

Use an Arrow Anchoring Kit to securely fasten the shed to the ground, preventing wind damage. Follow the kit’s instructions to drill and install anchors into the base. Ensure all straps are tightly fastened to the shed’s frame for maximum stability. This step is crucial for safety and longevity, especially in areas with high winds or unstable soil conditions.

6.2 Final Tightening of All Bolts and Screws

After completing the assembly, inspect and tighten all bolts and screws to ensure maximum stability. Use a wrench or screwdriver to double-check every connection. Properly securing all fasteners prevents structural issues and enhances durability. This final step is essential for ensuring the shed remains stable and safe under various weather conditions.

Optional Accessories and Customization

Enhance functionality and appearance with optional accessories like shelving, ventilation kits, and organization systems. These customization options maximize storage efficiency and tailor the shed to your needs.

7.1 Adding Shelving or Storage Solutions

Add shelving or storage solutions to maximize space inside your Arrow 8×10 Metal Shed. Install utility hooks, shelves, or heavy-duty brackets to organize tools and equipment efficiently. These accessories help keep items off the floor, ensuring better accessibility and protection from moisture. Customizable storage options enhance the shed’s functionality, making it ideal for workshops, gardening supplies, or seasonal storage needs while maintaining a tidy interior space.

7.2 Installing Ventilation for Better Airflow

Installing ventilation in your Arrow 8×10 Metal Shed improves airflow, reducing humidity and moisture buildup. Consider adding roof vents or window kits to enhance air circulation. Proper ventilation prevents rust on metal surfaces and keeps the interior dry. Ensure vents are securely installed and sealed to maintain the shed’s structural integrity while promoting a healthier storage environment for your belongings.

Troubleshooting Common Issues

Ensure all parts are included and double-check the manual for clarity. Address loose screws or uneven bases promptly. Contact Arrow customer support for unresolved issues.

8.1 Addressing Misaligned Parts or Gaps

Check the base for levelness and ensure all panels are securely fastened. Use shims or adjust the foundation to align parts properly. Gaps between panels may indicate loose screws or improper assembly. Tighten all bolts and screws firmly, and verify that the frame is square. If issues persist, consult the manual or contact Arrow customer support for assistance.

8.2 Solving Door Alignment Problems

Door misalignment can occur due to uneven assembly or foundation issues. Check if the door frame is properly attached to the shed. Loosen hinge screws, adjust the door position, and retighten securely. Ensure the shed is square and level, as an uneven base can cause doors to hang incorrectly. If problems persist, refer to the manual or contact Arrow customer support for further guidance.

Maintenance and Care Tips

Regularly clean the shed to prevent dirt buildup. Inspect for rust and apply protective coatings. Ensure proper ventilation to avoid moisture issues and maintain structural integrity over time.

9.1 Regular Cleaning and Inspection

Regular cleaning involves removing dirt and debris from the shed’s surface. Inspect for signs of rust or damage. Use mild detergents and water to wash the metal, avoiding abrasive materials. Check roof, walls, and doors for gaps or dents. Ensure proper ventilation to reduce moisture buildup. Regular inspections help maintain the shed’s structural integrity and prevent potential issues before they escalate. Schedule checks seasonally for optimal maintenance.

9.2 Protecting the Metal Surface from Rust

Protect the metal surface by cleaning it regularly and applying a rust-inhibiting coating. Inspect for scratches or gaps where moisture could enter. Ensure the shed is well-ventilated to reduce humidity. Avoid placing damp items inside. If rust appears, sand it off and apply metal primer and paint. Regular maintenance ensures longevity and prevents corrosion, keeping the shed durable and secure for years to come.

Warranty and Customer Support

The Arrow 8×10 Metal Shed comes with a warranty covering defects in materials and workmanship. For assistance, contact Arrow Customer Service at 1-800-851-1085 or visit their website.

10.1 Understanding the Warranty Coverage

The Arrow 8×10 Metal Shed is backed by a limited warranty covering defects in materials and workmanship. The warranty typically lasts for a specified period, such as 10 or 15 years, depending on the model. It does not cover damage caused by misuse, rust, or natural weathering. Registration is required to activate the warranty, and claims must be submitted through Arrow’s customer service department.

10.2 Contacting Arrow Customer Service

Arrow Customer Service is available to assist with questions, concerns, or warranty claims. Customers can contact them via phone at 1-800-851-1085 or visit their website at assistarrowsheds.com for support. The department is located at 1101 North 4th Street, Breese, Illinois, 62230, and is ready to help resolve any issues related to your Arrow 8×10 Metal Shed.

Open post

harley-davidson factory security system manual

Welcome to the Harley-Davidson Factory Security System Manual, your comprehensive guide to understanding and utilizing the advanced security features designed to protect your motorcycle.

This manual covers essential procedures, including arming, disarming, and troubleshooting, ensuring your bike remains secure and hassle-free. Explore the innovative features and step-by-step instructions.

Discover how to maximize the potential of your Harley-Davidson security system, ensuring peace of mind and protecting your investment with cutting-edge technology tailored for motorcycle enthusiasts.

Overview of the Factory Security System

The Harley-Davidson Factory Security System is an advanced, integrated solution designed to protect your motorcycle from unauthorized access. It combines cutting-edge technology, including the Smart Security System, key fob, siren, and Turn Signal Security Module (TSSM), to ensure robust protection. The system automatically arms and disarms, providing a seamless experience. It also features a PIN setup option for added security. With real-time notifications through the security light and alarm, this system offers peace of mind, knowing your bike is secure. Its intuitive design makes it easy to use while providing top-tier protection.

Importance of the Manual for Owners

The Harley-Davidson Factory Security System Manual is an essential guide for owners to understand and operate their security system effectively. It provides detailed instructions for arming, disarming, and troubleshooting, ensuring optimal functionality. By following the manual, owners can prevent unauthorized access and maintain their motorcycle’s security. It also offers insights into customizing settings and resolving common issues, making it a vital resource for protecting your investment and enjoying a hassle-free riding experience. Referencing the manual ensures you maximize the system’s features and keep your bike secure.

Key Components of the Harley-Davidson Factory Security System

The system includes the Smart Security System (H-DSSS), key fobs, sirens, and the Turn Signal Security Module (TSSM), ensuring comprehensive protection for your motorcycle.

Smart Security System (H-DSSS) Features

The Harley-Davidson Smart Security System (H-DSSS) offers advanced protection with automatic arming and disarming, key fob recognition, and immobilization technology. It includes a high-decibel siren, motion sensing, and tamper detection. The system arms itself within seconds after turning off the ignition and disarms when the key fob is detected. Riders can also disarm the system using a personal PIN. The H-DSSS integrates seamlessly with the Turn Signal Security Module (TSSM), providing real-time feedback through a flashing status indicator. This system ensures robust security while maintaining ease of use for Harley-Davidson owners.

Key Fob and Siren Components

The Harley-Davidson Factory Security System includes a compact key fob that enables seamless arming and disarming of the system. The key fob features a panic button for emergency situations and a range of up to 300 feet. The siren component is designed to be weather-resistant and produces a high-decibel alarm to deter potential threats. The siren is typically located near the battery for easy installation and is connected to the main harness. Together, these components provide a reliable and user-friendly security solution for Harley-Davidson motorcycles.

Turn Signal Security Module (TSSM) Functions

The Turn Signal Security Module (TSSM) is a central component of the Harley-Davidson Factory Security System. It integrates with the turn signal switches and ignition system to manage security features. The TSSM processes inputs from the key fob and turn signals to arm and disarm the system. It also handles the Personal Identification Number (PIN) setup, allowing manual disarming if the key fob is lost or damaged. Additionally, the TSSM monitors the motorcycle’s status when armed, ensuring that any unauthorized movements trigger the alarm. This module enhances the overall security system by providing multiple layers of protection, ensuring the motorcycle is secure and easily recoverable in case of theft.

Installation and Setup Guidelines

Install the siren near the battery, connect the harness, and ensure all components are securely fastened. Use the correct siren connector for your model year and follow the manual’s step-by-step instructions for proper setup and pairing.

Hardware Installation Steps

Begin by locating the siren connector behind the harness shield near the battery. Remove the dust cap and feed the connector downward. Select the correct siren harness for your model year from the kit. Connect the siren and ensure it is securely fastened. Next, access the Turn Signal Security Module (TSSM) and connect the appropriate wires. Ensure all connections are tight to avoid malfunctions. Finally, reassemble any removed components, such as the seat, and test the system to confirm proper functionality. Always follow the manual for model-specific instructions.

Software Configuration and Pairing

Pair your key fob by entering the default PIN (typically 11111) and follow on-screen prompts. Ensure the system recognizes the fob by testing arming/disarming. For VIN-specific codes, contact a Harley-Davidson dealer to program the fob’s serial number into the bike’s computer. After pairing, the system automatically arms when the ignition is off. If issues arise, reset the system or consult the manual for troubleshooting steps. Proper software configuration ensures seamless security functionality, protecting your motorcycle with advanced features.

Using the Factory Security System

Arm the system by turning off the ignition and walking away with the key fob. The system automatically activates, ensuring your motorcycle is secure.

Disarm by approaching with the key fob or entering your PIN. The system provides visual and audible feedback, ensuring easy operation and reliable protection.

Arming and Disarming Procedures

The Harley-Davidson Factory Security System arms automatically after turning off the ignition and walking away with the key fob. The system activates within 5 seconds, providing a secure lockdown.

Disarm the system by approaching the motorcycle with the key fob or entering your personal PIN. Turn the ignition switch to “ON” and press the left turn signal switch to deactivate the alarm. The system provides audible and visual feedback, such as a siren chirp and indicator light, confirming the status. For added convenience, the system can be programmed to automatically rearm if the ignition remains off for an extended period.

Personal Identification Number (PIN) Setup

The Harley-Davidson Factory Security System allows you to set a Personal Identification Number (PIN) for added security. The default PIN is 11111, but you can change it to a custom code. To set up or change your PIN, turn the ignition switch to the “ON” position and press the left turn signal switch three times, followed by the right turn signal switch once. Enter your desired PIN using the turn signal switches, and confirm the change. This feature ensures an extra layer of protection for your motorcycle.

Troubleshooting Common Issues

Address common issues like lost key fobs or system malfunctions by consulting the manual or contacting a Harley-Davidson dealership for expert assistance and genuine solutions.

Lost or Damaged Key Fob Solutions

If your key fob is lost or damaged, use your Personal Identification Number (PIN) to disarm the system temporarily. Enter the ignition on-off sequence, then input your 5-digit PIN using the turn signal switches. For a permanent solution, contact a Harley-Davidson dealership to obtain a replacement fob. Ensure your VIN is ready for verification. The dealership will program the new fob to your motorcycle’s security system, restoring full functionality and security to your bike. Always keep your PIN secure to avoid unauthorized access.

System Malfunction and Error Codes

If your Harley-Davidson security system malfunctions, refer to the error codes displayed on the dashboard or security module. Common codes like “13” indicate key fob communication issues, while “14” may signal a siren malfunction. To identify the issue, turn the ignition on and observe the flashing security light sequence. Consult your manual or a dealership for precise code meanings. Resetting the system may resolve minor glitches, but persistent errors require professional diagnosis. Regular system checks and updates can prevent malfunctions and ensure optimal security performance. Always address errors promptly to maintain your bike’s protection.

Advanced Features and Customization

The Harley-Davidson Factory Security System offers advanced features like Transport Mode and Extended Storage Settings to prevent battery drain and false alarms during prolonged inactivity or transport.

Customize security responses, such as siren durations and sensitivity levels, to tailor the system to your preferences, ensuring enhanced protection and convenience for your motorcycle.

Transport Mode and Extended Storage Settings

The Harley-Davidson Factory Security System includes Transport Mode and Extended Storage Settings to enhance convenience and protection during specific scenarios. Transport Mode prevents false alarms caused by movement during transportation, ensuring your bike remains secure without unnecessary notifications. Extended Storage Settings reduce battery drain and disable certain features to preserve power when the bike is not in use for extended periods. These modes are easily activated through the system’s menu or using the key fob, providing peace of mind while maintaining security.

  • Transport Mode: Ideal for trailers or long-distance moves.
  • Extended Storage: Conserves battery life during seasonal storage.
  • Customizable settings to suit your needs.

These features ensure your Harley-Davidson remains protected and ready for the next ride, regardless of the situation.

Customizing Security System Responses

The Harley-Davidson Factory Security System allows for personalized adjustments to enhance your riding experience while maintaining top-tier security. Users can customize the sensitivity of the alarm, toggle siren alerts, and set custom notifications for specific actions. The system also enables key fob programmability to tailor responses to individual preferences. Additionally, custom alerts can be configured to notify owners of unauthorized access or system malfunctions, ensuring a tailored security solution. These features provide flexibility and adaptability to meet the unique needs of each rider, supported by detailed instructions in the manual.

The Harley-Davidson Factory Security System Manual serves as an essential resource for owners seeking to protect their motorcycles effectively. By following the guidelines and procedures outlined, riders can ensure their bikes remain secure and functioning optimally. Customizable features, advanced technology, and straightforward troubleshooting steps empower owners to maintain control and peace of mind. Whether arming, disarming, or addressing malfunctions, this manual provides clear, step-by-step instructions tailored to enhance security and simplify ownership. Refer to your local Harley-Davidson dealership for further assistance or updates.

Open post

an fitting size chart pdf

Fitting size charts are essential tools for ensuring proper connections in plumbing‚ hydraulics‚ and engineering. They provide standardized measurements for threads‚ diameters‚ and dash sizes‚ guaranteeing compatibility and safety across applications. These charts are widely used to identify NPT‚ metric‚ and JIC threads‚ among others‚ helping professionals select the right fittings for their systems. By referencing these charts‚ users can avoid sizing errors‚ ensuring leak-free and durable connections in various industries.

Overview of Fitting Size Charts

Fitting size charts are detailed guides that list standard dimensions for various pipe and hydraulic fittings. They include measurements for thread types‚ such as NPT‚ metric‚ and JIC‚ as well as diameters‚ thread pitches‚ and dash sizes. These charts help users identify compatible fittings for specific applications‚ ensuring proper connections and system performance. They are widely used in plumbing‚ hydraulics‚ and engineering to standardize fittings across industries‚ preventing sizing errors and promoting safety. The charts often include tables and diagrams for easy reference‚ making them indispensable tools for professionals and DIY enthusiasts alike.

Importance of Accurate Fitting Sizes

Accurate fitting sizes are critical to ensure proper connections‚ prevent leaks‚ and maintain system integrity. Incorrect sizes can lead to mechanical failures‚ safety hazards‚ and increased maintenance costs. Fitting size charts help eliminate guesswork‚ ensuring compatibility across different thread standards like NPT‚ metric‚ and JIC. In industries such as aerospace and hydraulics‚ precise sizing is essential for reliability and performance. By adhering to standardized measurements‚ professionals can avoid costly rework and ensure long-term functionality of pipes‚ hoses‚ and fittings in various applications.

Types of Fittings and Their Sizes

Fittings vary by type‚ including NPT‚ metric‚ JIC‚ and SAE. Each type has specific thread pitches and diameters. Size charts ensure compatibility and proper installation.

National Standard Taper Pipe (NPT) Threads

NPT threads are a widely used standard in North America for pipe fittings. They feature a tapered design‚ creating a leak-free seal when properly connected. Common sizes range from 1/16″ to 24″‚ with thread counts of 27 TPI for smaller sizes and 18 TPI for larger ones. The thread pitch varies‚ ensuring compatibility across applications. NPT fittings are ideal for high-pressure and industrial uses. Referencing an NPT size chart is crucial for selecting the correct fitting‚ ensuring secure and reliable connections in plumbing and hydraulic systems.

Metric Thread Sizes

Metric threads are globally standardized‚ offering precise measurements for international applications. They are defined by nominal diameters and pitches‚ such as M1x0.2 to M48x2.0. The “M” designation indicates metric threads‚ with the number following representing the major diameter in millimeters. Thread pitch‚ measured in millimeters between threads‚ varies based on size. Metric thread charts provide essential details for engineers and technicians‚ ensuring accurate fitting selections. These charts are indispensable for industries requiring metric compatibility‚ including automotive and aerospace‚ where precise measurements are critical for safe and reliable connections.

JIC and SAE Thread Standards

JIC (Joint Industrial Council) and SAE (Society of Automotive Engineers) standards are widely used for thread specifications in hydraulic and pneumatic systems. JIC threads are known for their 37-degree flare seating‚ ensuring leak-free connections‚ while SAE standards often incorporate similar designs with specific adaptations for automotive applications. These standards are crucial for maintaining compatibility and performance in high-pressure environments. Reference charts for JIC and SAE threads detail dimensions‚ thread counts‚ and pitch measurements‚ aiding in precise fitting selections. They are integral to industries requiring reliable fluid power connections.

How to Read a Fitting Size Chart

Reading a fitting size chart involves identifying thread types‚ measuring diameters‚ and interpreting dash sizes. Charts typically list nominal sizes‚ thread pitches‚ and compatible fitting options for precise matching.

Understanding Thread Pitch and Diameter

Thread pitch refers to the distance between consecutive threads‚ measured in millimeters for metric threads or threads per inch (TPI) for imperial measurements. The diameter‚ often the nominal size‚ is the Thread pitch and diameter are crucial for ensuring compatibility between fittings and pipes. For example‚ in NPT threads‚ the pitch is constant‚ while for metric threads‚ it varies with size. Accurate measurement of both ensures proper sealing and connection strength‚ preventing leaks and system failures. Using charts‚ professionals can quickly match these dimensions with suitable fittings for their applications.

Interpreting Dash Sizes and Nominal Sizes

Dash sizes indicate the inner diameter of hoses or tubes‚ while nominal sizes represent standard reference numbers. Dash sizes correlate with tube O.D. (e.g.‚ dash size 2 = 1/8 inch). Nominal sizes‚ like DN or NPS‚ often differ from actual measurements. For example‚ a 1/2-inch NPT fitting may not measure exactly 0.5 inches. Charts help cross-reference dash and nominal sizes with actual diameters‚ ensuring correct fitting selection. Accurate interpretation is vital for compatibility and functionality in hydraulic‚ pneumatic‚ and plumbing systems‚ avoiding leaks and performance issues.

Measuring Fittings for Proper Sizing

Measuring fittings accurately ensures proper sizing and compatibility. Start by determining the thread type (tapered or straight) and measure the diameter using calipers. For tapered threads‚ measure at the end. For straight threads‚ measure the major diameter. Use a pitch gauge to determine thread pitch. Inner diameters of hoses or pipes are critical for dash size identification. Always reference a fitting size chart to validate measurements. Accurate sizing prevents leaks‚ ensures safety‚ and optimizes system performance in hydraulic‚ pneumatic‚ and plumbing applications.

Common Fitting Size Standards

Common fitting size standards include ISO for metric threads‚ SAE for imperial measurements‚ and ASME for pipe fittings. These standards ensure consistency and compatibility across industries‚ providing clear guidelines for thread pitch‚ diameter‚ and nominal sizes to guarantee safe and reliable connections in various applications.

ISO Standard for Metric Threads

The ISO standard for metric threads provides a uniform system for thread dimensions‚ ensuring global compatibility. It specifies the nominal size‚ pitch‚ and thread form‚ with common sizes like M1x0.2 to M48x2.0. These standards are crucial for industries requiring precise fittings‚ offering a reference for manufacturers and engineers. By adhering to ISO metrics‚ users can easily identify thread pitch and diameter‚ facilitating accurate fitting selections for hydraulic‚ pneumatic‚ and mechanical applications worldwide.

SAE Standard for Imperial Measurements

The SAE standard for imperial measurements is widely used in North America‚ focusing on inch-based thread systems. It provides specifications for thread sizes‚ pitches‚ and diameters‚ ensuring compatibility across hydraulic‚ pneumatic‚ and mechanical systems. SAE standards are particularly relevant for applications like O-ring boss adapters and fluid power systems. By referencing SAE charts‚ professionals can accurately determine thread dimensions and fitting sizes‚ ensuring reliable connections and minimizing errors in imperial-based designs and installations.

ASME Standards for Pipe Fittings

ASME standards provide detailed specifications for pipe fittings‚ ensuring compliance with safety and performance requirements. These standards cover dimensions‚ tolerances‚ and materials for various fittings‚ such as elbows‚ tees‚ and flanges. They also include guidelines for pressure ratings‚ nominal sizes‚ and schedule numbers. ASME standards are crucial for ensuring compatibility and reliability in piping systems across industries. By adhering to these standards‚ professionals can design and fabricate fittings that meet rigorous quality and safety benchmarks‚ minimizing risks and ensuring optimal system performance.

Applications of Fitting Size Charts

Fitting size charts are crucial in hydraulic‚ pneumatic‚ plumbing‚ and aerospace systems‚ ensuring proper connections and compatibility. They guide pipefitters and engineers in selecting the right components for safe and efficient installations. These charts are also vital in automotive and industrial settings‚ preventing leaks and system failures. By referencing size charts‚ professionals ensure accurate sizing‚ enhancing system performance and longevity across various applications.

Hydraulic and Pneumatic Systems

In hydraulic and pneumatic systems‚ fitting size charts are indispensable for maintaining pressure integrity and preventing leaks. They help specify the correct dash sizes‚ nominal sizes‚ and thread standards‚ ensuring seamless connections. For instance‚ dash sizes correspond to tube outer diameters‚ while nominal sizes align with port dimensions. Incorrect sizing can lead to system failure or inefficiency. Charts also guide the selection of adapters‚ such as JIC and NPT fittings‚ ensuring compatibility and optimal performance. Proper sizing is critical for safety and reliability in high-pressure applications‚ making these charts a cornerstone of system design and maintenance.

Plumbing and Pipeline Installations

Fitting size charts are vital in plumbing and pipeline installations to ensure accurate connections and prevent leaks. They specify nominal sizes‚ thread types‚ and pipe diameters‚ aligning with standards like ASTM for materials such as PVC‚ copper‚ or steel. For instance‚ NPT threads are commonly used in plumbing‚ requiring precise matching of male and female fittings. Charts also guide pipe schedule selection‚ ensuring the correct wall thickness for pressure requirements. Proper sizing ensures durability‚ safety‚ and efficiency in water supply‚ gas‚ and drainage systems‚ making these charts essential for installers and engineers to maintain system integrity and functionality.

Aerospace and Automotive Industries

Fitting size charts are crucial in aerospace and automotive industries for precise component connections. These charts detail thread sizes‚ diameters‚ and pitch measurements‚ ensuring compatibility with SAE and ISO standards. In aerospace‚ metric threads are often used‚ while automotive applications frequently rely on SAE standards for hydraulic and pneumatic systems. Accurate sizing ensures high performance‚ safety‚ and reliability in critical systems. Engineers use these charts to select fittings that withstand extreme conditions‚ such as high pressures or temperatures‚ making them indispensable for maintaining the integrity of advanced vehicles and aircraft.

Creating a Custom Fitting Size Chart

Developing a custom fitting size chart involves defining specific thread sizes‚ diameters‚ and standards based on application needs‚ ensuring precise measurements for compatibility and safety in various systems.

Steps to Develop a Tailored Chart

To create a custom fitting size chart‚ start by identifying the specific application and required standards‚ such as NPT or metric threads. Measure the inner and outer diameters of the fittings. Next‚ list the thread pitch and count‚ ensuring accuracy for compatibility. Organize the data into a table format‚ including nominal sizes‚ dash sizes‚ and corresponding dimensions. Validate the information against industry standards. Finally‚ use design software or templates to format the chart clearly‚ ensuring it is user-friendly and easily interpretable for various projects and installations.

Tools and Software for Chart Creation

Creating a fitting size chart requires specialized tools and software. CAD programs like AutoCAD or SolidWorks are ideal for precise technical drawings. Excel or Google Sheets can be used to organize data into tables. For thread calculations‚ software like Thread Calculator or Bolt Science streamlines the process. PDF editors such as Adobe Acrobat are essential for finalizing and formatting the chart. Additionally‚ graphic design tools like Illustrator or Canva can enhance the chart’s visual appeal. These tools ensure accuracy‚ clarity‚ and professionalism in the creation of custom fitting size charts.

Best Practices for Using Fitting Size Charts

Always verify thread types and sizes using standardized charts. Ensure compatibility between fittings and systems. Regularly update charts for accuracy and safety. Consult industry standards before installation to prevent sizing errors and ensure reliable connections.

Ensuring Compatibility and Safety

Fitting size charts are crucial for ensuring compatibility and safety in various systems. By using standardized charts‚ professionals can accurately match fitting sizes‚ thread types‚ and pressure ratings. This helps prevent leaks‚ system malfunctions‚ and potential hazards. Always verify measurements against trusted standards like NPT or metric charts. Regularly updating charts ensures adherence to current specifications. Double-checking sizes before installation is a best practice to maintain safety and reliability in hydraulic‚ plumbing‚ and industrial applications.

Regular Updates and Revisions

Regular updates and revisions of fitting size charts are crucial to reflect industry advancements and ensure accuracy. Standards like ISO‚ SAE‚ and ASME often evolve‚ requiring charts to adapt accordingly. In industries such as aerospace and automotive‚ outdated charts can lead to compatibility issues or safety risks. New materials and manufacturing techniques may introduce new sizing requirements. Staying updated ensures that fittings meet current specifications‚ maintaining system integrity and safety. Always refer to the latest version of the chart‚ especially in critical applications‚ to avoid potential errors and ensure optimal performance.

Fitting size charts are essential for ensuring compatibility and safety across various industries. They provide standardized measurements for threads‚ diameters‚ and dash sizes‚ ensuring proper connections and system integrity.

Final Thoughts on Fitting Size Charts

Fitting size charts are indispensable tools for engineers and technicians‚ offering precise measurements for threads‚ diameters‚ and dash sizes. They ensure compatibility and safety‚ preventing costly errors and downtime. By standardizing connections‚ these charts facilitate efficient system design and maintenance. Regular updates and adherence to standards like NPT‚ metric‚ and JIC are crucial for reliability. Proper use of these charts is key to achieving leak-free‚ durable connections in hydraulic‚ pneumatic‚ and plumbing systems‚ ensuring optimal performance and longevity.

Open post

interior freedom jacques philippe pdf

Jacques Philippe’s Interior Freedom explores the essence of true freedom, emphasizing spiritual liberation and inner peace. The book offers practical wisdom for living authentically amidst life’s challenges.

1.1 Brief Overview of the Book

Interior Freedom by Jacques Philippe is a spiritual guide that explores the concept of true freedom, emphasizing inner liberation and peace. The book helps readers discover freedom amidst life’s challenges, offering practical wisdom to cultivate authenticity, detachment, and trust in God. Philippe addresses universal struggles like anxiety and self-acceptance, providing insights for living a fulfilling, spiritually grounded life. It is a compelling read for those seeking deeper purpose and inner transformation.

1.2 Importance of the Topic in Modern Spirituality

In today’s fast-paced, anxiety-ridden world, the concept of interior freedom is more relevant than ever. Jacques Philippe’s work addresses the universal human longing for peace and authenticity, offering a spiritual antidote to modern pressures. By focusing on inner liberation, the book provides a timeless yet timely guide for navigating life’s challenges with grace and purpose, resonating deeply with contemporary spiritual seekers.

About Jacques Philippe and His Spiritual Contributions

Jacques Philippe is a renowned French author and spiritual guide, known for his insightful writings on interior freedom and Christian spirituality, profoundly impacting modern faith seekers.

2.1 Background of the Author

Jacques Philippe, a French spiritual author, was born in 1947 in Lorraine, France. He holds a doctorate in theology and has dedicated his life to spiritual guidance. His writings, including Interior Freedom, reflect his deep understanding of Christian spirituality and human nature. Philippe’s work emphasizes inner peace, freedom, and living authentically, resonating with readers globally seeking spiritual enrichment and personal growth.

2.2 His Impact on Contemporary Spiritual Thought

Jacques Philippe’s teachings have profoundly influenced modern spirituality, offering a fresh perspective on inner freedom and peace. His works, including Interior Freedom, are widely read and translated, resonating with diverse audiences. By integrating theology with everyday life, he provides accessible spiritual guidance. His emphasis on finding freedom in God’s love has inspired many to seek deeper faith and inner peace, making him a pivotal figure in contemporary spiritual thought.

Key Concepts Explored in “Interior Freedom”

Interior Freedom delves into themes of true freedom, inner peace, and spirituality. Philippe explores how grace and self-surrender lead to liberation, enabling individuals to embrace life’s challenges with faith and resilience.

3.1 The Meaning of True Freedom

In Interior Freedom, Jacques Philippe defines true freedom as an interior state, unshackled by external circumstances. It is rooted in grace and self-surrender, allowing individuals to embrace life’s challenges with peace and confidence, rather than resistance or fear.

3.2 Spirituality and Inner Peace

Jacques Philippe connects spirituality and inner peace, showing how true freedom fosters a tranquil soul. He guides readers to cultivate detachment, humility, and trust in God, emphasizing that inner peace is not absence of trials but the ability to face them with joy and confidence, rooted in spiritual surrender and divine grace.

Practical Applications of Interior Freedom

Jacques Philippe provides practical steps to integrate interior freedom into daily life, enabling individuals to navigate challenges with grace and confidence, fostering lasting peace.

4.1 Implementing Freedom in Daily Life

Jacques Philippe guides readers to embrace interior freedom by surrendering anxiety and trusting God’s providence in everyday circumstances. He encourages living simply, letting go of attachments, and finding joy in humility. Practical advice includes fostering gratitude, prayer, and self-awareness to navigate life’s challenges with peace. By integrating these principles, individuals can experience true liberation in relationships, work, and decision-making, leading to a life of authentic freedom and fulfillment.

4.2 Freedom as a Foundation for Decision-Making

Interior freedom empowers individuals to make decisions unshackled by fear or anxiety, fostering clarity and peace. By trusting divine providence, one can embrace uncertainty with confidence. True freedom in decision-making lies in aligning choices with core values and a deeper sense of purpose, leading to a life of integrity and peace, even amidst challenges.

Cultural and Social Relevance of the Book

Jacques Philippe’s work resonates deeply in today’s society, offering timeless wisdom for personal and collective growth. It bridges spirituality with modern life, inspiring transformation and renewal.

5.1 Impact on Modern Society

Jacques Philippe’s Interior Freedom has profoundly influenced modern society by offering a spiritual framework for navigating life’s complexities. Its emphasis on inner peace and authenticity resonates in a fast-paced, often chaotic world. The book’s practical wisdom helps individuals and communities cultivate freedom, fostering personal and societal transformation. Its relevance lies in addressing contemporary challenges with timeless spiritual truths, making it a vital resource for seekers of meaningful living and deeper fulfillment.

5.2 The Role of Interior Freedom in Personal and Collective Growth

Interior freedom, as explored by Jacques Philippe, plays a pivotal role in both personal and collective growth. It empowers individuals to embrace their true selves, fostering authenticity and resilience. This inner liberation also cultivates compassion and unity, enabling communities to thrive. By nurturing spiritual depth, it inspires collective transformation, creating a more harmonious and meaningful society. The book’s teachings thus serve as a cornerstone for holistic development on both individual and societal levels.

Reviews and Reader Feedback on “Interior Freedom”

Readers and critics acclaim Interior Freedom for its profound insights and transformative potential. Many describe it as a life-changing guide to spiritual growth and inner peace.

6.1 Popularity and Reception of the Book

Interior Freedom has gained widespread acclaim for its timeless wisdom and accessible insights. Readers worldwide praise its ability to address modern spiritual challenges with depth and clarity. The book’s practical approach to achieving inner peace resonates deeply, making it a cherished resource for personal growth and reflection. Its popularity continues to grow, solidifying its place as a modern spiritual classic.

6.2 How Readers Have Been Influenced by the Book

Readers of Interior Freedom often report profound personal transformations, citing its empowering message of spiritual liberation. Many have found renewed strength in facing life’s challenges, fostering resilience and inner peace. The book’s practical wisdom has inspired readers to reevaluate priorities, deepen their faith, and embrace authenticity. Its influence extends beyond individual growth, encouraging a more compassionate and meaningful approach to relationships and daily life.

Connection to Other Spiritual and Philosophical Works

Jacques Philippe’s Interior Freedom resonates with classic spiritual texts, emphasizing themes of inner peace, self-awareness, and divine grace, aligning with broader philosophical discussions on human liberation and fulfillment.

7.1 Influence of Jacques Philippe’s Work

Jacques Philippe’s teachings on interior freedom have profoundly influenced modern spirituality, offering practical wisdom for personal growth. His work resonates with readers globally, bridging theology and daily life. Themes of inner peace and liberation echo in contemporary spiritual discussions, inspiring a deeper pursuit of authentic freedom. Philippe’s insights have become foundational for many seeking to apply spiritual principles in real-life challenges, fostering a community of like-minded seekers of truth and inner transformation.

7.2 Similar Themes in Other Spiritual Literature

Jacques Philippe’s concepts of interior freedom resonate with themes in other spiritual works, such as Henri Nouwen’s emphasis on the inner life and Thomas Merton’s reflections on true self. These authors, like Philippe, explore the universal human quest for authenticity, peace, and liberation from external pressures. Their writings collectively highlight the transformative power of spirituality in achieving inner freedom and living a meaningful life.

The Role of Interior Freedom in Personal Growth

Interior freedom empowers individuals to embrace their true selves, fostering self-awareness, emotional resilience, and alignment with core values, essential for authentic personal growth and fulfillment.

8.1 Transformative Potential of the Book

Interior Freedom has the profound ability to transform lives by guiding readers to break free from internal constraints. It helps individuals move beyond self-doubt, fear, and anxiety, fostering a deeper connection with their true selves. By realigning thoughts, emotions, and actions with timeless spiritual truths, the book empowers personal growth, enabling readers to embrace challenges with courage and live more authentically. Its practical wisdom offers a pathway to lasting inner peace and fulfillment.

8.2 How to Apply the Teachings in Real Life

Jacques Philippe’s teachings on interior freedom can be applied through trust in God’s providence and self-awareness. Embrace simplicity, letting go of attachments, and practice surrender. Regular prayer, reflection, and mindfulness help integrate these principles into daily life. By aligning actions with core values and seeking inner peace, one can experience authentic freedom and joy, transforming relationships and decisions. This fosters a life rooted in faith and inner liberty.

Jacques Philippe’s Interior Freedom offers profound insights into spiritual liberation and inner peace. Its practical wisdom empowers readers to embrace authenticity and find joy amidst life’s challenges. A must-read for seekers of true freedom and personal growth.

9.1 Summary of Key Ideas

Interior Freedom by Jacques Philippe delves into the essence of true freedom, highlighting its spiritual dimensions. The book emphasizes that freedom is not external but an inner state, rooted in surrender, humility, and trust in God. Philippe explores how embracing this freedom leads to peace, joy, and fulfillment, even amidst life’s challenges. His teachings offer a profound guide for nurturing interior liberty and living authentically.

9.2 Recommendations for Future Reading and Reflection

For deeper exploration, readers can complement Interior Freedom with Jacques Philippe’s other works, such as The Way of Trust and Love. Additionally, spiritual classics like St. Teresa of Lisieux’s The Story of a Soul or C.S. Lewis’s Mere Christianity offer enriching perspectives. Reflecting on scripture and engaging in journaling can also enhance the application of Philippe’s teachings in daily life.

Open post

how great thou art lyrics pdf

“How Great Thou Art” is a powerful hymn expressing awe at God’s creation and power. Written by Stuart Wesley Keene Hine in 1931, it remains a timeless worship classic, widely used in churches and ceremonies, offering deep spiritual reflection and praise through its iconic lyrics and melody.

Historical Background

“How Great Thou Art” was originally written by Carl Boberg in 1885 as a Swedish poem, later translated and adapted into the hymn we know today, becoming a cornerstone of Christian worship worldwide.

2.1 Creation and Evolution

The hymn “How Great Thou Art” originated from a Swedish poem by Carl Boberg in 1885, titled “O Store Gud.” It was later translated into Russian and then into English by Stuart Wesley Keene Hine in 1949, becoming a beloved global worship anthem. Over time, it has evolved through various translations and arrangements, maintaining its core message of awe and reverence for God’s creation.

2.2 Original Authors and Translations

The original author of “How Great Thou Art” is Carl Boberg, a Swedish pastor, who wrote the poem “O Store Gud” in 1885. It was later translated into Russian by Ivan S. Prokhanov and then into English by Stuart Wesley Keene Hine in 1949, preserving the hymn’s profound spiritual essence while making it accessible to a global audience for worship and reflection.

Structure of the Lyrics

The hymn features four verses and a chorus, exploring themes of nature’s grandeur and divine redemption, with a structure that builds from creation to eternal worship.

3.1 Number of Verses

The hymn “How Great Thou Art” consists of four verses, each highlighting different aspects of God’s majesty; The first verse reflects on creation, the second on divine power, the third on redemption, and the fourth on eternal praise. Each verse is followed by a chorus, reinforcing the central theme of awe and worship, creating a balanced and impactful lyrical structure.

3.2 Chorus and its Significance

The chorus of “How Great Thou Art” is a powerful declaration of worship, repeating the phrase “How great Thou art, how great Thou art!” It emphasizes God’s grandeur and evokes a sense of awe and gratitude. This refrain serves as a unifying element, reinforcing the hymn’s central message of divine majesty and humanity’s response of humble adoration, making it a memorable and emotive highlight.

Downloading the Lyrics in PDF Format

The lyrics of “How Great Thou Art” are widely available in PDF format from numerous sources, including hymnals, church websites, and sheet music platforms, ensuring easy access for worshipers and musicians seeking to download and use this beloved hymn for personal or congregational use.

4.1 Sources for Download

The lyrics of “How Great Thou Art” in PDF format can be downloaded from various online sources, including hymn websites, sheet music platforms, and church websites. Many platforms offer free downloads, such as Hills Bible Church, which provides the hymn with original verses, chorus, and translations. Additionally, sites like Hymn Art and other digital repositories offer instant downloads for personal or worship use, ensuring easy access to this timeless hymn.

4.2 Copyright and Usage Considerations

The hymn “How Great Thou Art” is under copyright, requiring proper permissions for use. Users must ensure they comply with copyright laws when downloading or sharing the PDF. Many versions include copyright details within the document. For public performances or displays, licensing from publishers or rights holders is often necessary. Always verify permissions to avoid infringement, especially for commercial or large-scale use.

Translations and Adaptations

“How Great Thou Art” is available in multiple languages, including French and German, with PDF downloads offering translations. This hymn’s universal message transcends cultures, making it accessible worldwide through various adaptations while maintaining its spiritual core and emotional depth.

5.1 Multilingual Versions

The hymn “How Great Thou Art” has been translated into numerous languages, including French, German, and Spanish, ensuring its universal appeal. PDF downloads often include these translations, making the hymn accessible to diverse cultures. This linguistic diversity allows believers worldwide to connect with its profound message of awe and worship, fostering unity across different languages and traditions. Its adaptability has made it a global anthem of praise.

5.2 Cultural Variations

The hymn has been embraced across cultures, with various interpretations reflecting local traditions. From gospel choirs to instrumental renditions, its melody and lyrics adapt seamlessly to different musical styles. Artists like Carrie Underwood have popularized it, while traditional arrangements remain cherished. These cultural variations highlight the hymn’s versatility, ensuring its message resonates globally, transcending linguistic and cultural boundaries to inspire universal worship and devotion.

Use in Worship and Ceremonies

“How Great Thou Art” is widely used in church services, weddings, and funerals, evoking awe and reflection. Its powerful lyrics and uplifting melody make it a popular choice for spiritual gatherings, creating a sense of unity and deep connection among worshippers.

6.1 In Church Services

“How Great Thou Art” is a beloved hymn often sung in church services, inspiring awe and devotion. Its powerful lyrics and uplifting melody create a unifying worship experience, drawing congregations closer to God. Frequently performed by choirs or sung collectively, it serves as a timeless expression of faith, resonating deeply with worshippers and enriching spiritual gatherings worldwide.

6.2 In Weddings and Funerals

“How Great Thou Art” is often chosen for weddings and funerals due to its emotional depth. At weddings, it celebrates divine love and creation, while at funerals, it offers comfort through its message of hope and eternal life. Carrie Underwood notably performed it, showcasing its versatility. The hymn’s powerful lyrics provide solace and inspiration, making it a fitting choice for life’s most meaningful moments, both joyful and sorrowful;

Cultural Impact

“How Great Thou Art” has deeply influenced Christian music, inspiring countless performances and translations. Its timeless message resonates globally, making it a beloved hymn across cultures and generations, celebrated for its universal appeal and spiritual significance.

7.1 Popularity and Recognition

“How Great Thou Art” is widely recognized as one of the most popular Christian hymns globally. Its profound lyrics and uplifting melody have earned it a cherished place in worship services, ceremonies, and personal devotion. The hymn’s universal appeal has led to numerous translations and renditions, further cementing its status as a timeless classic in Christian music.

7.2 Notable Performances

The hymn has been performed by renowned artists like Carrie Underwood, who delivered a powerful rendition on the Today show, showcasing its enduring appeal. It has also been beautifully rendered by choirs and musicians worldwide, further enhancing its recognition as a cherished worship song. Its inclusion in various ceremonies and worship services underscores its timeless significance and universal resonance.

Lyric Analysis

The lyrics of “How Great Thou Art” express profound awe and reverence for God’s creation, reflecting on the universe’s majesty and divine power, inspiring deep worship and humility.

8.1 Themes of Awe and Worship

The hymn “How Great Thou Art” embodies themes of awe and worship, reflecting on God’s majestic creation and divine power. The lyrics evoke a sense of wonder at the universe’s vastness and beauty, while also expressing deep reverence for God’s might. This dual focus on creation and worship creates a profound spiritual connection, inspiring believers to humbly acknowledge God’s greatness and majesty through heartfelt praise.

8.2 Biblical References

The lyrics of “How Great Thou Art” are deeply rooted in biblical themes, reflecting on God’s creation and redemption. Verses like “O Lord my God, when I in awesome wonder” mirror Psalm 8, which marvels at God’s handiwork. The hymn also alludes to Christ’s sacrifice, echoing John 3:16, and the final redemption, aligning with Revelation’s vision of heavenly worship. These references ground the hymn in scriptural truths, enriching its spiritual depth.

Sheet Music and Chord Charts

Sheet music and chord charts for “How Great Thou Art” are widely available, offering various arrangements for worship leaders and musicians to enhance their performances.

9.1 Availability of Sheet Music

Sheet music for “How Great Thou Art” is widely available in various formats, including PDF downloads. Websites like Hills Bible Church and other hymn repositories offer free scores, chord charts, and arrangements; The sheet music often includes lyrics, melodies, and harmonies, making it accessible for worship bands, choirs, and individual musicians. Copyright information is typically included to ensure proper usage and attribution.

9.2 Chord Charts for Musicians

Chord charts for “How Great Thou Art” are readily available, offering musicians versatile arrangements. These charts, often in PDF format, provide guitar and piano chords, allowing for easy adaptation to various worship settings. Capo options, like Capo 2, enhance playability, while chord progressions align with the hymn’s timeless melody, making it accessible for both contemporary and traditional performances by worship bands and solo artists.

Role in Hymnals

“How Great Thou Art” is a staple in many hymnals, featured in various Christian denominations’ songbooks. Its timeless lyrics and universal appeal make it a cherished inclusion, ensuring its presence across generations and cultures in worship resources globally.

10.1 Inclusion in Hymn Books

“How Great Thou Art” is widely included in hymn books across Christian denominations. Its powerful lyrics and timeless message make it a staple in worship resources. The hymn’s universal appeal ensures its presence in countless songbooks, often accompanied by its original verses and chorus, making it accessible for congregational singing and personal devotion. Its inclusion reflects its enduring relevance and spiritual depth.

10.2 Modern vs. Traditional Arrangements

“How Great Thou Art” is available in both modern and traditional arrangements, catering to diverse worship styles. Traditional versions often feature classic organ or choir accompaniments, while modern adaptations incorporate contemporary instruments and rhythms. Despite these variations, the hymn’s core message and timeless appeal remain intact, ensuring its relevance across generations and musical preferences in worship settings.

Legacy and Timelessness

“How Great Thou Art” has left an enduring legacy as a timeless hymn, inspiring millions with its profound lyrics and universal appeal, remaining a cornerstone of Christian worship and devotion across generations.

11.1 Enduring Popularity

“How Great Thou Art” remains a globally recognized hymn, celebrated for its emotional depth and spiritual resonance. Its timeless lyrics and soaring melody continue to inspire diverse audiences, transcending generations and cultures. The hymn’s adaptability in worship settings, from traditional church services to modern adaptations, ensures its enduring relevance and widespread appeal, solidifying its place as a beloved classic in Christian music and devotion.

11.2 Influence on Christian Music

“How Great Thou Art” has profoundly shaped Christian music, inspiring countless artists and worship leaders. Its rich lyrical content and powerful melody have influenced modern hymns and contemporary worship songs. The hymn’s themes of awe, creation, and redemption continue to resonate, making it a foundational piece that bridges traditional and modern Christian music, ensuring its legacy endures across generations and genres.

Open post

ademco alarm manual

The Ademco Alarm System, part of Honeywell, is a trusted security solution offering burglary, fire, and emergency alarms. Known for reliability and user-friendly interfaces, it provides comprehensive protection for homes and businesses, ensuring safety and peace of mind with advanced features and customizable settings.

History of Ademco

Founded in 1969, Ademco emerged as a pioneer in security systems, becoming a trusted name globally. Acquired by Honeywell in 2000, it expanded its reach, offering advanced solutions. Known for innovation, Ademco systems have protected millions of premises, earning a reputation for reliability and cutting-edge technology. Its legacy continues to shape modern security standards, ensuring safety and peace of mind for users worldwide. Ademco’s history reflects a commitment to excellence and customer satisfaction.

Purpose and Functionality

The Ademco alarm system is designed to provide comprehensive security and safety solutions. It detects intrusions, fires, and emergencies, alerting users through alarms and notifications. The system integrates smoke detectors, motion sensors, and keypads for seamless functionality. Its primary purpose is to enhance safety, offering burglary, fire, and emergency protection. With a user-friendly interface, it ensures easy operation and customization. Ademco systems are built to deliver reliable performance, safeguarding homes and businesses while providing peace of mind through advanced security features and prompt alerts.

System Compatibility

Ademco alarm systems are designed for versatility, ensuring compatibility with various components and setups. They integrate seamlessly with smoke detectors, keypads, and other security devices. The systems support multiple zones, allowing customization to fit different property layouts. Ademco systems also work with both wired and wireless configurations, offering flexibility for installation. Compatibility extends to user-friendly interfaces, ensuring easy control and monitoring. This adaptability makes Ademco systems suitable for a wide range of residential and commercial applications, providing reliable security solutions tailored to diverse needs.

Key Features of the Ademco Alarm System

The Ademco Alarm System features multiple alarm types (burglary, fire, emergency), zone configuration, a user-friendly keypad, and integration with smoke detectors and emergency exits, ensuring comprehensive security.

Zone Configuration and Management

The Ademco Alarm System allows users to configure and manage multiple zones, each representing a specific area or device (e.g., doors, windows, motion detectors). Zones can be customized with unique names and settings, enabling tailored security responses. The system supports various zone types, including entry/exit delays and instant alerts, ensuring flexible protection. Users can monitor and adjust zone statuses via the keypad, enhancing overall system control and efficiency for a secure environment.

Types of Alarms (Burglary, Fire, Emergency)

The Ademco Alarm System offers three primary types of alarms: burglary, fire, and emergency. Burglary alarms activate upon detecting unauthorized entry, triggering loud alerts and notifications. Fire alarms are designed to respond to smoke or heat, ensuring early detection and evacuation. Emergency alarms provide immediate alerts for critical situations, such as medical emergencies or panic events. Each alarm type operates independently but integrates seamlessly, offering comprehensive protection and peace of mind for users. The system ensures timely responses to various threats, enhancing safety and security.

User-Friendly Keypad Interface

The Ademco Alarm System features an intuitive keypad interface designed for ease of use. It provides clear visual and audible feedback, with indicators like “READY” and “ARMED” to show system status. The keypad emits tones for button presses, confirming user inputs. Its straightforward layout allows users to arm, disarm, and manage alarms effortlessly. The interface is complemented by comprehensive manuals, ensuring users can navigate and customize settings with confidence. This design caters to both new and experienced users, enhancing overall system usability and effectiveness.

Installation and Setup Guidelines

Install smoke detectors in hallways over 40 feet and rooms with alarm controls. Follow step-by-step guides for proper setup, ensuring compliance with safety recommendations and manuals.

Step-by-Step Installation Instructions

Start by planning your system layout, ensuring smoke detectors are placed in hallways over 40 feet and rooms with alarm controls. Install the control panel in an accessible location, then connect all wires and detectors according to the manual. Test each component to ensure proper functionality. Finally, activate the system and perform a thorough test of alarms and keypad responses. Refer to the manual for specific instructions and safety guidelines to complete the setup successfully.

Smoke Detector Placement Recommendations

Install smoke detectors in hallways longer than 40 feet, rooms with alarm controls, and areas near AC sources or phone lines. Place detectors 12 inches from walls and avoid obstructions. Ensure coverage in all sleeping areas and living spaces. Do not install in bathrooms or kitchens to minimize false alarms. Test detectors after installation to confirm proper function. Refer to your Ademco manual for specific placement guidelines to ensure compliance with safety standards and optimal system performance.

System Activation and Testing

Activate the Ademco Alarm System by entering your code on the keypad. The READY indicator confirms all zones are secure. Test the system regularly to ensure proper function. Trigger smoke detectors and motion sensors to verify alarms sound and display correctly. Check the keypad for error codes and address any issues promptly. Always test after installation or updates to confirm reliability. Refer to your manual for detailed testing procedures to maintain optimal system performance and ensure your safety.

User Guides and Manuals

User guides and manuals for Ademco alarm systems are available for various models, covering installation, operation, and troubleshooting. They can be downloaded from Honeywell’s official resources and other trusted sites, providing clear instructions to help users understand and maintain their security systems effectively.

Overview of Available Manuals

Ademco alarm system manuals provide comprehensive guides for installation, operation, and troubleshooting. They cover various models, including the 4110, 4120, 4140, and 4150. These manuals detail system features, zone configurations, and alarm types, ensuring users can fully utilize their security setups. Additional resources include fire alarm specifications and smoke detector placement recommendations. Manuals are accessible online, offering step-by-step instructions and troubleshooting tips to help users maintain and optimize their Ademco security systems effectively.

Downloading User Guides

Ademco alarm system user guides are readily available for download from official sources. These manuals provide detailed instructions for installation, operation, and troubleshooting. Users can access guides for specific models like the 4110, 4120, and 4150 through Honeywell’s official website or authorized distributors. The guides cover topics such as zone configuration, alarm types, and system customization. Ensure to download the correct manual for your model to maximize system functionality and troubleshooting efficiency. Always verify the source for authenticity and updated information;

Understanding the User Setup Chart

The User Setup Chart, located at the back of the Ademco manual, helps users record essential system configurations. It includes sections for partition master codes, zone assignments, and user codes, ensuring organized system management. This chart simplifies programming by providing a clear reference for custom settings, such as alarm triggers and sensor sensitivity. Regularly update the chart to reflect system changes, ensuring all users have accurate information for seamless operation and troubleshooting. It serves as a vital tool for maintaining system efficiency and security.

Troubleshooting Common Issues

Addressing common Ademco alarm issues involves checking error codes, silencing false alarms, and ensuring proper system setup. Refer to the manual for step-by-step solutions and guidelines to resolve problems efficiently, maintaining optimal security and functionality.

Silencing Alarms

To silence an Ademco alarm, press the appropriate key on the keypad and enter your master code. The system will stop the alarm sound, and the indicators will reset. For fire alarms, refer to the manual for specific silencing instructions. Ensure all zones are secure before silencing to avoid potential risks. If the alarm persists, check for error codes or contact a professional for assistance. Always follow the step-by-step guide in the user manual for proper alarm management and system reset.

Addressing False Alarms

False alarms can be minimized by ensuring proper system setup and understanding alarm triggers. Adjust sensitivity settings and isolate zones to reduce unwanted activations. Regularly test the system and maintain equipment to prevent malfunctions. Review SIA Guidelines for False Alarm Reduction and use Installer Codes for programming adjustments. For specific models like VISTA-20P/VISTA-15P, follow the manual’s instructions to customize settings and eliminate recurring false alarms, ensuring reliable security without unnecessary disruptions.

System Error Codes and Solutions

Ademco systems display error codes to identify issues. For example, “AC” indicates a low battery, while “6” signals an AC power loss. Check the manual for specific codes and solutions. Ensure the system is properly charged and connections are secure. For recurring errors, refer to the troubleshooting section or contact a professional. Regular system maintenance and updates can prevent errors, ensuring reliable performance and security. Always consult the user manual for detailed guidance on resolving specific error conditions effectively.

Specific Ademco Models

Ademco offers various models like the 4110, 4120, 4140 XMP, 4150, and 4152, each designed with unique features to cater to different security needs and preferences.

Ademco 4110 Model Features

The Ademco 4110 model is a reliable security system designed for basic home protection. It supports multiple zones for intrusion detection and offers burglary, fire, and emergency alarm capabilities. The system features a user-friendly keypad interface for easy operation and is compatible with smoke detectors for enhanced fire safety. It provides essential security functions, making it a cost-effective solution for small properties or those needing straightforward protection without advanced features.

Ademco 4120 and 4140 XMP Models

The Ademco 4120 and 4140 XMP models are advanced security systems designed for comprehensive protection. They support up to 6 zones for burglary, fire, and emergency alarms, offering flexibility for various property sizes. The XMP (Expanded Module Platform) allows for additional zones and features, making them ideal for larger homes or businesses. These models include voice module compatibility, enhancing user interaction and system control. They are reliable solutions for properties requiring enhanced security and customizable alarm configurations.

Ademco 4150 and 4152 Models

The Ademco 4150 and 4152 models are advanced alarm systems renowned for their reliability and user-friendly interfaces. Designed for both residential and commercial use, these models offer enhanced security features, including multiple zone configurations and voice module compatibility. The 4152 model includes a built-in voice module for clear voice prompts, improving user interaction. Both systems are scalable, allowing for customization to meet specific security needs. They are compatible with a wide range of Honeywell devices, making them versatile solutions for comprehensive property protection.

Programming and Customization

Programming and customization allow users to tailor their Ademco system to specific needs, enhancing security and functionality through advanced command inputs and data field navigation.

Entering Programming Mode

To access programming mode on your Ademco system, press the * and 99 keys simultaneously. The system will prompt you with “Installer Code” or “Programmer Mode.” Enter your installer code, typically 4112, to proceed. Once confirmed, you can navigate through data fields to customize settings, such as zone configurations, user codes, and system features. Always refer to your manual for specific instructions, as improper programming may lead to system malfunctions or false alarms. Ensure all changes are saved before exiting.

Command Explanations

Ademco commands are essential for system customization. The “Go to Data Field” command allows navigation by entering field numbers. “Entering Data” requires inputting specific values. Commands like “Save” ensure changes are stored. Refer to the manual for detailed explanations and avoid errors. Proper command execution is crucial for system functionality. Always follow guidelines to prevent issues. Use the manual as a reference for smooth programming. Commands vary by model, so verify specifications for your system.

Data Field Navigation

Data field navigation in Ademco systems allows users to access and modify specific settings. Use the keypad to scroll through fields by entering numbers or arrows. Each field corresponds to system parameters like zone configurations or user codes. Common fields include zone attributes, alarm triggers, and access levels. Refer to the manual for field descriptions. Proper navigation ensures accurate programming. Save changes to apply updates. Always verify field values before exiting to avoid errors. The manual provides a detailed list of fields and their functions.

Open post

cvc worksheets pdf free download

CVC words are simple three-letter words with a consonant, vowel, and consonant structure. They are foundational for early reading skills, helping students recognize patterns in phonics and build confidence in decoding. These words, like “cat” or “dog,” introduce basic vowel sounds and are essential for young learners. Using free CVC worksheets can make learning engaging and effective, providing a clear path to mastering phonics fundamentals.

1.1 What Are CVC Words?

CVC words are three-letter words following the Consonant-Vowel-Consonant pattern. Examples include “cat,” “dog,” and “sun.” They are fundamental in early literacy as they introduce basic vowel sounds and word patterns, aiding in decoding and spelling. These words are simple, making them ideal for teaching phonics and building reading confidence. Free CVC worksheets, often available as PDF downloads, provide structured practice through activities like tracing and matching, supporting foundational literacy skills for young learners and various educational needs.

1.2 Importance of CVC Words in Phonics

CVC words play a crucial role in phonics as they introduce foundational reading and spelling patterns. These words help students recognize the relationship between sounds and letters, building phonemic awareness and decoding skills. By mastering CVC words, learners gain confidence in reading and spelling, laying the groundwork for more complex phonics concepts. Their simplicity makes them an ideal starting point for early readers. Free CVC worksheets, available as PDF downloads, provide structured practice, reinforcing these skills through interactive activities like tracing, matching, and reading exercises, supporting both classroom and home learning environments.

1.3 Examples of CVC Words

Common examples of CVC words include “cat,” “dog,” “sun,” “hat,” “car,” “boy,” “bag,” and “cup.” These simple words are essential for early readers as they introduce basic phonetic patterns. Each word consists of a consonant, a vowel, and another consonant, making them easy to sound out. They are often used in phonics instruction to help students recognize sound-letter relationships. Free CVC worksheets feature these and similar words, providing interactive exercises to practice reading and spelling. These examples are fundamental for building foundational literacy skills and confidence in young learners.

Where to Find Free CVC Worksheets

Free CVC worksheets are available on popular educational websites like Teachers Pay Teachers and Pinterest. These platforms offer downloadable PDFs without requiring an email sign-up, making access easy and convenient.

2.1 Popular Websites for Free Downloads

Several websites offer free CVC worksheet downloads in PDF format. Teachers Pay Teachers is a popular platform with a wide range of resources created by educators. Reading A-Z provides leveled reading materials, including CVC worksheets, ideal for differentiated instruction. Pinterest is another great source, offering visually appealing and printable CVC activities. Education.com and 123 Homeschool 4 Me also feature extensive collections of free, downloadable CVC worksheets tailored for various skill levels. These websites often allow direct downloads without requiring an email sign-up, making it convenient for teachers and parents to access resources quickly and efficiently.

2.2 How to Download Worksheets Without Email

To download CVC worksheets without providing an email, look for websites offering direct PDF downloads. Many platforms, such as Teachers Pay Teachers and Pinterest, feature free resources with instant access. Navigate to the desired worksheet, click the “Download” or “Print” button, and save the file directly to your device. Some sites may offer “guest download” options, eliminating the need for sign-ups. Ensure you’re using trusted websites to avoid spam or malware. Additionally, check for “no email required” filters in search results to find worksheets quickly and conveniently. This method saves time and ensures privacy while accessing educational materials;

2.3 Printable CVC Worksheets for Various Skills

Printable CVC worksheets are designed to target specific phonics skills, making them versatile for tailored instruction. Many worksheets focus on short vowel sounds, helping students master words like “cat” or “dog.” Others emphasize identifying beginning and ending consonants, while some combine these skills for comprehensive practice. Additionally, there are worksheets dedicated to word building, where students can manipulate letters to create new CVC words. Mixed-skill worksheets offer a variety of exercises, such as fill-in-the-blank, matching, and tracing activities. These resources cater to different learning needs, ensuring students can practice and reinforce their phonics abilities in engaging and effective ways. They are ideal for both classroom and home use.

Tips for Using CVC Worksheets Effectively

Effectively use CVC worksheets by integrating them into daily routines, employing interactive methods, and tailoring activities to meet individual learning needs for better phonics mastery.

3.1 Incorporating Worksheets into Literacy Centers

Incorporate CVC worksheets into literacy centers to create interactive and engaging learning environments. Use these worksheets as part of structured activities, such as word building, reading, and writing tasks. Rotate materials regularly to keep students interested and motivated. Pair worksheets with hands-on tools like letter stamps or magnetic letters for a multisensory approach. For example, a “Read and Draw” station can combine worksheet activities with creative expression. This method encourages independent practice while reinforcing phonics skills. Literacy centers with CVC worksheets help students develop fluency and confidence in decoding simple words, making learning enjoyable and effective.

3.2 Fun Activities to Supplement Worksheets

Supplement CVC worksheets with hands-on activities to make learning interactive and enjoyable. Try word scavenger hunts, where students find and read CVC words in their environment. Create bingo games using CVC words for a fun, competitive edge. Use manipulatives like letter tiles or stamps to build and rearrange words, fostering creativity and understanding. Incorporate movement-based activities, such as jumping to words starting with a specific sound or acting out CVC words. These engaging methods cater to different learning styles and reinforce skills learned from worksheets, ensuring a well-rounded and enjoyable approach to mastering CVC words.

3.3 Tracking Progress with CVC Worksheets

Tracking progress with CVC worksheets helps educators and parents monitor learning milestones effectively. Begin with pre-assessment to identify skill levels, then use worksheets to measure improvement. Regularly review completed sheets to pinpoint strengths and areas needing attention. Incorporate activities like word sorting or scavenger hunts to reinforce skills and track growth dynamically. Many free CVC worksheets include answer keys or progress charts, making it easier to assess accuracy and fluency. By consistently using these tools, learners can build confidence and mastery of CVC words, while educators gain valuable insights to tailor instruction and celebrate achievements.

CVC Worksheets for Specific Skills

CVC worksheets target specific phonics skills, such as short vowel sounds, beginning/end consonants, and word building. These focused exercises help learners master foundational reading abilities systematically.

4.1 Short Vowel Sounds in CVC Words

Short vowel sounds are a cornerstone of CVC words, helping learners recognize patterns in phonics. Worksheets often focus on individual vowels, like “a” in “cat” or “e” in “pet,” to build decoding skills. Activities such as read-and-draw or matching games reinforce these sounds. Many free PDFs include exercises where students identify and write CVC words with specific short vowels, making learning interactive and engaging. These resources are ideal for classrooms or homeschooling, providing structured practice to master short vowel recognition and application in simple words.

4.2 Identifying Beginning and Ending Sounds

Identifying beginning and ending sounds in CVC words is a critical phonics skill. Worksheets often include activities where students match words to their starting or ending consonants, such as pairing “cat” with the /k/ sound or “dog” with the /g/ sound. Exercises like fill-in-the-blank or sound sorting games help reinforce this concept. Free PDF resources provide engaging ways to practice, such as matching pictures to words or circling the correct initial or final consonant. These activities are especially useful for young learners or those needing extra support, making sound identification intuitive and fun while building a strong phonics foundation.

4.3 CVC Word Building Activities

CVC word building activities are interactive exercises that help students construct and deconstruct words. Using letter tiles, stamps, or magnetic letters, learners can create words by combining consonants and vowels. Worksheets often include cut-and-paste activities, where students arrange letters to form CVC words. These exercises reinforce phonics skills and letter-sound knowledge. Free PDF resources offer word-building templates, fill-in-the-blank tasks, and sorting games. Such activities make learning hands-on and engaging, helping students understand how sounds combine to form meaningful words. They are ideal for literacy centers or intervention, making the process of learning to read and spell enjoyable and effective.

CVC Worksheets for Special Needs

CVC worksheets are adaptable for special needs, offering tailored activities for speech therapy, ESL learners, and differentiated instruction. They provide visual and tactile learning aids, helping students with diverse abilities grasp phonics concepts at their own pace. Free PDF resources include simplified layouts, larger fonts, and repetitive exercises to accommodate individual learning needs, ensuring accessibility and engagement for all learners.

5.1 Using CVC Worksheets for Speech Therapy

CVC worksheets are invaluable in speech therapy, particularly for children with apraxia or articulation disorders. These resources often feature real photos and clear pronunciation guides, helping students practice specific sounds. Activities like matching games and fill-in-the-blank exercises reinforce phonetic awareness and word formation. Many worksheets are designed to target short vowel sounds, making them ideal for structured therapy sessions. Free printable CVC worksheets with visual aids and repetitive exercises support consistent practice, aiding in the development of clear and accurate speech. They are adaptable to individual needs, providing a tailored approach to speech development and language skills.

5.2 CVC Worksheets for ESL Learners

CVC worksheets are an excellent tool for ESL learners, offering a structured approach to learning English phonics. These resources help students recognize consonant-vowel-consonant patterns, essential for decoding simple words. Worksheets often include visual aids and repetitive exercises, making them ideal for language learners. Activities like matching games and word building exercises reinforce pronunciation and spelling skills. Many free printable CVC worksheets are designed with ESL learners in mind, providing clear instructions and engaging layouts. They are particularly useful for practicing short vowel sounds and common CVC word families, such as “cat” and “dog.” This makes learning fun and accessible for non-native speakers.

5.3 Adaptive CVC Worksheets for Differentiated Instruction

Adaptive CVC worksheets cater to diverse learning needs, providing tailored activities for students with varying abilities. These resources often include visual aids, adjustable difficulty levels, and interactive elements to engage learners. They support differentiated instruction by allowing teachers to customize exercises based on individual progress. For example, worksheets may offer word-building activities for advanced learners or simplified matching games for those needing extra support. Many free CVC worksheets are designed to be adaptable, ensuring accessibility for all students, including those with special needs or language barriers. This flexibility makes them a valuable tool for inclusive and personalized learning environments.

Open post

structural engineering reference manual

Structural engineering focuses on designing and analyzing structures to ensure safety, stability, and durability under various loads, combining principles of physics, mathematics, and materials science.

Overview of Structural Engineering

Structural engineering is a fundamental discipline that ensures buildings, bridges, and other infrastructure are safe, durable, and capable of withstanding environmental and operational stresses. It involves designing and analyzing structures to meet functional and safety requirements, using materials like steel and concrete. Structural engineers apply principles of physics and mathematics to create efficient and sustainable designs. The field encompasses both new constructions and the maintenance of existing infrastructure, ensuring stability and functionality. It requires a blend of creativity and technical expertise to address challenges in modern construction, making it indispensable for societal development and urban growth.

Key Concepts and Principles

Structural engineering relies on core principles such as equilibrium, strength, and stability to ensure structures resist deformation and failure. Engineers use load calculations to determine forces like weight, wind, and seismic activity. Material properties, including strength and elasticity, are critical for selecting appropriate building materials. The concept of stress and strain helps predict how structures respond to loads. Additionally, energy principles and structural analysis techniques, such as static and dynamic analysis, guide the design process. These principles ensure structures are both functional and safe, forming the foundation of all engineering designs.

Design Codes and Standards

Design codes and standards provide guidelines for safe and reliable construction, outlining material specifications, load calculations, and structural integrity to ensure compliance with regulatory requirements and best practices.

International Building Codes (IBC)

The International Building Code (IBC) is a comprehensive model code that sets minimum requirements for designing, constructing, and occupying buildings. It applies to all types of structures, ensuring safety, sustainability, and accessibility. The IBC covers critical aspects like load calculations, material standards, fire resistance, and seismic design. Regular updates reflect advancements in engineering and technology. Compliance with the IBC ensures buildings meet legal and safety standards, protecting occupants and the environment. It serves as a foundational reference for structural engineers, architects, and builders worldwide.

Material-Specific Standards (ACI, AISC, etc.)

Material-specific standards like ACI (American Concrete Institute) and AISC (American Institute of Steel Construction) provide detailed guidelines for designing structures with specific materials. ACI standards focus on concrete mix design, testing, and construction practices, ensuring durability and strength. AISC standards cover steel design, fabrication, and erection, emphasizing safety and structural integrity. These standards are regularly updated to incorporate new technologies and best practices. They serve as essential references for engineers, architects, and contractors, ensuring compliance with industry norms and material performance requirements. Adherence to these standards is critical for achieving safe, efficient, and sustainable structural designs.

Structural Design Process

The structural design process involves planning, analysis, and material selection to ensure structures are safe, functional, and compliant with design codes and standards.

Preliminary Design and Analysis

Preliminary design involves initial sketches and conceptual planning, ensuring functionality and meeting user requirements. Engineers assess loads, site conditions, and material options to create a feasible design framework.

Load Calculations and Distribution

Load calculations determine the forces acting on a structure, including dead loads (permanent weights) and live loads (variable weights like people or vehicles). Engineers also consider environmental loads such as wind, snow, and seismic activity. These calculations ensure the structure can withstand stresses without failure. Load distribution analysis evaluates how forces transfer through the structure, ensuring stability and safety. Codes like the International Building Code (IBC) and ASCE 7 provide guidelines for accurate load determination and distribution, critical for designing resilient and durable structures.

Selection of Structural Systems

The selection of structural systems involves choosing appropriate elements like beams, columns, and frames to support loads efficiently. Factors include load-bearing capacity, material choice, cost, and design preferences. Common systems are moment-resisting frames for seismic resistance and braced frames for stability. Foundations like footings or piles distribute loads to the ground. The choice aligns with the building’s intended use, ensuring safety and functionality. Engineers evaluate options to balance strength, durability, and economic efficiency, ensuring the structure meets design codes and withstands environmental factors like wind and earthquakes. Proper system selection is critical for achieving structural integrity and long-term performance.

Materials in Structural Engineering

Structural engineering utilizes materials like steel, concrete, wood, and composites, each offering unique strength, durability, and sustainability. Material selection is crucial for structural performance and environmental impact.

Steel and Concrete Design

Steel and concrete are cornerstone materials in structural engineering, offering exceptional strength and durability. Steel excels in tensile strength and flexibility, while concrete provides compressive strength and cost-effectiveness. Together, they form composite structures, optimizing performance and sustainability. Modern design techniques leverage advanced materials like high-strength steel and fiber-reinforced concrete to enhance structural integrity. Engineers use standardized codes to ensure safe and efficient designs, balancing load-bearing capacity with environmental considerations. These materials are integral to constructing resilient buildings, bridges, and infrastructure, adapting to diverse project demands and environmental challenges.

Advanced and Sustainable Materials

Modern structural engineering incorporates advanced materials like fiber-reinforced polymers, engineered cementitious composites, and recycled steel to enhance durability and sustainability. These materials reduce environmental impact while maintaining structural integrity. Sustainable practices, such as using recycled aggregates and low-carbon concrete, are gaining traction, aligning with green building standards. Advanced materials also offer improved resistance to natural disasters and harsh environments. Their adoption promotes energy efficiency and reduces long-term maintenance costs, making them critical for future-proof infrastructure development and eco-friendly construction projects.

Load and Stress Analysis

Load and stress analysis evaluates the effects of external forces on structures, ensuring they withstand static and dynamic loads without failure, maintaining safety and functionality.

Static and Dynamic Load Calculations

Static load calculations involve analyzing forces that remain constant over time, such as dead weight, while dynamic loads vary, like wind or traffic. Engineers use methods like finite element analysis and modal analysis to determine stress distributions and structural responses. Dynamic loads require evaluating inertia, damping, and resonance to ensure stability. Accurate calculations are critical to prevent failures and ensure compliance with design codes. Modern tools, including AI-driven simulations, enhance precision and efficiency in these complex analyses, enabling safer and more resilient structures under diverse conditions.

Stress and Strain Analysis

Stress and strain analysis evaluates how materials deform under external forces. Stress, measured in force per unit area, indicates internal resistance, while strain represents deformation. Engineers use Hooke’s Law and Poisson’s ratio to predict material behavior. Advanced methods like finite element analysis provide detailed insights into stress distributions, helping identify potential failure points. Fatigue analysis is crucial for cyclic loads, ensuring long-term durability. Accurate stress-strain modeling is essential for designing safe, efficient structures, minimizing risks of failure under static or dynamic conditions, and optimizing material performance in various environmental scenarios.

Case Studies and Practical Applications

This section explores real-world examples, such as the Eiffel Tower and Burj Khalifa, and lessons learned from failures, illustrating practical applications of structural engineering principles.

Real-World Examples of Structural Designs

Iconic structures like the Eiffel Tower and Burj Khalifa showcase innovative engineering solutions. The Eiffel Tower’s iron lattice design maximizes strength while minimizing material use. The Burj Khalifa’s buttressed core system resists wind and seismic forces. The Sydney Opera House’s spherical shell design demonstrates precision engineering. These examples highlight how structural engineering principles are applied to create safe, durable, and aesthetically pleasing buildings. Each structure offers insights into overcoming unique challenges, from extreme heights to complex geometries. These real-world applications inspire future innovations in the field of structural engineering.

Lessons Learned from Failures

Structural failures, such as the collapse of the Tacoma Narrows Bridge, have provided invaluable lessons. The bridge failed due to aerodynamic instability, leading to improved wind tunnel testing. Similarly, the failure of the Ronan Point apartment building highlighted the importance of progressive collapse analysis. These incidents underscore the need for rigorous testing, adherence to design codes, and consideration of dynamic loads. Failures also emphasize the importance of iterative design processes and the integration of advanced materials. Learning from these events has significantly advanced structural engineering practices, ensuring safer and more resilient designs for future projects.

Future Trends in Structural Engineering

Advancements in AI, machine learning, and sustainable materials are reshaping structural engineering. These innovations enable smarter designs, predictive failure analysis, and eco-friendly construction, driving the industry forward.

Role of AI and Machine Learning

AI and machine learning are revolutionizing structural engineering by enabling predictive analytics, optimizing designs, and automating simulations. These tools enhance precision, reduce costs, and improve safety in construction projects.

Sustainability and Green Building Practices

Sustainability in structural engineering emphasizes eco-friendly designs, minimizing environmental impact while maximizing efficiency. Key strategies include using recycled materials, optimizing energy consumption, and integrating renewable energy systems. Green building practices promote the use of sustainable materials like reclaimed wood, low-carbon concrete, and steel with high recycled content. Energy-efficient designs, such as passive solar systems and green roofs, reduce operational costs and environmental footprint. Certifications like LEED and BREEAM guide engineers in creating structures that balance performance, aesthetics, and environmental stewardship, ensuring a sustainable future for generations to come.

Open post

notice sign template pdf

Notice sign templates are pre-designed formats for creating signs that convey important information or instructions. They are widely used in public spaces, workplaces, and areas requiring specific guidance, ensuring clear communication through customizable and professional displays.

What is a Notice Sign Template?

A notice sign template is a pre-designed format used to create signs that communicate important information or instructions. These templates are customizable, allowing users to add specific text, graphics, or logos to suit their needs. Available in various formats like PDF, Word, or editable designs, they provide a quick and efficient way to produce professional-looking signs. Notice sign templates are widely used in workplaces, public spaces, and areas requiring clear guidance, ensuring messages are conveyed effectively. They are ideal for safety alerts, informational notices, or directional guidance, offering a versatile tool for organizations and individuals to maintain clear communication. By using these templates, users can save time and ensure consistency in their signage.

Importance of Using Notice Sign Templates

Using notice sign templates is essential for ensuring clear and professional communication. These templates provide consistency in design and messaging, making it easier to convey important information effectively. They are cost-effective, saving time and resources by eliminating the need to design signs from scratch. Notice sign templates also ensure compliance with safety regulations, such as OSHA standards, by offering pre-designed layouts that meet legal requirements. Additionally, they allow for customization, enabling users to tailor messages to specific needs while maintaining a professional appearance. This consistency helps in quickly grabbing attention, ensuring that critical information is understood without confusion. Overall, notice sign templates are a practical and efficient tool for organizations and individuals to communicate effectively and maintain safety standards.

Types of Notice Signs

Notice signs include caution, exit, and directional signs, each designed for specific purposes. They ensure safety, provide clear instructions, and are customizable for various environments and needs.

Caution Signs

Caution signs are essential for alerting individuals to potential hazards or unsafe conditions. Typically featuring black text on a yellow background, they are designed to grab attention and provide clear warnings. These signs are commonly used in workplaces, construction zones, and public areas to indicate non-life-threatening hazards, such as wet floors, electrical hazards, or restricted areas. By using standardized designs, caution signs ensure consistency and compliance with safety regulations. Many caution sign templates are available for download in PDF format, allowing users to customize messages and print them easily. They are a vital tool for promoting safety, preventing accidents, and maintaining order in various environments. Customizable templates make it easy to create professional and effective caution signs tailored to specific needs.

Exit Signs

Exit signs are critical for indicating emergency escape routes in public spaces, workplaces, and buildings. They are typically designed with a green background and white text, ensuring high visibility in various lighting conditions. These signs are essential for compliance with safety regulations and help individuals locate exits quickly during emergencies. Exit sign templates in PDF format are widely available, offering customizable options to suit specific needs. They are often paired with arrows or directional indicators to guide people toward the nearest exit. Proper placement and clear design ensure that exit signs remain effective and easily understood. By using standardized templates, users can create professional and compliant exit signs tailored to their environment.

Design and Customization

Notice sign templates offer customizable designs, allowing users to personalize text, colors, and visual elements to suit specific needs. Color codes and symbols enhance visibility and communication, ensuring clarity in conveying messages effectively.

Customizable Templates for Specific Needs

Customizable notice sign templates cater to diverse requirements, offering flexibility to tailor messages for specific scenarios. Users can modify text, colors, and graphics to align with their objectives, ensuring relevance and clarity. Whether for workplace safety, directional guidance, or informational updates, these templates provide adaptable solutions. Many are available in PDF and editable DOC formats, allowing easy adjustments. For instance, safety signs can highlight hazards using vibrant colors, while directional signs can include arrows or maps. Additionally, templates for events or announcements enable personalized messaging. This versatility makes customizable notice signs indispensable for effectively communicating across various contexts, ensuring professional and clear dissemination of information.

Color Codes and Visual Elements

Notice sign templates often incorporate standardized color codes and visual elements to ensure clarity and effectiveness. Yellow backgrounds with black text are commonly used for caution signs, while green signifies safe conditions or exits. Red is reserved for emergency or fire-related notices, and blue typically indicates informational messages. These color schemes are universally recognized, making them ideal for conveying instant understanding. Visual elements like arrows, exclamation marks, and pictograms further enhance readability, especially in environments where text alone may not suffice. By adhering to these design principles, notice signs ensure that critical information is communicated swiftly and efficiently, optimizing safety and compliance in various settings.

Popular Notice Sign Templates

Popular notice sign templates include blank signs, safety notices, and customizable designs. They are widely used in workplaces and public spaces for clear communication and safety compliance.

Blank Notice Sign Templates

Blank notice sign templates provide a versatile and customizable solution for creating signs tailored to specific needs. These templates are available in PDF format, allowing users to easily download and print them. They are ideal for workplaces, public spaces, and areas requiring clear communication. The blank design enables users to add their own text, ensuring the message is relevant and concise. Many templates are designed for safety purposes, such as caution signs or emergency notices, while others are suitable for general information or directional guidance.

Blank notice sign templates are popular due to their flexibility and professional appearance. They often include standard sizes, such as 8.5 x 11 inches, making them easy to print and display. Users can customize the text, fonts, and colors to match their branding or regulatory requirements. This ensures consistency and clarity in conveying important messages. Whether for safety, information, or direction, blank notice sign templates offer a practical and efficient way to communicate effectively in various settings.

Printable Safety Signs

Printable safety signs are essential tools for ensuring compliance with occupational safety and health regulations. These templates, available in PDF format, provide pre-designed layouts for quick customization. They are ideal for workplaces, construction sites, and public areas, offering clear visual communication of potential hazards or safety protocols. Many printable safety signs feature standard designs, such as “Caution” or “Men Working” notices, with bold text and eye-catching colors to grab attention. Users can download these templates for free or at a minimal cost, customize the text, and print them instantly. Professional designs ensure consistency and clarity, making them a practical solution for maintaining a safe and informed environment. These signs are widely used to promote safety awareness and prevent accidents in various settings.

Downloading and Printing

Downloading and printing notice sign templates is quick and easy. PDF formats are widely available, allowing for instant customization and professional results. Download now and print immediately!

Free Printable Notice Sign Templates in PDF

Free printable notice sign templates in PDF format offer a convenient and cost-effective solution for creating professional signs. These templates are easily downloadable and customizable to suit various needs, such as workplace safety, directional guidance, or public information. Many websites provide high-quality, editable designs that can be tailored with specific text or graphics. PDF templates ensure crisp and professional printing, making them ideal for both indoor and outdoor use. Popular options include caution signs, exit signs, and blank templates for versatility. Whether for emergencies, constructions, or general announcements, these free PDF templates are a reliable choice for clear and effective communication. Download, customize, and print your signs effortlessly to meet regulatory standards or convey important messages.

Professional Designs for Download

Professional notice sign templates are available for download, offering sleek and customizable designs to meet specific needs. These templates are crafted to ensure clarity and visual appeal, making them ideal for workplaces, public spaces, and events. Many designs feature standardized color codes and graphics, aligning with safety regulations and industry standards. Popular options include caution signs, directional signs, and emergency notices. Websites like BuildASign.com provide high-quality, editable templates in PDF and DOC formats, allowing users to add custom text or logos. These designs are royalty-free and suitable for both indoor and outdoor use. With professional templates, users can create polished signs that convey important messages effectively, ensuring compliance and visibility. They are perfect for businesses, organizations, and individuals seeking durable and professional signage solutions.

Open post

winnebago wiring schematic pdf free

Winnebago wiring diagrams provide a clear guide for understanding complex electrical systems, ensuring safety and efficiency․ They are crucial for RV owners to maintain and upgrade their motorhomes effectively and properly․

1․1 Understanding the Importance of Wiring Schematics for RV Owners

Wiring schematics are essential for RV owners to safely maintain, repair, and upgrade their motorhomes․ They provide a detailed roadmap of electrical systems, ensuring owners can identify components and troubleshoot issues efficiently․ These diagrams are critical for installing new equipment and understanding how systems interact․ By referencing wiring schematics, RV owners can avoid electrical hazards and ensure proper functionality, making them indispensable for both novice and experienced enthusiasts․

1․2 Overview of Winnebago Motorhomes and Their Electrical Systems

Winnebago motorhomes are renowned for their durability and innovative designs, catering to both casual and full-time RV enthusiasts․ Their electrical systems are meticulously engineered to support modern conveniences, combining 12V DC and 120V AC power․ The 12V system powers essential appliances and lighting, while the 120V system handles high-power devices like microwaves․ These systems are managed through circuit breakers, converters, and wiring diagrams, ensuring reliable performance and safety․ Understanding these components is vital for maintaining and upgrading your Winnebago motorhome effectively․

Finding Free Winnebago Wiring Schematics Online

Free Winnebago wiring schematics can be found on official Winnebago resources, community forums, and dedicated RV websites․ Users often share diagrams for specific models, such as the 2016 Dutchmen Voltage or 1994 Safari Ivory Edition, making it easier to locate and download the necessary files․ Websites like Winnebago Industries and EXPLORIST․life provide comprehensive guides and diagrams for various RV electrical systems․

2․1 Reliable Sources for Downloading Winnebago Wiring Diagrams

Official Winnebago websites and forums are the most reliable sources for wiring diagrams․ These platforms provide accurate and model-specific schematics, ensuring compatibility and safety․ Additionally, community forums and RV enthusiast groups often share verified diagrams for various Winnebago models․ Websites like Winnebago Industries and EXPLORIST․life offer comprehensive guides and downloadable PDFs for electrical systems․ Always verify the source to ensure the diagrams are authentic and up-to-date for your specific RV model․

2․2 Tips for Searching and Verifying Authentic Schematics

When searching for Winnebago wiring diagrams, use specific keywords like “Winnebago wiring schematic PDF free” or your model year․ Always check official Winnebago sources or trusted forums for authenticity․ Verify the diagram matches your RV’s make and model by cross-referencing with your owner’s manual․ Ensure the file is in PDF format and updated recently․ Avoid untrusted sites to prevent downloading incorrect or malicious content․ If unsure, consult community forums for recommendations or validation․

Key Components of a Winnebago Wiring Diagram

A Winnebago wiring diagram includes wiring codes, fuses, circuit breakers, and connectors․ It separates 12V and 120V systems for clarity, ensuring safe and accurate installations or troubleshooting of electrical components․

3․1 Breakdown of 12V and 120V Electrical Systems

The Winnebago wiring diagram separates the 12V DC system, which powers essential appliances and lighting, from the 120V AC system, designed for high-power devices․ Understanding these systems is crucial for RV owners to ensure safe and efficient operation․ The 12V system is typically used for lights, fans, and small appliances, while the 120V system handles larger loads like air conditioners and microwaves․ Proper identification and management of these systems are vital for maintaining functionality and preventing electrical issues․

3․2 Identifying Fuses, Circuit Breakers, and Wiring Codes

Identifying fuses, circuit breakers, and wiring codes in Winnebago motorhomes is essential for troubleshooting and maintenance․ Fuses are often located beneath the bench seat, with ratings like 20A or 5A, while circuit breakers are found in the main electrical panel․ Wiring codes, such as JH2 or JJ2, help trace connections․ Proper identification ensures safety and efficiency, preventing electrical failures․ Always consult the wiring diagram for accurate information to avoid misidentification and potential system damage․

Common Electrical Systems in Winnebago Motorhomes

Winnebago motorhomes feature both 12V DC and 120V AC electrical systems․ The 12V system powers essential appliances and lights, while the 120V system supports high-power devices when connected to shore power․

4․1 Understanding the 12V DC System for Appliances and Lights

The 12V DC system in Winnebago motorhomes powers essential appliances, lighting, and accessories․ It operates using a deep-cycle battery, which is charged by the engine alternator or an external power source․ This system is crucial for basic operations like interior lights, water pumps, and small electronics․ The battery and converter/charger work together to maintain consistent power supply․ Proper understanding of this system ensures reliable functionality and safety for RV owners, especially when boondocking or off-grid camping․

4․2 The 120V AC System for High-Power Appliances

The 120V AC system in Winnebago motorhomes powers high-demand appliances like microwaves, air conditioners, and hair dryers․ This system is typically energized by shore power or a generator, providing the necessary voltage for larger electrical loads․ The wiring schematic for this system highlights circuit breakers and outlets, ensuring safe and efficient power distribution․ Proper understanding of the 120V AC system is essential for operating high-power appliances safely and efficiently, especially when connected to external power sources․

Exterior and Interior Wiring Features

Winnebago wiring diagrams outline separate systems for exterior and interior components, ensuring safe and efficient power distribution to lights, outlets, and appliances throughout the motorhome․

5․1 Wiring for Exterior Components like the Shower and Lights

Winnebago wiring diagrams detail the exterior components, such as showers and lights, ensuring proper power distribution․ These systems are designed to withstand outdoor conditions and are connected to the motorhome’s electrical system through weatherproof connectors․ The wiring for exterior lights and showers is typically routed to a dedicated fuse panel, ensuring safety and ease of maintenance․ Using a wiring schematic helps owners identify the correct circuits and avoid electrical hazards during installations or repairs․

5․2 Interior Wiring for Lighting, Outlets, and Appliances

Winnebago interior wiring systems are meticulously designed to power lighting, outlets, and appliances safely and efficiently․ The 120V AC system supports high-power devices like microwaves and air conditioners, while the 12V DC system handles lights and smaller appliances․ Wiring diagrams highlight circuit routes, fuse locations, and connectors, aiding in installations and repairs․ Proper grounding and GFCI outlets ensure safety, preventing electrical hazards․ Regular maintenance and adherence to schematics are crucial for optimal performance and longevity of the interior electrical setup․

Battery and Converter Systems in Winnebago RVs

Winnebago RVs utilize battery and converter systems to manage power effectively․ These systems work together to provide a reliable energy supply for all electrical components․ Proper installation and maintenance are crucial for optimal performance and longevity․

6․1 How Batteries Integrate with the Electrical System

Batteries are the primary power source for Winnebago RVs when external power is unavailable․ They integrate seamlessly with the 12V DC system, supplying energy to lights, appliances, and essential components․ The battery system works in conjunction with the converter/charger to maintain power levels when connected to an external power source․ Proper installation and maintenance of the battery system are critical for ensuring reliable performance, safety, and efficiency in the RV’s electrical operations․

6․2 Role of the Converter/Charger in Maintaining Power

The converter/charger plays a vital role in maintaining power within Winnebago RVs․ It converts external AC power to DC power, charging the batteries and supplying energy to the 12V system․ When disconnected from external power, the charger ensures the battery is fully charged, preventing overcharging․ This component is essential for balancing power distribution, ensuring all electrical systems function smoothly and safely, especially when transitioning between external and internal power sources․

Safety Considerations for Wiring Diagrams

Handling electrical systems requires caution․ Always disconnect power before working on wiring, and avoid overloaded circuits to prevent fires․ Use diagrams to identify components safely․

7․1 Precautions for Handling Electrical Systems in RVs

When working with RV electrical systems, always disconnect the power source before starting any repairs․ Use a multimeter to verify voltage levels․ Avoid overloaded circuits, as they can cause fires․ Ensure proper grounding to prevent shocks․ Never bypass fuses or circuit breakers, as this can lead to system damage․ Always refer to the wiring diagram for accurate connections․ Wear protective gear, such as gloves and safety glasses, to minimize risks․ Proper precautions ensure a safe and efficient electrical system maintenance experience․

7․2 Common Mistakes to Avoid When Using Wiring Schematics

Common mistakes include improper wire connections, ignoring color codes, and not verifying diagram accuracy․ Assuming all symbols are universal can lead to errors․ Overlooking fuse and breaker ratings is risky․ Mixing 12V and 120V systems can cause damage․ Not grounding components properly increases shock risks․ Using incorrect tools or bypassing safety steps can result in system failure․ Always cross-reference diagrams with manufacturer guidelines to ensure safe and accurate electrical work․

Manufacturer Resources for Wiring Diagrams

Winnebago provides official wiring diagrams and resources on their website․ These include detailed PDF schematics, electrical guides, and customer support for accurate troubleshooting and installations, ensuring compliance with safety standards․

8․1 Official Winnebago Support and Documentation

Winnebago Industries provides official wiring diagrams and documentation through their website and customer support․ These resources include detailed PDF schematics, electrical system guides, and installation manuals․ Owners can access these materials by visiting the official Winnebago website, where they can search by model year and specific components․ Additionally, Winnebago offers customer support through contact forms, phone, and authorized service centers, ensuring owners receive accurate and reliable information for troubleshooting and installations․ This official support is essential for maintaining safety and system integrity in Winnebago motorhomes․

8․2 Community Forums and User-Shared Schematics

Community forums and user-shared schematics are invaluable resources for Winnebago owners seeking wiring diagrams․ Many RV enthusiasts share their experiences, diagrams, and troubleshooting tips online․ Websites like RV forums and social media groups often host detailed discussions and downloadable PDF files․ These shared resources can help owners identify components, resolve electrical issues, and install new equipment․ While user-shared content can be helpful, it’s important to verify the credibility of sources to ensure accuracy and safety․ These forums also provide a platform for advice and collaboration among RV owners․

DIY Installation and Troubleshooting

Winnebago wiring diagrams are essential for DIY installations and troubleshooting․ They guide RV owners in safely connecting systems, identifying faults, and resolving electrical issues efficiently․

9․1 Steps for Installing New Equipment Using a Wiring Diagram

Using a Winnebago wiring diagram, start by identifying the relevant circuit and components․ Locate the appropriate wiring harness and connectors․ Ensure all power sources are turned off for safety․ Follow the diagram to connect wires, matching colors and codes․ Verify connections with a multimeter if needed․ Test the equipment after installation to ensure proper function․ Refer to the diagram for troubleshooting common issues like blown fuses or short circuits․ Always consult the manual for specific guidelines and safety precautions․

9;2 Troubleshooting Common Electrical Issues

Begin by consulting the Winnebago wiring diagram to identify the affected circuit․ Common issues include blown fuses, tripped breakers, or loose connections․ Check for power at the source and verify wiring integrity using a multimeter․ Dead batteries or faulty converters often cause 12V system failures․ Refer to the diagram to trace wiring routes and isolate faults․ Always test components one at a time to avoid further damage․ Consult the manual for specific troubleshooting guides and solutions to ensure safe and effective repairs․

Future Trends in RV Wiring Systems

Advancements in RV wiring systems include integrated smart technology, automated controls, and sustainable energy solutions․ These innovations aim to enhance efficiency, safety, and user-friendly electrical management for modern motorhomes․

10․1 Advances in Electrical Systems for Modern RVs

Modern RVs are adopting smart electrical systems, integrating solar power, lithium batteries, and automated controls․ These advancements enhance energy efficiency, reduce reliance on shore power, and simplify system monitoring․ Wireless connectivity and touch-screen interfaces are becoming standard, allowing owners to manage power usage and diagnostics remotely․ Sustainable energy solutions, like advanced battery management and renewable energy integration, are reshaping the future of RV electrical systems, making them more eco-friendly and user-friendly for tomorrow’s travelers․

10․2 Importance of Staying Updated with Wiring Schematics

Staying updated with wiring schematics is crucial for safe and efficient RV maintenance․ Updated diagrams reflect the latest electrical system modifications, ensuring compatibility with new components․ They help diagnose issues accurately, prevent electrical hazards, and guide installations․ Regular updates also align with manufacturer improvements, ensuring compliance with safety standards․ For Winnebago owners, accessing the latest wiring schematics enhances troubleshooting and customization, keeping their motorhomes reliable and modern for years to come․

Posts navigation

1 2
Scroll to top