Open post

rapid set concrete leveler instructions

Article Plan: Rapid Set Concrete Leveler Instructions

This comprehensive guide details using CTS Rapid Set products—Non-Sag & Self-Leveling Sealants—for concrete leveling, covering preparation, application, and long-term care.

Rapid Set concrete levelers represent a significant advancement in construction materials, offering a swift and efficient solution for achieving perfectly level surfaces. Unlike traditional concrete which requires extended curing times, these innovative products, like those from CTS Cement – including their Non-Sag and Self-Leveling Sealants – dramatically reduce project timelines. This is particularly beneficial for renovations and projects with tight schedules.

These levelers are formulated using advanced technology, providing superior strength and durability. They are ideal for both professional contractors and DIY enthusiasts seeking a reliable and time-saving method for floor preparation and concrete repair.

Understanding Rapid Set Technology

Rapid Set technology hinges on a unique chemical composition, differing significantly from conventional Portland cement-based concretes. CTS Cement’s products, like their Non-Sag Sealant and Adhesive and Self-Leveling Sealant, utilize solvent-free hybrid silane polyether technology. This formulation allows for incredibly fast setting and hardening, minimizing downtime.

The benefits include reduced shrinkage, enhanced adhesion, and superior durability. This innovative approach delivers a high-performance solution, streamlining construction processes and ensuring long-lasting results, especially when compared to traditional methods requiring lengthy curing periods.

Chemical Composition & Benefits

CTS Rapid Set products distinguish themselves through their solvent-free hybrid silane polyether base. This composition provides a non-shrink characteristic, crucial for maintaining dimensional stability during setting. The absence of solvents contributes to lower VOC emissions, enhancing workplace safety and environmental responsibility.

Key benefits include exceptional adhesion to various substrates, high flexibility, and resistance to weathering. These sealants and adhesives offer superior performance in demanding applications, delivering a durable and long-lasting bond while minimizing potential for cracking or failure.

Setting Time Comparison: Traditional vs. Rapid Set

Traditional concrete levelers often require extended setting and curing times, potentially delaying project completion by days. Rapid Set technology, however, dramatically reduces this timeframe. While traditional mixes can take 24-72 hours to fully harden, Rapid Set formulations are engineered for significantly faster performance.

This accelerated setting allows for quicker return to service, minimizing downtime and increasing project efficiency. The reduced wait time is particularly beneficial for time-sensitive repairs or applications where rapid strength gain is essential, offering a substantial advantage over conventional methods.

Applications of Rapid Set Concrete Levelers

Rapid Set concrete levelers excel in diverse applications demanding swift and durable results. Primarily, they are ideal for floor leveling prior to installing various flooring materials like tile, hardwood, or laminate, ensuring a perfectly smooth and stable substrate. Beyond flooring prep, these levelers effectively patch damaged concrete surfaces – cracks, spalls, and uneven areas – restoring structural integrity.

CTS’s Non-Sag and Self-Leveling Sealants, based on silane polyether technology, broaden application possibilities, including sealing and adhering in demanding environments, offering versatile solutions for both professional contractors and DIY homeowners.

Floor Leveling Before Flooring Installation

Proper floor leveling is paramount for successful flooring installation, and Rapid Set levelers deliver exceptional performance. Uneven subfloors can cause issues like squeaking, tile cracking, and uneven wear. Rapid Set products, particularly self-leveling formulas, create a flawlessly smooth surface, accommodating various flooring types.

The quick setting time minimizes project delays, allowing for faster flooring installation. Utilizing these levelers ensures optimal adhesion and longevity of the finished floor, providing a stable and aesthetically pleasing result, crucial for both residential and commercial projects.

Patching Damaged Concrete Surfaces

Rapid Set concrete levelers excel at repairing spalled, cracked, or otherwise damaged concrete surfaces efficiently. These products offer a robust solution for restoring structural integrity and improving aesthetics. Non-sag formulas are ideal for vertical repairs, preventing material run-off, while self-leveling options quickly fill larger depressions.

The fast-setting nature minimizes downtime and disruption. Properly prepared surfaces, combined with Rapid Set’s advanced technology, create durable, long-lasting patches that seamlessly blend with existing concrete, offering a professional finish for both functional and cosmetic improvements.

Tools and Materials Required

Successfully applying Rapid Set concrete leveler demands specific tools and materials for optimal results. Essential items include the Rapid Set concrete leveler itself – choosing between Non-Sag and Self-Leveling formulas based on the project. You’ll need appropriate mixing buckets, a drill equipped with a robust mixing paddle, and measuring containers for accurate proportions.

Crucially, prioritize safety with gloves, a dust mask, and eye protection. Additional tools may include a trowel, screed board, and a primer suitable for concrete surfaces to ensure strong adhesion and a flawless finish.

Safety Gear (Gloves, Mask, Eye Protection)

Working with Rapid Set concrete levelers necessitates strict adherence to safety protocols. Cement-based products can be irritating to skin, eyes, and the respiratory system. Therefore, wearing heavy-duty, chemical-resistant gloves is paramount to prevent skin contact and potential burns. A properly fitted dust mask or respirator is crucial to avoid inhaling cement particles, safeguarding your lungs.

Furthermore, safety glasses or goggles are essential to protect your eyes from splashes or airborne debris during mixing and application. Prioritizing these safety measures ensures a safe and comfortable working environment.

Mixing Equipment (Buckets, Drill with Mixing Paddle)

Proper mixing is vital for achieving optimal Rapid Set concrete leveler performance. You’ll require clean, sturdy buckets – plastic is preferable – of adequate size to accommodate the batch you’re preparing, following the product’s instructions. A variable-speed drill is essential, coupled with a robust mixing paddle specifically designed for concrete or mortar.

Avoid using paddles that are bent or damaged, as they won’t mix effectively. Ensure the drill has sufficient power to handle the viscosity of the leveler. Having multiple buckets can streamline the process, especially for larger projects.

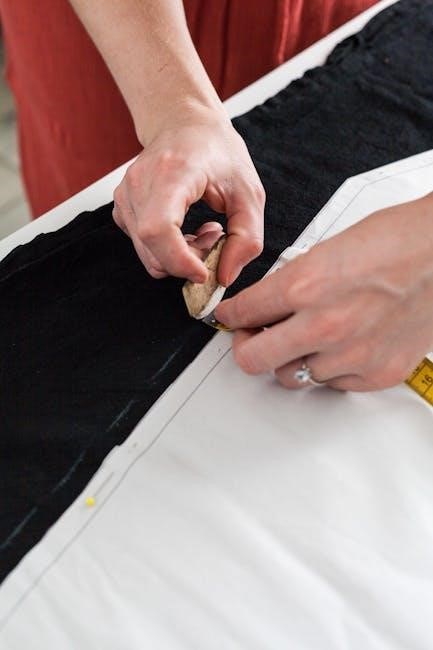
Surface Preparation – Crucial First Steps

Thorough surface preparation is paramount for successful Rapid Set concrete leveler adhesion and longevity. Begin by meticulously removing all debris – dust, dirt, grease, oil, loose particles, and any existing coatings. A concrete grinder or scraper may be necessary for stubborn residues. The surface must be structurally sound and free from cracks or voids that could compromise the leveler’s integrity.

Repair any significant damage before proceeding. Finally, consider priming the surface; this enhances bonding and prevents rapid moisture absorption, leading to a stronger, more durable result.

Cleaning & Removing Debris

Effective debris removal is the foundation of a successful Rapid Set application. Start with a thorough sweeping to eliminate loose particles. Next, employ a vacuum with a HEPA filter to capture fine dust. For stubborn contaminants like oil or grease, utilize a concrete degreaser, following the manufacturer’s instructions carefully.

Scraping may be needed for paint or adhesive remnants. Ensure the surface is completely dry before proceeding. Any remaining debris will hinder proper bonding and potentially cause leveler failure, so diligence is key.

Priming the Surface for Optimal Adhesion

Priming is critical for ensuring a strong, lasting bond with Rapid Set concrete levelers. Select a primer specifically designed for concrete and compatible with the leveler being used. Apply the primer evenly, following the manufacturer’s recommended coverage rate – typically with a brush, roller, or sprayer.

Allow the primer to fully dry before pouring the leveler; drying times vary based on temperature and humidity. Priming seals the concrete, reduces porosity, and promotes superior adhesion, preventing potential issues like delamination.

Mixing Instructions: Achieving the Right Consistency

Precise mixing is paramount for Rapid Set concrete levelers to perform optimally. Always follow the manufacturer’s water-to-powder ratio meticulously – deviations can compromise strength and setting time. Use a drill with a mixing paddle in a clean bucket, adding powder slowly to the water while mixing continuously.

Mix thoroughly, scraping the sides and bottom to ensure a uniform, lump-free consistency. Avoid over-mixing, which can introduce excessive air. The ideal consistency resembles a thick, creamy paste.

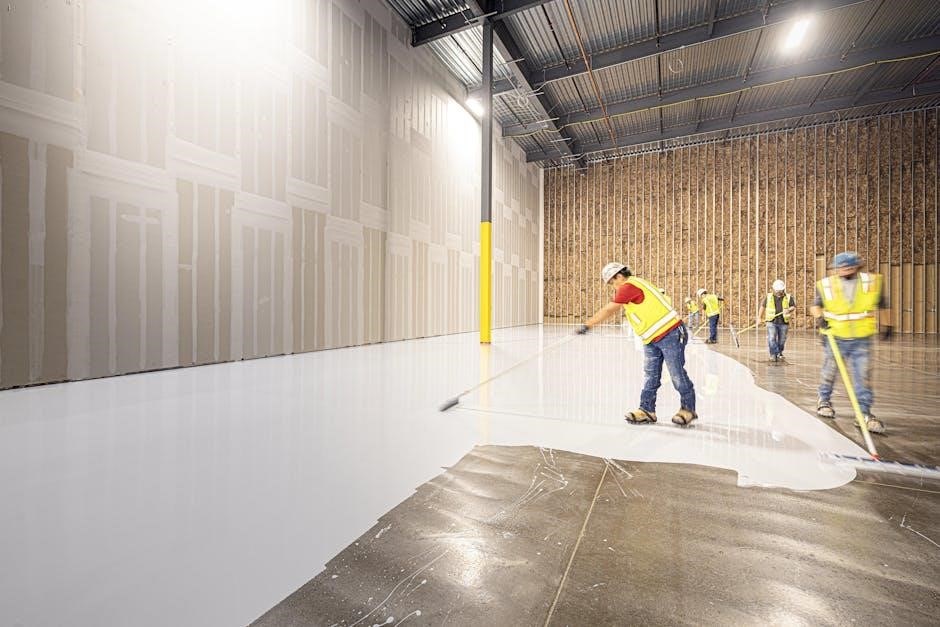
Pouring and Spreading the Leveler

Once mixed, promptly pour the Rapid Set leveler onto the prepared surface. Begin in the lowest area and work your way outwards, ensuring continuous coverage to avoid cold joints. For larger areas, pour in manageable sections. Immediately after pouring, use a screed board to distribute the material evenly across the surface, guiding it to fill low spots.

Avoid overworking the leveler during this stage; focus on achieving the desired depth and eliminating significant imperfections before proceeding to the next step.

Leveling Techniques: Ensuring a Smooth Finish

Achieving a perfectly level surface requires skillful technique. Following the screed board pass, utilize a magnesium float trowel to begin initial smoothing, embedding the aggregate and removing any surface irregularities. Allow a slight set before switching to a steel trowel for a final, polished finish.

For self-leveling compounds, minimal troweling may be needed. Feather edges carefully to blend with existing concrete. Proper technique minimizes imperfections and maximizes the leveler’s performance.

Using a Screed Board

A screed board is essential for initial leveling of rapid-set concrete. Position the board across the poured leveler, using a sawing motion to distribute the material evenly. Ensure the screed board spans at least two supports or screed guides for consistent results.

Apply firm, even pressure, removing excess material and filling low spots. Multiple passes, at different angles, refine the surface. Proper screeding establishes the foundational level before troweling, crucial for a smooth, durable finish.

Utilizing a Trowel for Final Smoothing

After screeding, a trowel refines the surface of the rapid-set concrete leveler. Begin with a steel trowel, using overlapping arcs and consistent pressure. This embeds larger aggregate and closes surface pores. For a glass-smooth finish, transition to a magnesium float, then a final steel trowel pass.

Maintain a slight downward angle, avoiding digging into the surface. Work quickly, as rapid-set concrete gains strength fast. Proper troweling minimizes imperfections and maximizes durability, creating a flawless base for flooring.

Curing Process & Timing

Rapid Set concrete levelers, unlike traditional mixes, achieve significant strength remarkably quickly. While not requiring extensive curing, proper hydration is still vital. Mist the surface lightly with water immediately after troweling to aid initial set, avoiding saturation.

Foot traffic can typically resume within 2-4 hours, and most flooring installations within 24-72 hours, depending on ambient temperature and product specifications. Full strength is usually attained within 7 days. Protect from extreme temperatures and direct sunlight during this period.

Troubleshooting Common Issues

Cracking can occur due to rapid drying or excessive shrinkage; maintain consistent moisture during initial set and consider control joints for larger areas. Improper mixing – too much or too little water – leads to weak spots or uneven setting.

Always adhere strictly to the manufacturer’s water-to-powder ratio. If the mix sets too quickly, it indicates insufficient water; conversely, a soupy mix suggests overwatering. Address these issues promptly during application for optimal results and a durable, level surface.

Cracking & Shrinkage Prevention

To minimize cracking, proper curing is paramount; maintain consistent moisture levels for the first 24-72 hours using plastic sheeting or a curing compound. Controlling the environment—temperature and humidity—also plays a vital role.

Avoid rapid temperature changes and direct sunlight during the initial set. For larger pours, consider incorporating shrinkage-reducing admixtures. Proper surface preparation and adherence to the recommended mixing ratios are crucial preventative measures, ensuring a durable and crack-resistant leveled surface.

Addressing Improper Mixing

If the rapid set concrete leveler is mixed with too much or too little water, its performance will be compromised. A too-dry mix results in poor flow and adhesion, while excess water weakens the final product and extends setting time.

If improperly mixed, do not attempt to salvage the batch. Discard it and remix according to the manufacturer’s instructions. Thoroughly clean mixing equipment before remixing. Accurate measurement and consistent mixing with a drill and paddle are essential for optimal results and prevent costly rework.

CTS Rapid Set Product Overview (Non-Sag & Self-Leveling)

CTS Cement offers specialized Rapid Set products designed for diverse leveling needs. Their Non-Sag Sealant and Adhesive excels in vertical applications, preventing slumping and providing robust bonding. Available in black, it utilizes solvent-free hybrid silane polyether technology.

Conversely, the Self-Leveling Sealant is ideal for horizontal surfaces, flowing easily to create a smooth, even finish. Both formulations are known for their rapid setting times and non-shrink characteristics, offering professional-grade performance for contractors and DIY enthusiasts alike.

Safety Precautions & Handling

When working with Rapid Set concrete levelers, prioritize safety. Always wear appropriate personal protective equipment (PPE), including gloves, a dust mask, and eye protection to prevent skin and respiratory irritation. Ensure adequate ventilation during mixing and application.

Avoid direct contact with the product, and if contact occurs, rinse thoroughly with water. Store materials in a cool, dry place, away from direct sunlight and moisture. Follow all manufacturer’s instructions on the product packaging for safe handling and disposal procedures.

Estimated Costs & Coverage Rates

The cost of Rapid Set concrete leveler varies based on product type (Non-Sag vs. Self-Leveling) and quantity purchased. Expect to pay roughly $40-$80 per 50lb bag, though prices fluctuate with market conditions. Coverage rates depend on the desired thickness and surface porosity.

Generally, a 50lb bag covers approximately 0.5 to 0.75 cubic feet. Factor in primer costs ($20-$40 per gallon) and tool rentals. Accurate estimation requires measuring the area and calculating the volume of leveler needed for the project.

Long-Term Maintenance & Care

Properly cured Rapid Set concrete leveler requires minimal long-term maintenance. Avoid exposing the surface to harsh chemicals or extreme temperature fluctuations, which could compromise its integrity. Periodic cleaning with a mild detergent and water is sufficient to maintain appearance.

Sealing the leveled surface with a concrete sealer can enhance durability and protect against staining. Inspect annually for any signs of cracking or deterioration, addressing minor issues promptly to prevent larger problems. Regular care ensures a lasting, smooth, and level surface.

Open post

heatnbond instructions

Understanding HeatnBond: A Comprehensive Guide

HeatnBond offers versatile adhesive solutions for various fabric projects‚ including applique‚ quilting‚ and creating fusible bias tape‚ simplifying no-sew applications effectively․

Numerous online resources‚ like YouTube tutorials from 2018‚ 2021‚ and 2025‚ demonstrate HeatnBond’s ease of use with different fabric types and techniques․

Despite lost instructions‚ as discussed on DISboards․com in 2010‚ readily available guides detail proper application for projects like curtains and beyond․

HeatnBond’s FeatherLite‚ Lite‚ and Ultrahold variations cater to diverse needs‚ offering varying levels of adhesion for optimal project outcomes consistently․

What is HeatnBond?

HeatnBond is a brand of fusible adhesive web‚ essentially a heat-activated glue that bonds fabrics together without the need for traditional sewing․ It’s a remarkably versatile tool for crafters and quilters‚ simplifying numerous projects and opening up creative possibilities․ Different types exist‚ including FeatherLite‚ Lite‚ and Ultrahold‚ each offering varying degrees of adhesion strength to suit different fabric weights and project requirements․

The core function of HeatnBond revolves around its adhesive properties‚ activated by the heat of an iron․ This allows you to temporarily or permanently join fabrics‚ creating designs for applique‚ embellishments‚ or even entire quilted pieces․ Online resources‚ like tutorials available since 2018‚ showcase how easily it adheres fabrics‚ even for those who’ve misplaced original instructions‚ as noted in a 2010 forum discussion․

Essentially‚ HeatnBond acts as a temporary or permanent substitute for stitching‚ making it ideal for quick projects‚ intricate designs‚ or situations where sewing isn’t practical․ It’s a cornerstone product for many crafting enthusiasts‚ offering a clean and efficient bonding solution․

Types of HeatnBond Fusible Web

HeatnBond offers a range of fusible webs tailored to specific project needs․ HeatnBond Lite and FeatherLite are ideal for lighter-weight fabrics and applications requiring a softer hand‚ often used in quilting and delicate applique․ These provide a gentle‚ flexible bond‚ perfect for projects needing drape and movement․ Resources from 2018 and 2025 highlight their suitability for various fabric types․

Conversely‚ HeatnBond Ultrahold delivers a stronger‚ more permanent bond‚ suitable for heavier fabrics and projects demanding durability․ This is particularly useful for items needing frequent washing or experiencing significant wear․ A 2021 YouTube tutorial demonstrates its effectiveness for no-sew applications‚ showcasing its robust adhesive qualities․

Understanding these distinctions is crucial for selecting the appropriate HeatnBond for your project․ Choosing the right type ensures optimal adhesion‚ longevity‚ and overall project success‚ as emphasized by crafting guides and user experiences shared online․

Preparing Your Fabrics for HeatnBond Application

Fabrics must be clean and ironed before applying HeatnBond‚ ensuring optimal adhesion and a smooth finish for successful project outcomes consistently․

Proper preparation maximizes the bonding process‚ preventing issues like bubbling or lifting‚ as demonstrated in various online tutorials readily available․

Washing and Ironing Fabrics

Prior to HeatnBond application‚ thoroughly washing your fabrics is crucial for removing sizing‚ finishes‚ or any potential contaminants that could hinder proper adhesion․ Use a mild detergent and a gentle cycle to avoid damaging delicate materials․ After washing‚ allow the fabrics to dry completely – do not attempt to apply HeatnBond to damp fabric!

Ironing is equally important․ A crisp‚ smooth surface ensures maximum contact between the fabric and the fusible web․ Use the appropriate iron setting for your fabric type‚ referencing the fabric’s care label․ Test a small‚ inconspicuous area first to confirm the heat won’t cause damage or discoloration․ Iron both sides of the fabric‚ paying close attention to wrinkles and creases․ A well-ironed fabric will yield a much cleaner and more professional-looking result when using HeatnBond․

Remember‚ pre-treating fabrics properly sets the foundation for a successful and long-lasting bond‚ preventing issues like peeling or shifting later on․

Cutting Fabrics for HeatnBond

Precise cutting is essential when working with HeatnBond‚ as the fusible web adheres to the edges of your fabric pieces․ Use sharp scissors or a rotary cutter and mat to achieve clean‚ accurate cuts․ For applique‚ cut slightly inside your desired shape to prevent the adhesive from being visible around the edges of the design․

Consider the type of HeatnBond you’re using․ Ultrahold‚ being a sheet adhesive‚ requires careful cutting to match the fabric shape exactly․ Lite and Featherlite‚ often used for layering‚ allow for a bit more flexibility in cutting․ Always cut your fabric and HeatnBond to the same size and shape for optimal results;

Accuracy minimizes bubbling and ensures a smooth‚ professional finish․ Double-check your cuts before fusing‚ and don’t hesitate to re-cut if necessary․ A little extra time spent on precise cutting will save you frustration later!

Applying HeatnBond: Step-by-Step Instructions

HeatnBond application involves fusing the web to fabric‚ then bonding pieces together with an iron‚ as demonstrated in numerous online tutorials readily available․

Ultrahold requires a no-sew approach‚ while Lite & Featherlite benefit from precise ironing for secure adhesion‚ enhancing project durability consistently․

Using HeatnBond Lite & Featherlite

HeatnBond Lite & Featherlite are ideal for projects needing a softer hand and lighter bond‚ perfect for delicate fabrics and intricate applique designs․ Begin by placing the fusible side of the HeatnBond web onto the wrong side of your fabric․

Use a household iron on a cotton or linen setting – avoid steam! – and press firmly for several seconds‚ ensuring complete adhesion across the entire surface․ Allow the fabric to cool completely before handling or cutting․

When applying pieces together‚ position them accurately on your base fabric․ Cover with a pressing cloth and iron again‚ using the same settings‚ for approximately 10-15 seconds․

These lighter-weight webs are excellent for projects where flexibility is key‚ like quilts or garments․ Remember to always test a small scrap first to determine the optimal iron temperature and pressing time for your specific fabric combination‚ guaranteeing a flawless finish․

Using HeatnBond Ultrahold

HeatnBond Ultrahold provides a permanent‚ no-sew bond‚ making it excellent for heavier fabrics and projects requiring exceptional durability‚ as demonstrated in various YouTube tutorials․ Begin by placing the adhesive sheet‚ fusible side down‚ onto your fabric․

Utilize a dry iron set to the cotton or linen setting‚ applying firm‚ even pressure for approximately 30-60 seconds․ Cooling is crucial; allow the fabric to cool completely before proceeding․

For bonding layers‚ position accurately and cover with a pressing cloth․ Iron again‚ maintaining consistent pressure for another 30-60 seconds․ This creates a strong‚ lasting hold․

Ultrahold is particularly useful for projects like bags‚ home décor‚ and items needing frequent washing․ Always test on scraps to confirm compatibility and optimal settings‚ ensuring a secure and professional result every time․

No-Sew Applications with HeatnBond

HeatnBond truly shines in no-sew applications‚ offering a quick and easy way to create projects without a needle and thread․ Perfect for embellishments‚ quick gifts‚ or simple home décor‚ the process is remarkably straightforward․

Cut your desired shapes or designs from fabric․ Apply HeatnBond to the wrong side of the fabric‚ ensuring complete coverage․ Peel away the paper backing and position the fabric onto your base material․

Cover with a pressing cloth and iron using the appropriate temperature setting (typically cotton or linen)․ Apply firm‚ even pressure for the recommended time – usually 30-60 seconds – to activate the adhesive․

Allow to cool completely before handling․ This method is ideal for appliques‚ patches‚ or attaching fabric to various surfaces‚ offering a clean and professional finish without any sewing required․

Iron Settings and Temperature Control

HeatnBond requires precise temperature control; generally‚ cotton or linen settings work best‚ but always test a scrap to prevent scorching or adhesion failures․

Recommended Iron Temperatures

HeatnBond products generally recommend utilizing a cotton or linen iron setting for optimal adhesion‚ typically equating to around 300-330°F (149-166°C)․ However‚ these are merely starting points‚ and variations exist based on the specific HeatnBond type – Lite‚ Featherlite‚ or Ultrahold – and the fabric composition․

For HeatnBond Lite and Featherlite‚ a medium-hot‚ dry iron is usually sufficient․ Conversely‚ HeatnBond Ultrahold‚ designed for a stronger‚ permanent bond‚ often benefits from a slightly higher temperature within the cotton setting range․ Delicate fabrics necessitate a lower temperature‚ potentially utilizing a silk or synthetic setting‚ alongside a pressing cloth to shield the material․

Always consult the specific product packaging for the manufacturer’s precise temperature recommendations․ Remember that iron temperatures can fluctuate‚ so consistent testing is crucial for achieving a secure and lasting bond without damaging your fabrics․ Prioritize caution and gradual temperature increases․

Testing Iron Temperature

Before applying HeatnBond to your project fabric‚ conducting a test on scrap pieces is absolutely essential․ This simple step prevents potential scorching or inadequate adhesion‚ safeguarding your final creation․ Begin with the recommended iron temperature – typically cotton or linen setting – and apply pressure for the suggested duration‚ usually 8-10 seconds․

Allow the test piece to cool completely before gently attempting to separate the HeatnBond and fabric․ If the bond is weak‚ incrementally increase the iron temperature‚ retesting after each adjustment․ Conversely‚ if you observe any signs of fabric discoloration or melting‚ immediately reduce the temperature․

A pressing cloth acts as a protective barrier during testing and application‚ mitigating the risk of direct heat exposure․ Consistent testing ensures the ideal temperature for your specific fabric and HeatnBond product‚ guaranteeing a successful and visually appealing outcome․

Troubleshooting Common HeatnBond Issues

HeatnBond problems like poor adhesion‚ scorching‚ or residue are solvable! Adjust iron settings‚ use a pressing cloth‚ and re-apply for optimal results consistently․

Adhesive Not Sticking

If your HeatnBond isn’t adhering properly‚ several factors could be at play․ First‚ ensure you’re using the correct iron temperature – refer to the product packaging or online guides for specific recommendations․ Insufficient heat is a primary culprit‚ preventing the adhesive from fully bonding to the fabric․

Secondly‚ verify adequate pressure is being applied during ironing․ A firm‚ even press is crucial; avoid gliding the iron as you would for regular ironing․ Consider using a pressing cloth to protect delicate fabrics while still maximizing heat transfer․

Furthermore‚ confirm the fabrics are clean and free of any finishes or sizing that might create a barrier․ Washing and ironing fabrics beforehand‚ as recommended in preparation guides‚ can significantly improve adhesion․ Finally‚ double-check that you’re applying the adhesive to the correct sides of the fabric‚ as indicated in the HeatnBond instructions․

If issues persist‚ a second application of HeatnBond might be necessary‚ following the same careful steps․

Fabric Scorching

Preventing fabric scorching when using HeatnBond is paramount‚ especially with delicate materials․ Always begin by testing the iron temperature on a scrap piece of fabric identical to your project material․ This ensures the heat level is appropriate and won’t cause damage․

Utilizing a pressing cloth – a thin cotton fabric placed between the iron and your project – acts as a protective barrier‚ diffusing the heat and minimizing the risk of scorching․ Avoid using steam during application‚ as moisture can exacerbate heat-related damage․

Employ consistent‚ short bursts of heat rather than prolonged pressing․ Move the iron continuously‚ applying firm pressure but avoiding dwelling in one spot․ If you notice any discoloration or singeing‚ immediately reduce the iron temperature and adjust your technique․

Remember‚ lower temperatures and careful monitoring are key to preserving your fabrics while achieving a strong HeatnBond adhesion․

Residue on Iron or Fabric

Dealing with HeatnBond residue on your iron or fabric requires gentle methods to avoid further damage․ If adhesive appears on your iron’s soleplate‚ never use abrasive cleaners or scouring pads‚ as these can scratch the surface․

Instead‚ while the iron is cool‚ gently wipe the soleplate with a soft cloth dampened with distilled white vinegar․ For stubborn residue‚ a specialized iron cleaner may be necessary‚ following the product’s instructions carefully․

On fabric‚ avoid harsh solvents․ A cool iron with a clean pressing cloth can sometimes lift the residue․ Alternatively‚ a very gentle application of Goo Gone (tested on a hidden area first!) might help‚ followed by careful washing․

Prevention is key: using a pressing cloth consistently minimizes residue transfer․ Regular iron cleaning also helps maintain optimal performance and prevents buildup․

HeatnBond for Specific Projects

HeatnBond excels in applique‚ quilting‚ and fusible bias tape creation‚ offering strong adhesion for intricate designs and simplifying projects with its versatile applications․

Tutorials demonstrate its effectiveness for various crafts‚ enabling quick and easy no-sew solutions for diverse creative endeavors consistently․

From curtains to quilts‚ HeatnBond provides reliable bonding‚ making it ideal for both beginners and experienced crafters alike effectively․

Applique with HeatnBond

HeatnBond significantly simplifies the applique process‚ allowing for precise fabric placement without the need for pins or tedious hand-basting․ Begin by cutting your applique shapes from fabric‚ then adhere a piece of HeatnBond to the wrong side of each shape․

Using a household iron‚ fuse the HeatnBond to the applique fabric according to the manufacturer’s temperature recommendations – testing is crucial! Carefully peel away the paper backing‚ revealing the adhesive side․

Position the applique onto your base fabric‚ adhesive side down‚ and iron again to permanently bond the pieces․ Different HeatnBond types‚ like FeatherLite or Ultrahold‚ offer varying degrees of adhesion‚ impacting washability and durability․

For intricate designs‚ HeatnBond Ultrahold is recommended for its strong‚ permanent bond‚ while Lite or FeatherLite are suitable for projects requiring repositionability or a softer feel․ Remember to always follow the specific instructions for your chosen HeatnBond product․

Quilting with HeatnBond

HeatnBond offers quilters a convenient method for creating quick and accurate quilt blocks‚ particularly useful for English Paper Piecing or foundation paper piecing techniques․ Apply HeatnBond to the wrong side of your fabric pieces‚ fusing it with an iron according to the product’s temperature guidelines․

This creates a stable‚ adhesive layer allowing you to precisely position and bond fabric to paper templates or foundation pieces‚ eliminating the need for pinning or basting․ HeatnBond Lite or FeatherLite are often preferred for quilting due to their repositionable nature․

Once the fabric is bonded to the foundation‚ sew the pieces together as usual․ After sewing‚ carefully remove the paper foundation‚ leaving a securely pieced quilt block․

HeatnBond Ultrahold can be used for more permanent bonding‚ but consider its impact on fabric drape and washability․ Always test your iron temperature to prevent scorching and ensure a strong‚ lasting bond․

Creating Fusible Bias Tape

HeatnBond simplifies the creation of fusible bias tape‚ eliminating the need for traditional fusing methods․ Begin by cutting fabric strips on the bias – diagonally across the grain – for maximum flexibility․ Apply HeatnBond Lite or FeatherLite to the wrong side of these strips‚ ensuring even coverage․

Fuse the adhesive to the fabric using an iron set to the appropriate temperature‚ as indicated on the HeatnBond packaging․ This creates a stable‚ fusible strip ready for application․ Fold the strip in half lengthwise‚ with the wrong sides together‚ and press again to create a neat fold․

This fusible bias tape can then be applied to curved edges‚ necklines‚ or armholes‚ providing a clean and professional finish without sewing․ It’s ideal for lightweight fabrics or projects where a minimal seam allowance is desired․

Remember to test the adhesion before applying to your final project‚ and always follow the manufacturer’s instructions for optimal results․

Caring for HeatnBond Projects

HeatnBond projects benefit from gentle washing‚ inside-out‚ on a delicate cycle‚ and low heat drying to maintain long-term adhesion effectively․

Avoid harsh detergents or bleach‚ as these can compromise the adhesive bond‚ ensuring your creations remain beautiful for years consistently․

Washing Instructions

HeatnBond projects‚ while offering a durable bond‚ require careful washing to preserve their integrity and appearance over time․ Always turn your finished project inside out before placing it in the washing machine; this minimizes abrasion and direct contact with the adhesive․

Utilize a gentle cycle with cold water․ Avoid hot water at all costs‚ as heat can weaken the adhesive and cause peeling․ When selecting a detergent‚ opt for a mild‚ color-safe formula‚ steering clear of harsh chemicals‚ bleach‚ or fabric softeners‚ which can degrade the fusible web․

After washing‚ it’s best to air dry your HeatnBond project․ If you must use a dryer‚ select the lowest heat setting and a delicate cycle․ Excessive heat is the primary enemy of fusible adhesion․ Removing the item promptly once dry will also help prevent any potential issues․ Following these guidelines will ensure your creations remain vibrant and securely bonded for a long time․

Long-Term Adhesion

Maintaining the longevity of HeatnBond’s adhesion relies on proper initial application and consistent care․ While HeatnBond provides a strong bond‚ factors like repeated washing‚ high heat exposure‚ and fabric type can influence its durability over extended periods․

To maximize long-term adhesion‚ ensure fabrics are thoroughly cleaned and ironed before applying HeatnBond․ Consistent‚ even heat during fusion is crucial; insufficient heat weakens the bond‚ while excessive heat can damage fabrics․ Selecting the appropriate HeatnBond type – Lite‚ Featherlite‚ or Ultrahold – for your project’s demands is also vital․

Avoid stretching or distorting the fused fabric‚ as this can stress the adhesive․ Gentle handling and storage are recommended․ Periodic re-ironing (on a low setting‚ with a pressing cloth) can sometimes revitalize the bond‚ but prevention through careful initial application and washing is key to lasting results․

Open post

instructions for orbit water timer

Orbit Water Timer: A Comprehensive User Guide

This guide provides detailed instructions for effortless setup and operation of your Orbit Water Timer, ensuring flexible watering programs and efficient irrigation management for your garden.

Understanding Your Orbit Water Timer

Orbit Irrigation Products, Inc. delivers user-friendly sprinkler timers designed for simple, yet effective, watering solutions. These timers, like the 4 Station Timer Manual, employ easy-set logic, allowing homeowners to establish customized watering schedules tailored to their specific landscape needs.

Before diving into installation and programming, familiarize yourself with the timer’s core functionality. Understanding the basic principles of operation will streamline the setup process and maximize the benefits of automated irrigation. This comprehensive guide breaks down the process into manageable steps, prioritizing safety and ensuring a seamless experience.

Whether you’re a novice or an advanced user, this resource will empower you to confidently utilize your Orbit Water Timer and achieve optimal garden hydration.

Timer Models and Features

Orbit offers a diverse range of water timers, each equipped with unique features to suit varying irrigation demands. From basic single-zone timers to advanced multi-station models, there’s an Orbit timer for every garden size and complexity. Key features commonly found across models include programmable watering schedules, manual override capabilities, and rain delay functionality.

The 4 Station Timer Manual, for instance, provides flexible programming options for up to four independent watering zones. These zones allow for customized watering durations and frequencies, catering to the specific needs of different plant types. Understanding the specific features of your chosen model is crucial for maximizing its potential and achieving efficient water management.

Explore the product specifications to unlock the full capabilities of your Orbit timer.

Key Components of the Orbit Timer

Understanding the components of your Orbit Water Timer is essential for proper installation and operation. Typically, you’ll find a timer housing protecting the internal mechanisms, a digital display for programming and monitoring, and a series of valve connections for attaching to your irrigation system.

The timer’s control panel features buttons or a dial for setting the current time, date, and watering schedules. A battery compartment houses the power source, while a mounting bracket facilitates secure attachment to a wall or faucet. The valve connections are designed to accommodate standard garden hoses or threaded fittings.

Familiarizing yourself with each component ensures a smooth setup process and effective water management.

Installation and Setup

Proper installation is crucial for optimal performance; select a suitable location, securely mount the timer, and carefully connect it to your water source and valves.

Choosing the Right Location for Your Timer

Selecting an ideal location significantly impacts your Orbit Water Timer’s functionality and longevity. Prioritize a spot that’s easily accessible for programming and maintenance, yet protected from direct sunlight and extreme weather conditions. Ensure the location is close enough to a power source if your model requires electricity, and within range of your Wi-Fi network for smart features.

Avoid areas prone to flooding or standing water, as this can damage the timer’s internal components. A shaded location helps prevent overheating and extends battery life. Consider proximity to the water source and valves to minimize the length of necessary connections. A secure mounting surface is also essential to prevent accidental dislodgement or damage. Remember, a well-chosen location contributes to reliable and efficient operation.

Mounting the Orbit Water Timer

Securely mounting your Orbit Water Timer is crucial for stable operation and protection from the elements. Most models include mounting holes designed for screws or zip ties. Select a sturdy surface – a fence post, wall, or dedicated mounting bracket – capable of supporting the timer’s weight, even with connected hoses.

Ensure the mounting surface is level to prevent strain on the connections. Before attaching, verify the timer is positioned for easy access to the display and controls. Use appropriate screws or zip ties for the chosen surface, tightening them firmly but avoiding over-tightening, which could crack the timer’s casing. A secure mount minimizes vibration and potential damage, ensuring long-lasting performance and reliable scheduling.

Connecting to the Water Source and Valves

Proper connection to your water source and sprinkler valves is essential for a functioning system. Begin by attaching the timer to the outdoor faucet, ensuring a watertight seal using Teflon tape on the threads. Next, connect the main output of the timer to a hose or manifold that distributes water to individual sprinkler valves.

Each valve should be connected to a separate zone or station on the timer. Double-check all connections for leaks before activating the system. Securely fasten hoses with clamps to prevent accidental disconnection. Following these steps guarantees efficient water delivery and prevents potential water waste, maximizing the benefits of your Orbit Water Timer.

Programming Your Orbit Timer

Effortlessly customize your watering schedule by setting the current time and date, then creating station-based programs with adjustable duration and frequency options.

Setting the Current Time and Date

Accurate time and date settings are crucial for your Orbit Water Timer to function correctly and execute watering schedules as intended. Begin by locating the “Set Clock” or similar button on your timer model – consult your specific model’s documentation if needed. Use the directional buttons to navigate through the year, month, and day, adjusting each value until it reflects the current date.

Next, proceed to set the time. Similarly, utilize the directional buttons to adjust the hour and minute. Pay close attention to the AM/PM indicator to ensure correct time representation. Some models may offer a 24-hour clock option. Once the time and date are accurately set, confirm your selections by pressing the “Enter” or “Set” button. The timer display should now reflect the correct current time and date, enabling precise scheduling.

Creating Watering Schedules (Station-Based)

Station-based scheduling allows for customized watering plans for different zones in your yard. Begin by selecting the “Program” or “Schedule” button on your Orbit Timer. Choose the station you wish to program – typically labeled Station 1, Station 2, etc. – representing a specific valve or watering zone. Next, set the start time for watering on that station, using the directional buttons to input the desired hour and minute.

Then, define the watering days. You can select specific days of the week, or opt for interval settings like “Every Other Day.” Finally, set the watering duration for that station, specifying how long the valve will remain open. Repeat these steps for each station, tailoring the schedule to the unique needs of each watering zone in your landscape.

Adjusting Watering Duration and Frequency

Fine-tuning your watering schedule is crucial for optimal plant health and water conservation. To adjust watering duration, navigate to the specific station within your programmed schedule. Use the timer’s buttons to increase or decrease the watering time, measured in minutes. Consider the type of plants in each zone; shrubs require longer watering than annuals.

To modify watering frequency, access the day selection settings for that station. You can change from watering every day to specific days of the week, or utilize interval settings like “Every Other Day” or “Every Third Day.” Regularly review and adjust these settings based on weather conditions and seasonal changes to ensure efficient water usage and a thriving garden.

Advanced Features and Troubleshooting

Explore rain delay and manual override options for customized control, alongside solutions to common issues, ensuring seamless operation of your Orbit Water Timer system.

Rain Delay Functionality

The Rain Delay feature intelligently pauses your programmed watering schedule, conserving water during periods of natural precipitation. This is particularly useful when unexpected rainfall occurs, preventing overwatering and promoting healthy plant growth. To activate Rain Delay, typically you’ll navigate through the timer’s menu using the ‘Mode’ or ‘Set’ button.

You’ll then be prompted to enter the duration of the delay, often in increments of hours or days. The timer will automatically resume its scheduled watering once the specified delay period has elapsed. Some models allow you to cancel the Rain Delay manually. Utilizing this feature contributes to responsible water usage and helps maintain a thriving landscape, adapting to real-time weather conditions for optimal irrigation.

Manual Watering Override

The Manual Watering Override function allows for immediate, on-demand watering, bypassing your pre-programmed schedule. This is incredibly useful for addressing localized dry spots or providing supplemental hydration to plants needing extra attention. Typically, activating this feature involves pressing and holding a ‘Manual’ or ‘Override’ button on the timer’s control panel.

You’ll often be able to select which station(s) you want to water and specify the duration. The timer will then run those stations for the designated time, regardless of the regular schedule. Remember to deactivate the override once finished, allowing the timer to revert to its programmed settings. This provides convenient, targeted watering control, ensuring your landscape receives precisely the moisture it requires, when it needs it.

Common Issues and Solutions

Encountering problems with your Orbit timer is common, but often easily resolved. A frequent issue is a timer not turning on – check battery levels first, ensuring correct polarity. If the display is blank, replace the batteries. Another common problem is stations not activating; verify the station is programmed correctly and the valve is functioning.

Low water pressure can also cause issues, so ensure adequate supply. If the timer displays an error message, consult the user manual for specific troubleshooting steps. For unresponsive buttons, try resetting the timer. Remember to always disconnect the power source before attempting any repairs. If problems persist, contact Orbit Irrigation Products customer support for assistance and potential warranty claims.

Maintenance and Winterization

Proper care extends your timer’s life. Cleaning and winterizing are crucial steps, alongside battery checks, to ensure reliable performance season after season.

Cleaning Your Orbit Water Timer

Regular cleaning maintains optimal functionality. Before commencing, always disconnect the timer from the water source and remove the batteries for safety. Use a mild soap solution and a soft cloth to gently wipe down the exterior casing, removing any dirt, dust, or debris that may have accumulated.

Pay particular attention to the display screen and button areas, ensuring they are free from obstructions. Avoid using harsh chemicals or abrasive cleaners, as these can damage the timer’s components. For internal cleaning, it’s generally not recommended to disassemble the unit unless specifically instructed in the manufacturer’s documentation.

If sediment or mineral deposits are present around the water connections, carefully remove them with a soft brush or cloth. Thoroughly rinse the exterior with clean water and allow it to dry completely before reconnecting and resuming operation. Consistent cleaning contributes to the longevity and reliable performance of your Orbit Water Timer.

Preparing for Cold Weather (Winterization)

Protect your timer from freezing temperatures. Before the first frost, disconnect the Orbit Water Timer from the water source and all connected valves. Thoroughly drain all water from the unit, including the internal components, to prevent ice formation which can cause damage. Remove the batteries to avoid corrosion from potential leaks during freezing conditions.

Store the timer indoors in a dry, sheltered location, away from direct sunlight and extreme temperatures. Consider covering outdoor valves with insulation to further protect them from the cold. Inspect the timer for any cracks or damage before storage, and address any issues promptly.

Proper winterization ensures your Orbit Water Timer remains functional and ready for use when the warmer weather returns, extending its lifespan and preventing costly repairs or replacements.

Battery Replacement and Care

Maintaining optimal battery power is crucial for reliable timer operation. When the timer display appears dim or erratic, or if watering schedules aren’t executing correctly, it’s time for battery replacement. Use only fresh, high-quality alkaline batteries of the correct size as specified in the timer’s documentation – typically AA or AAA.

Always replace all batteries simultaneously to ensure consistent performance and prevent potential issues caused by differing voltage levels. Before inserting new batteries, clean the battery contacts with a dry cloth to remove any corrosion.

Remove batteries if the timer will not be used for an extended period, preventing leakage and damage. Proper battery care extends the life of your Orbit Water Timer and ensures accurate, dependable watering schedules.

Open post

idaho potatoes instructions

Idaho Potatoes: A Comprehensive Guide to Preparation

Idaho potatoes, a versatile staple, offer culinary possibilities from simple sides to elaborate dishes. This guide empowers every cook, providing insights into selecting, storing, and preparing these beloved spuds.

Microsoft, founded in 1975, champions technological empowerment, mirroring our goal of equipping you with potato preparation mastery. Explore techniques for baking, boiling, and roasting, unlocking the full potential of Idaho potatoes.

Utilize Microsoft 365’s collaborative tools to share your potato creations and access a world of culinary inspiration. From fluffy mashed potatoes to crispy fries, this guide delivers success.

Understanding Idaho Potato Varieties

Idaho boasts a remarkable diversity of potato varieties, each possessing unique characteristics suited for specific culinary applications. Russet potatoes, the most iconic, are renowned for their fluffy texture when baked and their exceptional performance when fried, making them ideal for classic French fries. Their high starch content contributes to this desirable outcome.

Yukon Gold potatoes, distinguished by their golden hue and buttery flavor, excel in mashed potatoes, gratins, and roasted dishes. Their moderate starch content provides a creamy texture without becoming gluey. Red potatoes, with their waxy texture and thin skin, hold their shape well when boiled or steamed, making them perfect for potato salads and vibrant side dishes.

Like Microsoft’s diverse product suite – from Windows to Azure – Idaho potatoes offer a range of options to meet every need. Understanding these differences, as Microsoft understands its users, is crucial for achieving optimal results. Consider the intended use when selecting your potatoes; a Russet won’t yield the same creamy mash as a Yukon Gold.

Just as Microsoft empowers individuals and organizations, knowing your potato varieties empowers you in the kitchen. Explore the nuances of each type to elevate your culinary creations and unlock the full potential of this versatile vegetable.

Selecting the Best Idaho Potatoes

Choosing the right Idaho potatoes begins with a visual and tactile inspection. Look for firm potatoes with smooth, unblemished skin, avoiding those with cuts, bruises, or soft spots. A slight earthy aroma is a good sign of freshness, while any green tinge indicates the presence of solanine, a potentially harmful compound – avoid these.

Consider the size and shape based on your intended use. Larger potatoes are ideal for baking, while smaller ones are better suited for boiling or roasting whole. Uniform size ensures even cooking. Just as Microsoft offers solutions for diverse needs, selecting the right potato is key.

Avoid potatoes that are sprouting, as this indicates they are beginning to convert starch into sugar, affecting texture and flavor. A firm press should reveal a slight give, but not mushiness. Think of it like checking the responsiveness of a Microsoft Surface – it should feel solid and reliable.

Prioritize potatoes that are consistently sized within the bag, ensuring even cooking times. Selecting quality potatoes is the first step towards a successful dish, mirroring Microsoft’s commitment to delivering reliable products.

Storing Idaho Potatoes for Optimal Freshness

Proper storage is crucial for maintaining the quality and extending the shelf life of Idaho potatoes. The ideal environment is cool, dark, and well-ventilated – around 45-55°F (7-13°C) is perfect. Avoid direct sunlight, which can cause greening and solanine development, similar to how Microsoft protects data with robust security measures.

Store potatoes in a breathable container, such as a paper bag or a mesh sack, to allow for air circulation. Plastic bags trap moisture, leading to spoilage. Do not wash potatoes before storing, as this encourages mold growth. Think of it as preserving the integrity of a Microsoft product – keep it in its original packaging until needed.

Keep potatoes separate from onions and apples, as these fruits release ethylene gas, which can accelerate sprouting. A dedicated potato storage area is best. Regularly check your potato stash and remove any that show signs of spoilage to prevent it from spreading.

With proper care, Idaho potatoes can remain fresh for several weeks, providing a reliable staple for your culinary creations, much like Microsoft’s consistent product support.

Basic Idaho Potato Cooking Methods

Idaho potatoes shine with simple techniques! Baking, boiling, and roasting unlock their versatility. Microsoft empowers users – we empower cooks. Explore these foundational methods for delicious results.

Baking Idaho Potatoes: A Classic Approach

Baking Idaho potatoes is a timeless method, yielding fluffy interiors and slightly crispy skins. Begin by scrubbing the potatoes clean and piercing them several times with a fork – this allows steam to escape, preventing explosions! Rubbing the potatoes with olive oil or butter and sprinkling with salt enhances flavor and promotes a beautifully browned skin.

Preheat your oven to 400°F (200°C). Place the prepared potatoes directly on the oven rack or on a baking sheet for easier cleanup. Baking time varies depending on size, typically ranging from 45 to 75 minutes. To test for doneness, gently squeeze the potato; it should yield easily. Alternatively, insert a fork or knife – it should slide in without resistance.

Microsoft’s commitment to user experience parallels our dedication to a perfect baked potato. Just as Microsoft 365 offers versatile tools, baking allows for endless topping possibilities. Consider classic toppings like butter, sour cream, chives, and bacon bits, or explore more adventurous combinations. Remember, like Microsoft Support, we’re here to help you achieve optimal results!

Allow the baked potatoes to cool slightly before serving. Enjoy this simple yet satisfying dish, a testament to the versatility of the Idaho potato.

Boiling Idaho Potatoes: Perfect for Mashed Potatoes

Boiling Idaho potatoes is the foundational step for creating incredibly smooth and flavorful mashed potatoes. Begin by peeling and cutting the potatoes into uniform chunks – this ensures even cooking. Place the potato pieces in a large pot and cover them with cold water; adding cold water helps them cook evenly from the outside in.

Add a generous pinch of salt to the water. Bring the water to a boil over high heat, then reduce the heat to medium and simmer for 15-20 minutes, or until the potatoes are fork-tender. Microsoft’s collaborative platforms, like Teams, foster seamless teamwork, much like perfectly boiled potatoes form the base for a harmonious dish.

Once cooked, drain the potatoes thoroughly. Return them to the pot and allow any remaining steam to evaporate for a minute or two – this prevents watery mashed potatoes. Just as Microsoft 365 provides access to essential apps, boiling unlocks the potato’s potential for transformation.

Now, they’re ready to be mashed with butter, milk, and seasonings to your liking! Enjoy the creamy, comforting result of this classic technique.

Roasting Idaho Potatoes: Achieving Crispy Perfection

Roasting Idaho potatoes unlocks a world of crispy, golden-brown goodness. Begin by preheating your oven to 400°F (200°C). Peel and chop the potatoes into evenly sized pieces – about 1-inch cubes work well. This uniformity ensures consistent cooking and maximum crispiness.

In a large bowl, toss the potatoes with olive oil, salt, pepper, and your favorite herbs and spices. Rosemary, garlic powder, and paprika are excellent choices. Microsoft’s commitment to innovation, like Surface devices, parallels the transformative power of roasting potatoes. Spread the potatoes in a single layer on a baking sheet, ensuring they aren’t overcrowded.

Roast for 30-45 minutes, flipping halfway through, until they are tender inside and beautifully browned and crispy on the outside. Like Microsoft’s support resources, careful attention during roasting yields optimal results. The key is to avoid disturbing them too much during the initial roasting phase to allow for proper browning.

Serve immediately and enjoy the delightful crunch!

Advanced Idaho Potato Recipes & Techniques

Elevate your potato game with gourmet recipes and refined techniques. Explore innovative methods, mirroring Microsoft’s technological advancements, for truly exceptional results.

From duchess potatoes to potato gratin, unlock culinary artistry and impress with sophisticated potato creations, enhancing any dining experience.

Making Fluffy Mashed Potatoes

Achieving truly fluffy mashed potatoes begins with the right Idaho potato variety – Russets are ideal due to their high starch content. Begin by peeling and quartering approximately 2 pounds of potatoes, ensuring uniform size for even cooking. Place them in a large pot and cover with cold water; adding cold water helps them cook evenly.

Bring the water to a boil and generously salt it – this seasons the potatoes from within. Cook until fork-tender, typically 15-20 minutes. Drain the potatoes thoroughly and return them to the warm pot. This step is crucial; excess water leads to gummy potatoes.

Now, the key to fluffiness: use a ricer or food mill instead of a mixer. These tools create a light, airy texture without overworking the starch. Warm 1 cup of milk and 4 tablespoons of butter together; gradually add this mixture to the riced potatoes, mixing gently until combined.

Season with salt and white pepper to taste. Microsoft’s commitment to user experience parallels our dedication to perfect mashed potatoes – a seamless and satisfying result. Avoid overmixing, as this develops gluten and makes the potatoes gluey. Serve immediately and enjoy!

Creating Perfect French Fries

The quest for perfect French fries starts with selecting the right Idaho potato – Russets, again, are the champion choice due to their high starch and low moisture content. Peel and cut 2 pounds of potatoes into consistent fry shapes, approximately ½ inch thick. Consistency ensures even cooking.

Immediately place the cut fries in a bowl of cold water for at least 30 minutes, or even overnight. This removes excess starch, resulting in crispier fries. Drain and thoroughly dry the fries with paper towels – moisture is the enemy of crispness.

Now for the double-fry method: heat oil (peanut or vegetable) to 325°F (160°C) and fry the potatoes in batches for 5-6 minutes. Don’t overcrowd the fryer. Remove and drain on a wire rack. Increase the oil temperature to 375°F (190°C) and fry again for 2-3 minutes, until golden brown and crispy.

Season immediately with salt. Microsoft’s focus on innovation mirrors our pursuit of the ideal fry – a technological and culinary achievement. Like Microsoft 365’s seamless integration, these fries offer a harmonious blend of texture and flavor. Serve hot and enjoy!

Idaho Potato Salad: Variations and Tips

Idaho potato salad is a classic, but endlessly customizable. Begin with 2 pounds of Yukon Gold or red potatoes, boiled until tender but firm – avoid overcooking! Cool slightly, then cube. A creamy base typically involves mayonnaise, mustard, and a touch of sweetness, like sugar or relish.

For a German-style potato salad, use a warm vinegar-based dressing with bacon and onions; A Southern variation might include hard-boiled eggs, celery, and sweet pickle relish. Experiment with herbs like dill, parsley, or chives for added freshness.

Don’t be afraid to add other vegetables: chopped bell peppers, red onion, or even peas contribute color and texture. Microsoft’s collaborative spirit encourages experimentation, just as you can personalize your potato salad. Like Microsoft Teams, it’s about bringing elements together.

A tip: add the dressing while the potatoes are still slightly warm; they’ll absorb the flavors better. Chill for at least 30 minutes before serving. Enjoy this versatile dish, adapting it to your taste!

Troubleshooting Common Idaho Potato Issues

Addressing potato problems ensures culinary success; Like Microsoft Support resolving tech issues, we’ll tackle greening, hollow centers, and inconsistent cooking.

Proper storage and technique are key. Microsoft’s commitment to solutions mirrors our focus on perfect potatoes, every time!

Dealing with Green Potatoes

Green discoloration in Idaho potatoes signals the presence of solanine, a glycoalkaloid that develops when potatoes are exposed to light. While not immediately dangerous in small amounts, higher concentrations can cause unpleasant symptoms, so caution is advised, much like addressing software vulnerabilities with Microsoft updates.

The extent of greening dictates the course of action. If only small areas are affected, carefully cut away the green portions, discarding them responsibly. The remaining potato is generally safe to consume after thorough cooking. However, if the potato is extensively green, or if sprouts are present, it’s best to discard the entire potato – mirroring Microsoft’s recommendation to replace compromised hardware.

Preventing greening is straightforward: store potatoes in a cool, dark, and well-ventilated place. Avoid exposure to sunlight, and don’t store them near onions or apples, as these fruits release ethylene gas that can promote solanine formation. Think of it as maintaining a secure digital environment, protecting your data (potatoes) from harmful elements. Like Microsoft’s Account Checkup Wizard, proactive measures are best. Remember, a little prevention goes a long way towards enjoying perfectly safe and delicious Idaho potatoes!

Preventing Hollow Centers in Baked Potatoes

Hollow centers in baked Idaho potatoes, a frustrating outcome for many cooks, are typically caused by excessive internal steam pressure during baking. Similar to troubleshooting issues within Microsoft’s complex systems, understanding the cause is key to finding a solution. This isn’t a sign of a bad potato, but rather a baking technique adjustment needed.

To prevent this, pierce the potato several times with a fork before baking. This allows steam to escape gradually, preventing the buildup that creates the hollow space. Don’t skip this step – it’s as crucial as installing security updates on your Microsoft 365 applications! Another effective method is to rub the potato with a small amount of oil before baking; this helps seal the skin slightly.

Baking temperature also plays a role. A moderate temperature (around 400°F / 200°C) is preferable to extremely high heat. Like Microsoft’s focus on balanced performance, a steady baking process yields the best results. Finally, avoid wrapping potatoes tightly in foil, as this traps steam. Embrace a more open baking environment for consistently fluffy, solid-centered Idaho potatoes, ensuring a delightful culinary experience, much like a smoothly running Microsoft system.

Fixing Under- or Over-Cooked Potatoes

Encountering under- or over-cooked Idaho potatoes is a common kitchen challenge, akin to troubleshooting software glitches within a Microsoft environment. Fortunately, both scenarios are often salvageable with a bit of quick thinking and adjustment. If your potatoes are undercooked – firm to the touch – don’t despair! Return them to the oven, covered with foil, for an additional 15-20 minutes, checking for doneness with a fork.

For overcooked, mushy potatoes, the options are more limited, but not hopeless. They’re perfect for transforming into mashed potatoes! Embrace the situation, much like Microsoft adapts to user feedback. Add butter, cream, and seasonings to create a comforting side dish. Alternatively, if only slightly overcooked, try briefly cooling them to firm them up a bit before attempting to handle them.

Prevention is key, though. Using a reliable oven thermometer, like ensuring your Microsoft systems are updated, ensures accurate temperature control. Consistent potato size also promotes even cooking. Remember, just as Microsoft Support offers solutions, a little attention to detail can save your potato dish!

Idaho Potatoes & Nutritional Information

Idaho potatoes aren’t just delicious; they’re a nutritional powerhouse, much like Microsoft’s suite of productivity tools empowers users. A medium-sized baked Idaho potato boasts approximately 161 calories, providing essential vitamins and minerals. They are an excellent source of Vitamin C, potassium – exceeding even a banana’s content – and Vitamin B6, vital for brain health.

Furthermore, Idaho potatoes contain fiber, promoting digestive health and contributing to a feeling of fullness. They are naturally gluten-free and contain no fat, sodium, or cholesterol. This makes them a healthy addition to any diet, mirroring Microsoft’s mission to empower individuals to achieve more, including wellness goals.

Consider the preparation method; baking or boiling preserves more nutrients than frying. Just as Microsoft offers various product tiers to suit different needs, Idaho potatoes adapt to diverse culinary approaches while maintaining their inherent nutritional value. Embrace this versatile and wholesome ingredient for a flavorful and health-conscious meal, supported by reliable nutritional data.

Open post

la crosse atomic clock instructions

La Crosse Atomic Clocks are user-friendly devices offering precise timekeeping․ They feature manual time setting via the SET button and adjustments using + or ⎻ buttons․ With YouTube tutorials and guides available, setup is straightforward for models like WT-3161WHx1 and WS-8117U-IT, ensuring easy customization and troubleshooting․

1․1 What Are Atomic Clocks?

Atomic clocks are highly precise timekeeping devices that use the vibrations of atoms, typically cesium-133, to measure time accurately․ They serve as reference points for modern timekeeping, ensuring minimal deviation․ La Crosse Atomic Clocks synchronize with these atomic signals, providing reliable and accurate time display․ These clocks are designed for everyday use, combining advanced technology with user-friendly features․ By leveraging atomic timekeeping, they eliminate manual adjustments, offering a convenient and efficient way to maintain precise time․ This technology is integral to La Crosse clocks, making them a popular choice for both functionality and reliability․

1․2 Benefits of Using a La Crosse Atomic Clock

La Crosse Atomic Clocks offer exceptional accuracy and convenience․ They synchronize with atomic signals, ensuring precise timekeeping without manual adjustments․ The clocks are easy to use, with features like the SET button and + or ‒ buttons for quick adjustments․ YouTube tutorials provide guidance for setup and troubleshooting․ Additional benefits include automatic time synchronization, eliminating the need for manual updates․ These clocks also often feature alarms, timers, and customizable displays, making them versatile for various settings․ Their reliability and advanced features make La Crosse Atomic Clocks a practical and efficient choice for home or office use, ensuring accurate timekeeping with minimal effort․

Unboxing and Preparing Your La Crosse Atomic Clock

Unboxing your La Crosse Atomic Clock is exciting! Carefully unpack the clock, ensuring all components are included․ Insert the required batteries and place it in a stable location․ Allow 24 hours for initial synchronization․ Refer to the manual for specific model instructions, like the WT-3161WHx1 or WS-8117U-IT, to ensure proper setup․ Keep the clock away from electronic interference for optimal performance․ Your clock is now ready to provide accurate timekeeping and additional features like alarms and timers․

2․1 Unpacking the Clock

Unboxing your La Crosse Atomic Clock is an exciting first step! Carefully remove the clock from its packaging and inspect for any damage․ Ensure all components, such as the clock itself, mounting hardware, and user manual, are included․ Gently handle the clock to avoid scratching the display․ For specific models like the WT-3161WHx1 or WS-8117U-IT, refer to the official YouTube setup guides for visual assistance․ If any items are missing or damaged, contact La Crosse Technology support immediately․ Properly unpacking ensures a smooth setup process and optimal performance of your atomic clock․

2․2 Inserting Batteries

Inserting batteries into your La Crosse Atomic Clock is a straightforward process․ Open the battery compartment, usually located on the back, by sliding it downward or unscrewing it, depending on the model․ Use the recommended AA or AAA alkaline batteries for optimal performance․ Ensure the batteries are inserted with the correct polarity, as indicated by the + and ⎻ signs inside the compartment․ Avoid mixing old and new batteries to prevent power issues․ Once the batteries are securely in place, close the compartment tightly․ Your clock will now power on, allowing you to proceed with the initial setup․ Proper battery installation ensures accurate timekeeping and functionality․

2․3 Initial Setup Requirements

After inserting the batteries, press the SET button to begin the initial setup․ Use the + or ‒ buttons to adjust the hour, minutes, and date․ Ensure the time zone is correctly set for your location․ Some models may require selecting between 12-hour or 24-hour formats․ Refer to the user manual or YouTube tutorials for specific guidance, especially for models like WT-3161WHx1 or WS-8117U-IT․ Proper setup ensures accurate timekeeping and synchronization․ If needed, consult the official La Crosse Technology support channel for additional assistance․ Correct initial setup is crucial for optimal performance and functionality․

Setting the Time on Your La Crosse Atomic Clock

Press the SET button, adjust the time with + or ‒ buttons, and confirm․ YouTube tutorials provide further help for models like WT-3161WHx1 for easy setup․

3․1 Manual Time Setting

To manually set the time on your La Crosse Atomic Clock, press and release the SET button to enter the TIME menu․ Use the + or ⎻ buttons to adjust the hour, minute, and second values․ Once the correct time is displayed, press the SET button to confirm and save the settings․ For models like the WT-3161WHx1, holding the SET button for 3 seconds may be required to access the manual mode․ YouTube tutorials and user guides provide step-by-step instructions for specific models, ensuring accurate and efficient setup․

3․2 Automatic Time Synchronization

La Crosse Atomic Clocks automatically synchronize with atomic signals, ensuring precise time accuracy․ The clock receives signals from locations like Boulder, Colorado, and updates accordingly․ To activate, simply place the clock near a window, as signals are strongest outdoors․ It may take a few minutes for the clock to establish a connection․ Once synchronized, a signal icon will appear on the display․ This feature eliminates manual adjustments, providing reliable timekeeping․ For troubleshooting, refer to YouTube tutorials or user guides for specific models, which offer detailed instructions to resolve synchronization issues and ensure optimal performance․

3․3 Adjusting Time Zones

Adjusting the time zone on your La Crosse Atomic Clock is straightforward․ Press and hold the SET button until the time zone option appears․ Use the + or ⎻ buttons to cycle through available time zones․ For models like the WT-3161WHx1, this feature ensures accurate timekeeping regardless of location․ Once selected, press SET to confirm․ Some models automatically adjust for daylight saving time, but this can be disabled if needed․ Refer to YouTube tutorials or user guides for specific instructions, as procedures may vary slightly between models like the WS-8117U-IT․ Proper time zone setup is essential for optimal performance․

Understanding Time Synchronization

La Crosse Atomic Clocks use a built-in receiver to connect to atomic signals, ensuring precise time accuracy․ The clock automatically updates the time, date, and daylight saving changes, eliminating manual adjustments․ A strong signal reception is essential for proper synchronization, typically achieved near a window․ This feature guarantees your clock stays perfectly aligned with official time standards, providing reliable and consistent timekeeping․ Refer to YouTube guides for troubleshooting synchronization issues if needed․

4․1 How Atomic Time Synchronization Works

La Crosse Atomic Clocks synchronize time by receiving radio signals from the National Institute of Standards and Technology (NIST)․ These signals are broadcast continuously and contain precise time data․ The clock’s internal receiver picks up the signal, decodes it, and adjusts its time display accordingly․ This process occurs automatically, ensuring the clock stays accurate to within one second of the official atomic time․ The synchronization typically happens within the first 24 hours of operation․ Strong signal reception is crucial, and placement near a window often improves connectivity․ This feature eliminates the need for manual time adjustments, providing reliable and consistent timekeeping․

4․2 Signal Reception Tips

For optimal atomic signal reception, place your La Crosse clock near a window, as signals penetrate glass better than walls․ Avoid metal objects and electronics, which can interfere with the signal․ Positioning the clock in a central location often improves reception․ If signal strength is weak, try moving the clock to different areas to find the best spot․ Ensure the clock is at least 3 feet away from other devices emitting electromagnetic fields․ Consult the user manual for specific placement recommendations tailored to your model․ Proper placement ensures consistent synchronization and accurate timekeeping․

4․3 Troubleshooting Synchronization Issues

If your La Crosse Atomic Clock fails to synchronize, ensure it is placed in an area with strong signal reception․ Check for obstructions like thick walls or metal objects․ Reset the clock by removing batteries for 30 seconds, then reinstalling them․ If issues persist, refer to the user manual for model-specific troubleshooting steps․ Some models may require manual synchronization by holding the SET button․ Consult YouTube tutorials or official support resources for additional guidance․ Persistent problems may require contacting La Crosse Technology’s customer support for assistance․

Customizing Your Clock’s Display

Adjust the brightness and display format on your La Crosse Atomic Clock․ Enable or disable features like alarms or timers for a personalized experience․ Refer to the user manual or YouTube tutorials for specific model guidance, ensuring optimal customization without overlapping with other sections․

5․1 Adjusting Brightness Settings

Adjusting the brightness on your La Crosse Atomic Clock ensures optimal visibility․ Use the + or ⎻ buttons to increase or decrease the display brightness․ For models like the WT-3161WHx1, press and hold the SET button to access the brightness menu․ Select from multiple brightness levels to suit your preference․ Ensure the clock is placed away from direct sunlight to maintain clarity․ Refer to the user manual or YouTube tutorials for specific model instructions․ Proper brightness adjustment enhances readability and preserves battery life, ensuring your clock remains functional and visually appealing in any setting․

5․2 Changing Display Formats

To change the display format on your La Crosse Atomic Clock, press the MODE or FORMAT button until the desired format appears․ Choose between 12-hour or 24-hour time displays․ Some models also allow adjusting the date format, such as MM/DD/YYYY or DD/MM/YYYY․ Use the + or ⎻ buttons to cycle through options․ For detailed guidance, refer to the user manual or YouTube tutorials specific to your model, like the WT-3161WHx1 or WS-8117U-IT․ Customizing the display ensures the clock meets your preferences for time and date presentation, enhancing usability and visual appeal․

5․3 Enabling/Disabling Features

To enable or disable features on your La Crosse Atomic Clock, press the SET button to access the menu․ Use the + or ‒ buttons to navigate to the desired feature, such as alarms, timers, or brightness settings․ Press SET to toggle the feature on or off․ For example, disable the alarm by selecting the alarm option and pressing SET until it shows “OFF․” Refer to your model’s user manual or YouTube tutorials for specific guidance, as options may vary for models like WT-3161WHx1 or WS-8117U-IT․ This customization ensures your clock functions exactly as you prefer․

Advanced Features of La Crosse Atomic Clocks

La Crosse Atomic Clocks offer advanced features like alarms, timers, and customizable displays․ These features enhance functionality, providing users with tailored timekeeping solutions for daily convenience․

6․1 Setting Alarms

To set an alarm on your La Crosse Atomic Clock, press and hold the SET button until the alarm menu appears․ Use the + or ‒ buttons to adjust the hour and minute․ Once set, press SET to confirm․ For multiple alarms, repeat the process for each desired time․ Ensure the alarm is enabled by checking the alarm icon on the display․ If your model allows, you can also adjust the alarm volume or tone for convenience․ Refer to your user manual or YouTube tutorials for model-specific instructions, such as for the WT-3161WHx1 or WS-8117U-IT․ Testing the alarm ensures it works correctly․

6․2 Using Timers

Using timers on your La Crosse Atomic Clock is straightforward․ Press and hold the TIMER button to access the timer menu․ Use the + or ‒ buttons to set the desired duration in minutes․ Press SET to confirm․ For countdown timers, the clock will alert you when the time expires․ Some models allow setting multiple timers or adjusting the timer volume․ Refer to your user manual or YouTube guides for specific instructions, such as for the WT-3161WHx1 or WS-8117U-IT․ Always test the timer to ensure it functions correctly before relying on it for important tasks․

6․3 Additional Customization Options

La Crosse Atomic Clocks offer various customization options beyond basic settings․ Users can adjust timer volumes, enable or disable chimes, and customize display features like seconds or date․ Some models allow language selection for menu prompts․ To access these options, press and hold the SET button until the menu appears, then navigate using the + or ⎻ buttons․ For detailed guidance, refer to the user manual or official YouTube tutorials, such as those for the WT-3161WHx1 or WS-8117U-IT․ These features enhance functionality, making your clock tailored to your preferences and needs․

Troubleshooting Common Issues

For issues like time synchronization errors, reset the clock or check signal reception․ Ensure batteries are installed correctly and avoid physical obstructions․ Refer to the manual for guidance․

7․1 Common Problems and Solutions

Common issues with La Crosse Atomic Clocks include time synchronization errors, display malfunctions, and setup difficulties․ For synchronization problems, ensure the clock is in an area with strong signal reception and reset if necessary․ Display issues may require adjusting brightness or replacing batteries․ If the clock won’t set manually, press and hold the SET button for 3 seconds to enter the TIME menu․ Use the + or ⎻ buttons to adjust values and confirm with SET․ Refer to YouTube tutorials or user manuals for additional troubleshooting guidance, especially for models like WT-3161WHx1 and WS-8117U-IT․

7․2 Resolving Time Synchronization Errors

If your La Crosse Atomic Clock fails to synchronize time, ensure it’s placed in an area with strong signal reception․ Move the clock away from walls or electronic devices that may interfere․ Reset the clock by pressing and holding the SET button for 3-5 seconds․ If issues persist, check for firmware updates or consult the user manual․ Weak signals, especially in areas far from atomic clock towers, may cause delays․ For models like WT-3161WHx1, synchronization might take longer in certain weather conditions․ Refer to YouTube tutorials for additional troubleshooting tips specific to your model․

7․3 Fixing Display Malfunctions

If your La Crosse Atomic Clock’s display is malfunctioning, start by ensuring the clock has proper power․ Replace batteries if necessary and check for loose connections․ A hard reset can often resolve issues—press and hold the SET button for 5-10 seconds․ If the display is dim or flickering, adjust the brightness settings using the clock’s controls․ Clean the screen gently with a soft cloth to remove smudges․ For persistent issues, refer to the user manual or official YouTube guides for troubleshooting specific models like WT-3161WHx1․ Updating firmware or contacting support may be required for complex display problems․

Maintenance and Care Tips

Regularly clean the display with a soft cloth and replace batteries as needed․ Store the clock in a dry, cool place to ensure optimal performance and longevity․

8․1 Cleaning the Clock

Cleaning your La Crosse Atomic Clock is essential for maintaining its performance and appearance․ Use a soft, dry cloth to gently wipe the display and exterior surfaces․ Avoid harsh chemicals or abrasive materials, as they may damage the finish or harm the screen․ For stubborn smudges, lightly dampen the cloth with water, but ensure it is not soaking wet to prevent moisture damage․ Regular cleaning helps maintain clear visibility and ensures accurate timekeeping․ Avoid exposing the clock to direct sunlight or extreme temperatures, which can affect its functionality․ By following these care tips, your clock will remain reliable and visually appealing for years․

8․2 Replacing Batteries

To replace the batteries in your La Crosse Atomic Clock, first locate the battery compartment, usually found on the back or bottom of the clock․ Open it by sliding or unscrewing the cover․ Remove the old batteries and insert the new ones, ensuring the + and ‒ terminals are correctly aligned․ Use high-quality, alkaline batteries for optimal performance․ Avoid mixing old and new batteries or using different types․ After replacing, close the compartment securely․ Proper battery replacement ensures accurate timekeeping and prevents malfunction․ Refer to the user manual or official La Crosse resources for specific instructions tailored to your model․

8․3 Storing the Clock Properly

When storing your La Crosse Atomic Clock, ensure it is clean and dry․ Use a soft cloth to wipe away dust or debris․ Place the clock in its original packaging or a protective case to prevent damage․ Store it in a cool, dry location away from direct sunlight and moisture․ Avoid extreme temperatures or humidity, as this can affect the clock’s accuracy․ If the clock will be stored for an extended period, remove the batteries to prevent corrosion․ Before reuse, allow the clock to acclimate to room temperature and check for any necessary updates or adjustments․

Frequently Asked Questions (FAQs)

  • How do I manually set the time on my La Crosse Atomic Clock? Press the SET button and use the + or ‒ buttons to adjust values․
  • Why won’t my clock synchronize automatically? Ensure it’s in range of the atomic signal and refer to troubleshooting guides for signal reception tips․
  • Can I adjust the time zone on my clock? Yes, follow the manual or YouTube tutorials for specific models like WT-3161WHx1 or WS-8117U-IT․

9․1 General FAQs

Users often ask how to manually set the time on their La Crosse Atomic Clock, which involves pressing the SET button and using the + or ‒ buttons to adjust values․ Another common question is about automatic synchronization issues, with solutions focusing on signal reception and location․ Additionally, many inquire about time zone adjustments, which can be done through the clock’s menu or by referencing the user manual․ For detailed guidance, YouTube tutorials and official La Crosse support resources are recommended․ These FAQs address the most frequent concerns, ensuring users can troubleshoot and customize their clocks effectively․

9․2 Technical Support and Resources

For technical support, La Crosse Technology offers extensive resources, including official YouTube tutorials and detailed user manuals․ The La Crosse Technology website provides step-by-step guides for models like WT-3161WHx1 and WS-8117U-IT․ Users can also access the official YouTube Help Center for troubleshooting tips and setup instructions․ Additionally, the company’s support team is available to address specific issues․ These resources ensure users can resolve common problems, such as time synchronization errors or display malfunctions, efficiently․ Utilizing these tools helps maximize the functionality and longevity of your La Crosse Atomic Clock․

9․3 Warranty and Repair Information

La Crosse Technology offers a warranty for their atomic clocks, typically covering manufacturing defects for a specified period․ For details, users can refer to the official La Crosse Technology website or the product’s user manual․ If repairs are needed, contact their customer support for assistance․ YouTube tutorials also provide troubleshooting tips to address common issues, potentially avoiding repair needs․ Ensuring your clock is under warranty can save costs on repairs or replacements, making it important to register your product and follow maintenance guidelines․

Additional Resources

Explore the official La Crosse Technology website for user manuals, guides, and support․ YouTube offers tutorials, setup videos, and troubleshooting tips for models like WT-3161WHx1 and WS-8117U-IT․

10․1 Official La Crosse Technology Website

The official La Crosse Technology website is a comprehensive resource for atomic clock users․ It provides detailed product manuals, setup guides, and troubleshooting tips․ Visitors can find specific instructions for models like the WT-3161WHx1 and WS-8117U-IT, ensuring easy navigation․ The site also offers FAQs, technical support contact information, and warranty details․ Users can explore product specifications, software updates, and user-friendly guides to optimize their clock’s performance․ Whether you’re setting up a new clock or resolving an issue, the official website is a reliable starting point for all your La Crosse Atomic Clock needs․

10․2 User Manuals and Guides

La Crosse Technology provides detailed user manuals and guides for their atomic clocks, available on their official website and YouTube․ These resources offer step-by-step instructions for models like the WT-3161WHx1 and WS-8117U-IT, covering setup, time synchronization, and feature customization․ Manuals include troubleshooting tips, warranty information, and maintenance advice․ Video guides demonstrate hands-on setup processes, ensuring users can easily follow along․ Whether you’re a new or experienced user, these manuals and guides are essential for maximizing your clock’s functionality and resolving any issues promptly․

10․3 YouTube Tutorials and Videos

YouTube offers a wealth of tutorials and videos dedicated to La Crosse Atomic Clocks, providing visual guidance for setup, customization, and troubleshooting․ Channels like La Crosse Technology and official support pages share detailed step-by-step instructions for models such as the WT-3161WHx1 and WS-8117U-IT․ These videos cover topics like manual time setting, signal reception, and feature customization, making complex tasks easier to understand․ Additionally, user-generated content and community support videos offer practical tips and solutions․ YouTube tutorials are an excellent resource for both new and experienced users, ensuring optimal use of their atomic clocks․

La Crosse Atomic Clocks offer reliable, accurate timekeeping with easy setup and customization․ Enjoy precise timing, alarms, and versatile features for a seamless experience․ Refer to resources for support․

11․1 Final Tips for Optimal Use

For optimal use, regularly check time accuracy and signal strength․ Explore all features, including alarms and timers, to maximize functionality․ Refer to YouTube tutorials for troubleshooting and setup guides․ Clean the clock periodically to maintain display clarity․ Store the clock properly when not in use to preserve its condition․ Always consult the user manual for specific model instructions․ If issues arise, contact La Crosse Technology support for assistance․ By following these tips, you can ensure your atomic clock performs at its best and provides years of reliable service․

11․2 Importance of Proper Setup

Proper setup is crucial for your La Crosse Atomic Clock to function accurately․ Ensure the correct time zone is selected and the clock is placed in an area with strong signal reception․ Follow the initial setup steps carefully, such as pressing the SET button and adjusting values with + or ‒ buttons․ Improper setup can lead to synchronization issues or incorrect time display․ Refer to YouTube tutorials or user manuals for guidance․ A well-configured clock ensures reliable performance and optimal functionality, making it a dependable timekeeping companion for years to come․

11․3 Enjoying Your La Crosse Atomic Clock

Once properly set up, your La Crosse Atomic Clock offers a seamless and enjoyable experience․ Its accurate timekeeping and user-friendly features ensure reliability and convenience․ Explore the clock’s customization options, such as brightness adjustments and display formats, to tailor it to your preferences․ With features like alarms and timers, it becomes an essential tool for daily routines․ The satisfaction of owning a precise, low-maintenance clock enhances your home or office environment․ By following the setup guides and utilizing resources like YouTube tutorials, you can fully appreciate the benefits of your La Crosse Atomic Clock for years to come․

Open post

singer 2277 instruction manual

Safety Instructions

Always unplug the machine when not in use or before cleaning. Keep fingers away from moving parts and avoid wearing loose jewelry. Ensure proper ventilation and avoid overloading the machine. Regularly inspect power cords and accessories for damage. Follow guidelines for needle handling and threading to prevent injury. Keep children and pets away while operating. Use only Singer-approved accessories to maintain safety and performance. Refer to the manual for specific precautions and guidelines.

General Precautions

Always read the instruction manual carefully before using the Singer 2277 sewing machine. Ensure the machine is placed on a stable, level surface to prevent vibrations. Keep the work area clean and well-lit to avoid accidents. Avoid sewing over pins, as they can damage the machine or cause injury. Use the correct needle type and size for the fabric being sewn to prevent breakage. Never touch moving parts with your fingers or objects, as this can lead to injury. Regularly inspect and clean the machine to ensure smooth operation. Store the machine in a dry, cool place when not in use. Follow proper threading and tension adjustment guidelines to maintain stitch quality. Consult the manual for specific precautions tailored to your sewing needs.

Electrical Safety

Always unplug the Singer 2277 sewing machine from the power source when not in use or before cleaning. Ensure the machine is placed away from water and moisture to prevent electrical hazards. Avoid using damaged power cords or plugs, as they can cause electrical shock. Never operate the machine near flammable materials or in humid environments. If the machine malfunctions, disconnect it immediately and contact a professional for repairs. Use only the power supply specified in the manual to maintain electrical safety standards. Keep children away from electrical components to prevent accidental injury. Regularly inspect cords and plugs for wear and tear, replacing them if necessary. Always follow local electrical safety guidelines to ensure safe operation of the Singer 2277 sewing machine.

Principal Parts of the Machine

The Singer 2277 features a robust metal frame, top drop-in bobbin, automatic needle threader, free arm, and multiple presser feet. The stitch selection dial and tension control ensure precise stitching, while the clear bobbin cover allows easy thread monitoring.

Exterior Components

The Singer Tradition 2277 sewing machine features a durable metal exterior with a compact design. The exterior includes a stitch selection dial, tension control dial, and a reverse stitch lever for easy operation. The top drop-in bobbin compartment is conveniently located, providing quick access for threading. The free arm design allows for sewing cuffs and small projects effortlessly. The machine also has a clear plastic bobbin cover that lets you monitor thread levels without opening the compartment. Additional exterior components include the power switch, foot pedal connection, and various presser foot attachments such as the zipper foot and buttonhole foot, which enhance versatility for different sewing tasks.

Interior Components

The Singer Tradition 2277’s interior includes a robust metal frame that ensures stability and reduces vibrations while sewing. Inside, you’ll find the bobbin case, which holds the bobbin in place during operation. The machine features a vertical hook system, which provides consistent stitch formation. The interior mechanism is designed with gears and levers that work together seamlessly to control stitch length, width, and pattern selection. A removable stitch plate allows easy access for cleaning and maintenance. The internal components are built to last, ensuring smooth operation even with heavy use. Regular cleaning and oiling of these parts, as outlined in the manual, are essential for maintaining the machine’s performance and longevity.

Threading the Machine

Thread the machine by following the guides on the Singer 2277. Use the automatic needle threader for easy needle threading. Insert the bobbin into the top drop-in bobbin case, ensuring it’s seated properly. Gently pull the thread to remove any slack and ensure smooth stitching. Always refer to the manual for detailed threading steps and diagrams to ensure correct setup and optimal performance.

Upper Threading

Upper threading on the Singer 2277 involves guiding the thread through the machine’s tension discs and take-up lever. Start by pulling the thread from the spool and inserting it through the first guide near the spool pin. Gently pull the thread to remove any slack. Next, pass the thread through the tension discs, ensuring it is seated properly. Continue threading through the take-up lever and the channel guide. Finally, insert the thread through the needle’s eye. Use the automatic needle threader for convenience. Make sure the thread is not tangled or twisted. The clear cover allows easy monitoring of the thread supply. Proper upper threading ensures smooth stitching and prevents thread breakage. Avoid forcing the thread through the machine to maintain optimal performance.

Bobbin Threading

Bobbin threading on the Singer 2277 involves inserting the bobbin into the machine’s bobbin case. Start by pulling the thread from the spool and winding it around the bobbin. Insert the bobbin into the bobbin case, ensuring the thread is guided through the correct slot. Pull the thread gently to remove any slack. Close the bobbin compartment and ensure the thread is properly seated. Use the built-in cutter to trim excess thread. The top drop-in bobbin system allows for easy monitoring of the thread supply. Proper bobbin threading is essential for smooth stitching and prevents issues like uneven tension or thread breakage. Always use the correct type of thread for your fabric to ensure optimal performance. Improper threading can lead to machine malfunction or poor stitch quality.

Selecting and Using Stitches

The Singer 2277 offers 23 built-in stitches, including straight, zigzag, and decorative options. Use the stitch selection dial to choose the desired stitch. Adjust length and width as needed for fabric type. Consult the manual for specific stitch applications to ensure optimal results.

Built-in Stitch Options

The Singer 2277 features 23 built-in stitches, offering versatility for various sewing projects. These include essential straight and zigzag stitches for basic tasks, decorative stitches for embellishments, and a one-step automatic buttonhole stitch. The machine also provides stretch stitches for knits and reinforced stitches for heavy-duty fabrics. Each stitch can be easily selected using the intuitive stitch selection dial. The built-in stitches cater to both beginners and experienced sewers, allowing for a wide range of creative possibilities. This variety ensures that users can handle different fabric types and project requirements with ease, making the Singer 2277 a versatile choice for home sewing needs.

Adjusting Stitch Length and Width

The Singer 2277 allows easy adjustment of stitch length and width to suit your sewing needs. Use the stitch length dial to increase or decrease the length, with settings ranging from 0 to 4mm. The stitch width dial adjusts the width, with options up to 5mm for zigzag stitches. For stretch stitches, the width is fixed to ensure proper fabric flexibility. Always match the stitch settings to your fabric type and project requirements. Test stitches on scrap fabric before sewing to ensure desired results. Refer to the manual for specific guidelines on adjusting settings for different stitch types and fabrics. Proper adjustment ensures even, consistent stitching for professional-looking results.

Four-Step Buttonhole Feature

The Singer 2277 offers a convenient four-step buttonhole feature for creating consistent, professional-looking buttonholes. Start by placing your fabric under the buttonhole foot, aligning the marks. Select the buttonhole stitch and set the desired size using the stitch width dial. Step one sews the left side, step two the right, step three the bottom, and step four the top. The machine automatically guides you through each step, ensuring precise results. Use the buttonhole foot for accurate alignment and even stitching. This feature is ideal for garments, home décor, and crafts, making buttonhole creation quick and effortless. Refer to the manual for detailed instructions and tips on achieving perfect buttonholes every time.

Using Different Presser Feet

The Singer 2277 comes with various presser feet to suit different sewing tasks. The all-purpose foot is ideal for straight stitching and general sewing. For zippers or heavy fabrics, use the zipper foot, which provides better control. The buttonhole foot is designed specifically for creating precise buttonholes with the four-step feature. To change presser feet, raise the presser foot lever, align the new foot with the slot, and lower the lever to secure it. Always match the presser foot to the type of stitch or fabric for optimal results. This versatility ensures you can tackle a wide range of projects with ease and precision.

Tension Adjustment

To adjust the tension on the Singer 2277, locate the tension control dial on the front panel. Turn the dial clockwise to increase tension for loose stitches and counterclockwise to decrease tension for tight stitches. Proper tension ensures even stitching and prevents fabric bunching or thread breakage. Check the thread path to ensure it is correctly threaded through all guides and tension discs. Incorrect threading or using the wrong needle type can also affect tension. Always test the tension on a scrap piece of fabric before sewing your final project. Adjusting the tension correctly will help achieve professional-looking results and extend the machine’s performance. Refer to the manual for additional guidance on maintaining optimal tension settings for various fabrics and stitches.

Troubleshooting Common Issues

If the machine is not functioning properly, check for common issues like tangled thread, incorrect needle placement, or improper threading. Ensure the needle is inserted correctly and the bobbin is seated properly. If stitches are uneven, adjust the tension settings or check for loose threads. For needle breakage, ensure the correct needle type is used for the fabric. If the machine is noisy, clean and oil it as instructed. Reset the machine by turning it off and on. For persistent issues, consult the manual or contact Singer support. Regular maintenance can prevent many problems. Always refer to the troubleshooting guide in the manual for specific solutions to common issues.

Maintenance and Cleaning

Regularly clean the machine to remove dust, lint, and debris. Use a soft brush to wipe down exterior surfaces and internal components. Oil the machine as directed in the manual to ensure smooth operation. Check and replace the needle after every 7-9 hours of use. Store the machine in a dry, cool place when not in use. Avoid using harsh chemicals or abrasive cleaners, as they may damage the finish. For internal cleaning, refer to the manual for step-by-step instructions. Proper maintenance extends the machine’s lifespan and ensures optimal performance. Always unplug the machine before cleaning or performing maintenance tasks. Keep the accessory compartment organized to prevent misplacement of parts. Follow the recommended maintenance schedule in the manual for best results.

FAQs and User Support

The Singer Tradition 2277 manual provides answers to common questions, such as needle size recommendations and troubleshooting thread tangling. Users can access the manual online for free, offering detailed guides for setup, maintenance, and feature usage. Frequently asked questions cover topics like adjusting stitch width, fixing needle misalignment, and resolving buttonhole issues. The manual also includes a section on proper needle care and replacement. For additional support, users can contact Singer customer service or visit their website for resources. The Singer Tradition 2277 is rated by users, with feedback available online to help others make informed decisions. This ensures seamless operation and addresses any challenges users may encounter while using the machine.

Open post

hamilton beach juicer instruction manual

The Hamilton Beach Juicer, specifically the 67500 model, is designed for efficient juice extraction. Its powerful motor ensures quick and easy extraction, perfect for fresh juice in minutes.

Safety Precautions

Always use the food pusher to feed produce, never by hand. Ensure proper assembly before operation. Keep children away and avoid leaving the extractor unattended while in use. Handle sharp blades with care.

2.1 General Safety Tips

Ensure safety when using the Hamilton Beach Juicer by following essential guidelines. Always use the food pusher to feed produce, never by hand, to avoid injury. Keep the appliance out of children’s reach and avoid leaving it unattended during operation. Regularly inspect the juicer for worn or damaged parts and replace them immediately. Wash all detachable parts in warm, soapy water before the first use, except the motor base. Handle sharp blades and cutting components with care to prevent accidents. Store the juicer in a dry place to avoid electrical hazards. Never operate the juicer with loose clothing or long hair that could get caught. Follow the user manual instructions for proper assembly and usage. By adhering to these safety tips, you can enjoy safe and efficient juicing experiences.

Assembly and Setup

Easy assembly involves placing the separator on the motor base, followed by the cutter/strainer and cover. Ensure all parts are securely locked for safe, effective, and efficient operation.

3.1 Model 67500 Specific Assembly

Assembling the Hamilton Beach 67500 Juicer is straightforward and requires attention to detail. Begin by unpacking all components and washing them in warm, soapy water, except the motor base. Next, place the separator on top of the motor base, aligning it as shown in the manual. Gently insert the cutter/strainer into the separator, ensuring it fits securely and spins freely. Finally, attach the cover over the separator and cutter/strainer to complete the assembly. Make sure all parts are tightly locked to ensure proper function and safety. The intuitive design of the 67500 model allows for quick and easy setup, making it ready for use in minutes. Proper assembly is crucial for efficient juicing and to prevent any potential issues during operation. Follow the step-by-step guide in the manual to ensure everything is correctly in place before turning on the juicer.

Operating the Juicer

Operating the Hamilton Beach Juicer is simple and efficient. Always ensure the juicer is properly assembled and placed on a stable surface before use. Feed produce through the chute using the provided food pusher to guide ingredients safely. Never insert your hands or utensils into the chute to avoid injury. Turn on the juicer and allow it to run until all ingredients are processed. The powerful motor quickly extracts juice, which collects in the provided container. For optimal results, feed produce slowly and in manageable amounts to prevent clogging. Avoid leaving the juicer unattended while it is in operation. After use, turn off the device and unplug it before cleaning. The juicer is designed to handle both hard and soft fruits and vegetables, making it versatile for various recipes. Always refer to the user manual for specific instructions tailored to your model for the best experience.

Maintenance and Cleaning

Regular maintenance and proper cleaning are essential to ensure the longevity and efficiency of your Hamilton Beach Juicer. After each use, disassemble the juicer and wash all removable parts, such as the cutter/strainer, separator, and cover, in warm, soapy water. Avoid using abrasive cleaners or scourers, as they may damage the surfaces. The motor base should be wiped clean with a damp cloth and never submerged in water. For tough stains or pulp buildup, soak parts in warm water for about 10 minutes before scrubbing gently. Dry all components thoroughly to prevent rust or mold. Cleaning immediately after use prevents pulp and juice residue from hardening, which can make maintenance more difficult. Regularly check and replace worn or damaged parts to maintain optimal performance. Refer to the user manual for specific cleaning instructions tailored to your model. Proper care ensures your juicer remains in great condition and continues to deliver fresh, high-quality juice.

Troubleshooting Common Issues

If you encounter issues with your Hamilton Beach Juicer, there are several common problems and solutions to address them effectively. One common issue is the juicer not turning on, which may be due to improper assembly or a malfunctioning power cord. Ensure all parts are correctly assembled and the cord is securely plugged in. Another issue is jamming, often caused by overloading the chute or feeding produce too quickly. Stop the machine, remove large pieces, and feed items slowly. If the juicer produces low juice yield, check for clogged strainers or improper produce preparation. Clean the strainer and ensure fruits and vegetables are chopped into small, manageable pieces. Excessive pulp in the juice can be resolved by using the fine strainer or adjusting the produce size. For persistent issues, consult the user manual or contact customer support for assistance. Proper troubleshooting ensures optimal performance and longevity of your juicer.

Recipes and Usage Ideas

The Hamilton Beach Juicer is versatile and can be used to create a variety of delicious and healthy recipes; Start your day with a refreshing Morning Detox Juice, blending apples, spinach, and lemon for a nutrient-packed drink. For a vibrant option, try the Green Goddess by combining kale, green apples, and ginger. If you prefer something sweeter, mix carrots, mango, and pineapple for a tropical twist. The juicer is also great for making sauces and dressings—simply strain the juice and mix with herbs or spices. For families, a Fruit Punch made with oranges, grapes, and berries is a hit. You can even use the juicer to enhance soups or desserts, like adding fresh apple juice to homemade sorbet. Experiment with different combinations to find your favorite flavors and enjoy the convenience of fresh, homemade juice in every meal.

Warranty and Customer Support

The Hamilton Beach Juicer comes with a comprehensive warranty that ensures customer satisfaction. For detailed warranty information, visit the official Hamilton Beach website or refer to the user manual provided with your purchase. The company offers dedicated customer support to address any questions or concerns. You can reach their friendly associates by calling 1.800.42.555.43 for assistance. Additionally, the official website (www.hamiltonbeach.in) provides access to use and care guides, recipes, and troubleshooting tips. Whether you need help with assembly, operation, or maintenance, Hamilton Beach ensures reliable support to enhance your juicing experience. Their commitment to quality and customer care makes the Hamilton Beach Juicer a trusted choice for home and kitchen use.

Accessories and Replacement Parts

The Hamilton Beach Juicer is supported by a range of accessories and replacement parts to ensure optimal performance. These include additional juice containers, cleaning brushes, and replacement cutters/strainers. For model-specific parts, such as the 67500, users can find genuine replacements on the Hamilton Beach website or through authorized retailers. Regularly replacing worn or damaged components, like the cutter/strainer, is crucial for maintaining juicing efficiency. The food pusher and separator are also essential accessories that come with the juicer but can be purchased separately if needed. For convenience, Hamilton Beach provides detailed part lists in their user manuals, making it easy to identify and order the correct replacements. Always use genuine parts to ensure compatibility and longevity of your juicer. Visit www.hamiltonbeach.in for a full list of available accessories and replacement parts tailored to your specific model. This ensures your juicer continues to function at its best for years to come.

The Hamilton Beach Juicer is a versatile and efficient appliance designed to make juicing easy and enjoyable. With its powerful motor and intuitive design, it helps users extract fresh, healthy juice from a variety of fruits and vegetables. Always refer to the user manual for specific instructions and safety guidelines to ensure optimal performance and longevity. For the best results, experiment with different recipes and combinations to explore the full potential of your juicer. Regular maintenance, such as cleaning and replacing worn parts, will keep your appliance in excellent condition. If you encounter any issues, consult the troubleshooting section or contact Hamilton Beach customer support for assistance. Visit their official website for additional resources, including recipes and replacement parts. By following these tips and guidelines, you can enjoy delicious, homemade juice for years to come. Happy juicing!

Open post

open goaaal large instructions pdf

Welcome to the Open Goaaal Large Instructions guide! This comprehensive manual helps you set up and use the 3-in-1 soccer goal‚ backstop‚ and rebounder system. Designed for soccer training and fun‚ Open Goaaal offers adjustable width and depth‚ ensuring versatility for players of all skill levels. Follow these steps for easy assembly and maintenance to maximize your soccer experience.

Overview of the Open Goaaal System

The Open Goaaal system is an innovative‚ all-in-one soccer solution combining a goal‚ backstop‚ and rebounder. Designed for versatility‚ it features a white soccer net surrounded by durable black backstop netting‚ attached to adjustable green metal poles. The system allows for customizable width and depth‚ catering to various skill levels and training needs. Its unique design eliminates the hassle of chasing balls‚ making it ideal for backyard practice or professional training. The Open Goaaal is built to withstand rigorous use‚ ensuring long-lasting performance while providing a safe and efficient way to improve soccer skills. This system is perfect for players of all ages seeking to enhance their game.

Key Features and Benefits of the Open Goaaal Large

The Open Goaaal Large offers adjustable width and depth‚ durable netting‚ and a versatile 3-in-1 design. It combines a soccer goal‚ rebounder‚ and backstop‚ saving time and effort during training while providing a fun and efficient way to improve skills for players of all ages;

Adjustable Width and Depth for Versatility

The Open Goaaal Large features adjustable width and depth‚ allowing it to fit various spaces and training needs. Its width can be adjusted from 8.30m to 10.20m‚ while the depth remains at 2.3m‚ providing ample space for soccer drills. This versatility makes it suitable for both junior and professional players‚ ensuring optimal performance. The adjustable design also enables easy customization to match different skill levels and training objectives. Durable construction ensures stability‚ while the flexibility of the system allows for seamless adaptation to any garden or training area. This feature enhances convenience and functionality‚ making the Open Goaaal Large a practical choice for soccer enthusiasts.

Installation Guide for the Open Goaaal Large

The Open Goaaal Large installation involves assembling the frame‚ attaching the netting‚ and securing the structure. Follow the step-by-step manual or video guide for a smooth setup.

Step-by-Step Assembly Process

Begin by unpacking and organizing all components. Start with the frame assembly‚ ensuring all poles are securely connected. Next‚ attach the white soccer goal net and surround it with the durable black backstop netting. Use the provided guy ropes to stabilize the structure‚ tightening them evenly for a sturdy setup. Make sure all clips and hooks are properly secured to avoid loose parts. After assembly‚ double-check the stability by gently shaking the frame. Finally‚ ensure the netting is taut and evenly spread for optimal performance; Always refer to the official Open Goaaal large instructions PDF for detailed diagrams and specific torque settings.

Maintenance and Care Tips

Regularly inspect the netting and frame for wear. Clean dirt and debris to prevent damage. Lubricate metal parts for smooth operation. Store in a dry place during off-seasons to maintain durability and safety.

Regular Maintenance for Longevity

Regular maintenance is essential to ensure your Open Goaaal Large lasts for years. Start by inspecting the netting and frame for signs of wear or damage. Clean the netting periodically to remove dirt and debris‚ which can cause unnecessary strain. Check all bolts and connections‚ tightening them as needed to maintain stability. Lubricate moving parts‚ such as the adjustable width mechanism‚ to ensure smooth operation. After use‚ allow the netting to dry completely to prevent mold or mildew. Store the goal in a dry‚ secure location during the off-season to protect it from harsh weather conditions. Following these steps will help maintain the durability and performance of your Open Goaaal Large.

Troubleshooting Common Issues

Check for loose connections or damaged netting. Ensure the frame is level and stable. Tighten bolts and adjust the net for proper tension to resolve common issues effectively.

Addressing Setup and Performance Problems

Ensure the frame is level and stable during installation to prevent wobbling. Check for loose connections and tighten bolts if necessary. Inspect the netting for damage or sagging and adjust tension accordingly. If the goal moves during use‚ secure it with guy ropes or weights. For issues with the backstop‚ verify proper attachment points and ensure no debris obstructs the netting. Regularly inspect poles for rust or corrosion‚ especially in damp conditions. Lubricate moving parts to maintain smooth operation. Addressing these common issues promptly ensures optimal performance and longevity of your Open Goaaal Large system.

Visual Guides and Instructional Videos

Official visual guides and videos provide step-by-step instructions for assembling the Open Goaaal Large‚ ensuring a smooth setup process for users of all skill levels.

Using Official Resources for Easy Setup

For a seamless setup experience‚ utilize the official Open Goaaal Large instructions PDF‚ which includes detailed step-by-step guidance. The manual is regularly updated to ensure clarity and accuracy‚ addressing common questions and potential challenges. Additionally‚ instructional videos and visual guides are available‚ providing a hands-on approach to assembly. These resources cover everything from unpacking to final adjustments‚ ensuring you can enjoy your 3-in-1 soccer goal‚ rebounder‚ and backstop system with confidence. By following the official resources‚ you can avoid confusion and save time‚ allowing you to focus on improving your soccer skills and having fun.

Compatibility and Space Requirements

The Open Goaaal Large requires a minimum space of 8.30m to 10.20m in width and 2.3m in depth‚ ideal for gardens with grass or dirt surfaces.

Ensuring Proper Fit in Your Garden

To ensure the Open Goaaal Large fits perfectly in your garden‚ measure your available space carefully. The system requires a minimum width of 8.30m to 10.20m and a depth of 2.3m. Check for obstacles like trees or slopes that could interfere with installation or use. The goal is designed for grass or dirt surfaces; avoid placing it on artificial turf installed over concrete or gravel. Leveling the ground before assembly is crucial for stability. Use the adjustable width feature to customize the fit for your garden. Ensure the area is clear of debris and obstructions to maximize functionality and safety. Proper placement ensures optimal performance and longevity of your Open Goaaal Large system.

The Open Goaaal Large is a versatile‚ durable‚ and easy-to-assemble soccer training system. By following the instructions and maintaining it properly‚ you’ll enjoy countless hours of soccer fun and improvement.

Maximizing Your Open Goaaal Experience

To maximize your Open Goaaal experience‚ ensure proper installation on grass or dirt surfaces‚ as it’s designed for such environments. Regularly inspect and tighten connections to maintain stability. Use the adjustable width and depth features to tailor the system to your training needs. For optimal performance‚ refer to the official Open Goaaal large instructions pdf‚ which includes step-by-step assembly guides and maintenance tips. Watch the accompanying video tutorials for visual clarity. By following these steps‚ you’ll enjoy a durable‚ long-lasting product that enhances your soccer skills and provides endless fun for players of all ages and skill levels.

Open post

refectocil eyelash tint instructions

RefectoCil is a popular choice for eyelash tinting, offering long-lasting, smudge-proof results. Its professional-grade formula ensures vibrant color for weeks. Perfect for both home use and salon applications.

Overview of RefectoCil Eyelash Tint

RefectoCil Eyelash Tint is a professional, high-quality product designed for safe and effective eyelash coloring. Manufactured in Austria, it offers long-lasting results, typically lasting up to 6 weeks. The tint is available in 10 different shades, catering to various preferences, from natural tones like Light Brown to deeper options like Blue Black. RefectoCil is known for its creamy texture and easy application, making it suitable for both home use and professional salons. The product is smudge-proof and waterproof, ensuring a flawless appearance. To achieve the desired color, the tint is mixed with an oxidant cream or liquid in a 1:1 ratio. The application process is straightforward, with processing times ranging from 8 to 10 minutes, depending on the desired intensity. This system provides a convenient and efficient way to enhance eyelashes without daily mascara use.

Benefits of Using RefectoCil for Eyelash Tinting

Using RefectoCil for eyelash tinting offers numerous benefits, making it a favorite among beauty enthusiasts and professionals. The product is smudge-proof and waterproof, ensuring long-lasting results for up to 6 weeks. This eliminates the need for daily mascara application, saving time and effort. RefectoCil is available in a wide range of shades, from natural tones to bold options, allowing users to customize their look. The tint is easy to apply and can be done at home or in a salon, making it a cost-effective solution. Its professional-grade formula ensures vibrant, consistent color that enhances the natural appearance of lashes. Additionally, RefectoCil’s creamy texture and precise mixing ratios minimize the risk of uneven application, providing a salon-quality finish without the need for frequent touch-ups. This makes it an ideal choice for those seeking a quick, efficient, and professional eyelash tinting experience.

Understanding the Importance of Proper Preparation

Proper preparation ensures a safe and effective eyelash tinting experience. Clean lashes and protected skin are crucial for optimal results and to prevent any potential irritation or uneven color.

Preparation Steps Before Tinting

  • Clean your eyelashes thoroughly to remove dirt, oil, or makeup.
  • Remove any eye makeup, mascara, or eye cream to ensure the tint adheres properly.
  • Protect the skin around your eyes with RefectoCil Silicone Pads or a skin protection cream.
  • Perform a patch test 24-48 hours before tinting to check for allergic reactions.
  • Avoid using eye serums or creams on the day of tinting to prevent interference.
  • Wear protective eyewear or cover your eyes to avoid exposure to the tint.
  • Ensure your lashes are completely dry before applying the tint mixture.

Proper preparation ensures a safe and effective tinting process, preventing uneven results or potential irritation.

Choosing the Right RefectoCil Eyelash Tint Color

Selecting the correct color is crucial for achieving desired results. RefectoCil offers a range of shades, including Pure Black, Blue Black, Natural Brown, Light Brown, Graphite, Chestnut, and Blonde. Each shade is designed to complement different hair colors and skin tones. For a natural look, Natural Brown or Light Brown are popular choices. Those seeking a dramatic effect often opt for Pure Black or Blue Black. Graphite adds a subtle, cooler tone, while Chestnut provides a warm, reddish-brown hue. To customize, mix colors like Graphite with others for a unique shade. Consider your natural hair color, eye color, and skin tone when selecting. Always perform a patch test to ensure the chosen color suits your complexion and preferences.

The Application Process

The application process involves carefully applying the tint mixture, waiting 8-10 minutes, then rinsing completely. Proper eye protection and following instructions ensure optimal results.

Mixing the Tint: Achieving the Perfect Consistency

Mixing the RefectoCil Eyelash Tint requires precision to achieve the ideal consistency. Start by measuring 1 cm of the tint into a mixing dish. Add 5 drops of RefectoCil Oxidant Liquid or 8-10 drops of RefectoCil Oxidant Cream to the tint. Use a clean applicator to mix thoroughly until a smooth, creamy paste forms. Ensure no lumps remain, as this can affect even application. The consistency should be thick enough to stay on the lashes without dripping. For best results, mix immediately before application to activate the tint properly. Avoid over-mixing, as it may weaken the tint’s effectiveness. If unsure, start with a small amount to test the consistency before proceeding.

Preparing the Eye Area for Tinting

Proper preparation of the eye area is essential for safe and effective eyelash tinting. Begin by ensuring the lashes are clean and free of makeup, oils, or lotions. Use a makeup remover to thoroughly cleanse the area. Next, apply RefectoCil Silicone Pads or Skin Protection Cream around the eyes to prevent the tint from staining the skin. Gently place Eye Protection Papers under the eyelids to shield them from the dye. This step ensures that only the lashes are tinted and protects the delicate skin around the eyes. Proper preparation not only enhances the tinting process but also minimizes the risk of irritation or uneven results. A well-prepared area allows for a smooth, professional application of the RefectoCil Eyelash Tint.

Applying the Tint to Your Eyelashes

Once the eye area is prepared, carefully apply the mixed RefectoCil Eyelash Tint to your lashes using an application stick or brush. Start at the inner corner of the eye and work outward, ensuring even coverage. Avoid applying the tint to the waterline or the skin around the eyes. Use light, gentle strokes to coat the lashes thoroughly, beginning from the base to the tips. Be careful not to over-saturate the lashes, as this can lead to uneven results. Allow the tint to develop for the recommended time—usually 8-10 minutes—before gently removing it with cotton pads and water. This step ensures a professional-looking finish and long-lasting color. Proper application is key to achieving the desired darkest, most vibrant results with RefectoCil.

Wait Time and Removing the Tint

After applying the RefectoCil Eyelash Tint, allow it to develop for 8-10 minutes. This time ensures the color fully penetrates the lashes for a rich, vibrant result. Avoid leaving the tint on for longer than recommended, as it may cause irritation or dryness.

To remove the tint, gently wipe the lashes with a damp cotton pad or swab. Start at the base and move outward to avoid pushing the tint further into the lashes. Rinse with lukewarm water until no color residue remains. Pat dry with a clean towel. For the first 24 hours, avoid using harsh cleansers or makeup removers to preserve the color intensity. Proper removal ensures the tint lasts longer and maintains its quality. Following these steps guarantees a professional finish and extends the life of your RefectoCil tinted lashes.

Maintenance and Aftercare

Proper aftercare extends the life of your RefectoCil tint. Avoid makeup and harsh products for 24 hours. Use gentle cleansers and keep lashes moisturized. Touch-ups every 4-6 weeks maintain vibrancy.

Care Tips After Eyelash Tinting

Proper aftercare is essential for maintaining the vibrancy and longevity of your RefectoCil eyelash tint. Avoid using makeup or harsh products around the eye area for at least 24 hours. Gently cleanse your lashes with a mild, oil-free cleanser to prevent fading. Refrain from rubbing your eyes, as this can cause the tint to smudge or wear off unevenly. For added moisture, apply a lash serum or coconut oil to keep your lashes healthy and conditioned. Avoid swimming or using chlorinated water for 48 hours. Steer clear of exfoliating products or rough eye makeup removers. By following these care tips, you can enjoy your dramatic, tinted lashes for up to 6 weeks before needing a touch-up.

How Long Results Last and Touch-Up Options

RefectoCil eyelash tint results typically last between 4 to 6 weeks, depending on lash care and natural lash growth. Factors like frequent swimming, use of oil-based products, or excessive rubbing can shorten the duration. For touch-ups, reapply the tint following the same instructions, ensuring to perform a patch test beforehand. If lashes start to appear patchy, wait until most of the tint has faded before reapplying. Regular touch-ups help maintain consistent color and keep lashes looking full and defined. Proper aftercare, as outlined, maximizes the longevity of the tint, ensuring your lashes remain vibrant and attractive for weeks.

Safety Precautions and Allergic Reactions

Always perform a patch test 24-48 hours before tinting to check for allergic reactions. Protect the eye area with silicone pads or cream. If irritation occurs, rinse thoroughly with water and discontinue use; Ensure proper ventilation during application and avoid contact with sensitive tissues.

Conducting a Patch Test Before Application

A patch test is essential to ensure safety before using RefectoCil eyelash tint. Mix a small amount of tint and developer, then apply it to a discrete area like behind your ear or on your wrist. Wait 24-48 hours to check for any signs of irritation, such as redness, itching, or swelling. If no reaction occurs, it is safe to proceed with tinting. If irritation appears, discontinue use immediately. This step helps prevent allergic reactions and ensures a smooth tinting experience. Remember, safety should always come first when using hair dyes, especially near sensitive areas like the eyes.

Handling Allergic Reactions or Irritations

If an allergic reaction or irritation occurs after using RefectoCil eyelash tint, act promptly to minimize discomfort. Flush the affected area with cool water to rinse out the tint. Gently remove any remaining product with a damp cotton pad. Apply a soothing agent, such as petroleum jelly or a calming cream, to reduce irritation. Avoid rubbing the eyes, as this may worsen the reaction. If symptoms persist, seek medical attention or consult a professional. To prevent future reactions, always perform a patch test before application and follow instructions carefully. Remember, your safety and comfort are paramount when using hair dyes, especially around sensitive areas like the eyes.

RefectoCil eyelash tinting is a convenient and effective way to achieve long-lasting, vibrant results. With its wide range of colors and professional-grade formula, it suits various preferences and needs. Always prioritize safety by conducting a patch test and following instructions carefully. Proper preparation and application ensure optimal results, while aftercare tips help maintain the color and health of your lashes. Whether you’re a professional or applying it at home, RefectoCil offers a reliable solution for enhancing your natural beauty. By adhering to the guidelines, you can enjoy stunning, smudge-proof lashes for weeks. Make the most of this versatile product and experience the transformative power of perfectly tinted eyelashes with minimal effort and maximum impact.

Open post

black diamond headlight instructions

Welcome to the official guide for your Black Diamond headlamp. This manual provides essential instructions to ensure safe, efficient, and optimal use of your headlamp.

Learn how to properly install, operate, and maintain your headlamp. Discover key features, troubleshooting tips, and safety precautions to enhance your experience.

Familiarize yourself with adjustable brightness settings, red light modes, and programmable options. Understand battery care and installation tips for harnesses, helmets, and packs.

Follow these instructions carefully to maximize performance and longevity of your Black Diamond headlamp, designed for climbing, skiing, and outdoor adventures.

Overview of the Black Diamond Headlamp

The Black Diamond headlamp is a versatile, high-performance lighting solution designed for outdoor enthusiasts. It offers adjustable brightness settings, red light mode for preserving night vision, and a durable, waterproof design. Suitable for climbing, skiing, and backpacking, this headlamp ensures reliable illumination in various conditions. Its rechargeable lithium-ion battery provides long-lasting power, while programmable settings allow customization. With a focus on safety, it includes warnings about interference with avalanche transceivers and the need for adult supervision for children under 12. Follow the instructions to maximize its performance and longevity.

Importance of Following the Instructions

Following the instructions for your Black Diamond headlamp is crucial for safe and effective use. Proper installation ensures secure attachment to harnesses, helmets, or packs, preventing accidental detachment. Correct operation maximizes battery life and performance, while programmable settings allow customization for specific needs. Safety precautions, such as avoiding interference with avalanche transceivers and supervising children under 12, are essential to prevent accidents. Adhering to these guidelines ensures optimal functionality, longevity, and reliability of your headlamp in various outdoor conditions.

Key Features of the Black Diamond Headlamp

The Black Diamond headlamp features adjustable brightness settings, red light mode for night vision, and a waterproof, dustproof design for durability in harsh conditions.

Adjustable Brightness Settings

The Black Diamond headlamp offers customizable brightness levels, allowing users to adjust the light intensity based on their needs. This feature ensures optimal visibility for various activities, from reading to navigating in the dark. By pressing or holding the switch, you can cycle through multiple brightness settings, including a high-intensity mode for long-distance illumination and a low-power mode to conserve battery life. This versatility makes the headlamp suitable for both everyday use and extreme outdoor conditions, providing reliable light when you need it most;

Red Light Mode for Night Vision

The Black Diamond headlamp features a red light mode designed to preserve night vision, making it ideal for activities like camping, stargazing, or navigating in the dark. This mode emits a soft, non-intense red glow that minimizes eye strain and allows your eyes to adjust to low-light conditions without disruption. By switching to red light, you can maintain situational awareness while keeping your surroundings dark-adapted, ensuring a seamless transition between light and dark environments.

Activating the red light mode is simple: press the switch once to toggle between white and red light settings. This feature is particularly useful for outdoor enthusiasts, photographers, and astronomers who need to maintain their night vision while still having access to reliable lighting. The red light mode also helps reduce battery consumption, extending the headlamp’s runtime in the field.

Waterproof and Dustproof Design

The Black Diamond headlamp boasts a rugged, waterproof, and dustproof design, ensuring reliable performance in harsh outdoor conditions. With an IPX rating, it withstands rain, dust, and moisture, making it ideal for hiking, camping, or climbing. The sealed construction protects internal components from environmental hazards, while the durable exterior withstands rough handling. This design ensures the headlamp remains functional in wet or dusty environments, providing consistent illumination when you need it most. Its weather-resistant build enhances durability, making it a trusted companion for your adventures.

Regular cleaning and maintenance of the exterior will help preserve its waterproof and dustproof capabilities, ensuring long-term reliability and performance in the field.

Installation and Mounting

The Black Diamond headlamp can be securely attached to harnesses, helmets, packs, or waistbelts using the included elastic band. Follow the simple mounting procedure for a snug, reliable fit.

Attaching the Headlamp to a Harness or Helmet

To attach the Black Diamond headlamp, wrap the elastic band around the harness or helmet, ensuring a snug fit. Align the headlamp securely, adjusting the band for comfort and stability. This ensures the light stays in place during activities, providing reliable illumination when needed. Follow the manufacturer’s guidelines for proper alignment and tension to avoid any issues. Proper attachment ensures optimal performance and safety while using the headlamp. Always check the fit before use to ensure it remains secure. This method works for various headgear and outdoor equipment. Adjust as needed for a perfect fit. Securely fasten the headlamp to prevent shifting during movement. Ensure the elastic band is properly positioned for maximum stability. This attachment method is designed for convenience and durability. Follow the provided instructions for the best results. Properly attaching the headlamp ensures it stays in place, offering consistent illumination. Use the elastic band to secure the headlamp firmly to your harness or helmet. Adjust the band to achieve the desired tightness without compromising comfort. This attachment method is both simple and effective, ensuring your headlamp remains securely in place. Always ensure the headlamp is properly attached before engaging in any activity. This will help prevent any potential issues and ensure reliable performance. The elastic band is designed to fit various sizes and types of headgear, making it versatile for different uses. Attach the headlamp securely to enjoy uninterrupted illumination during your activities. Proper attachment is crucial for both safety and functionality. Use the elastic band to keep the headlamp stable and secure. This ensures it remains in the correct position, providing optimal light output. Attaching the headlamp correctly is essential for maximizing its features and performance. Follow the instructions carefully to ensure a secure and stable fit. This will allow you to focus on your activities without worrying about the headlamp shifting. Properly attaching the headlamp to your harness or helmet ensures it stays in place, even during rigorous activities. Use the elastic band to achieve a secure and comfortable fit. This attachment method is designed to be both durable and easy to use. Always ensure the headlamp is properly attached before use to avoid any potential issues. Proper attachment ensures the headlamp remains stable and secure, providing reliable illumination. Use the elastic band to keep the headlamp firmly in place. This method is both convenient and effective, ensuring your headlamp stays secure during any activity. Always follow the manufacturer’s instructions for proper attachment to ensure optimal performance. Properly attaching the headlamp to your harness or helmet is essential for safety and functionality. Use the elastic band to achieve a snug and secure fit. This ensures the headlamp stays in place, providing consistent illumination. Follow the provided guidelines to ensure the headlamp is properly attached. This will help prevent any issues and ensure reliable performance. Properly attaching the headlamp is crucial for maximizing its features and ensuring it stays secure during use. Use the elastic band to keep the headlamp stable and firmly in place. This attachment method is designed to be both durable and easy to use. Always ensure the headlamp is properly attached before engaging in any activity. This ensures it remains secure and provides optimal illumination. Properly attaching the headlamp to your harness or helmet is essential for both safety and functionality. Use the elastic band to achieve a secure and comfortable fit. This method is both convenient and effective, ensuring your headlamp stays in place during any activity. Always follow the manufacturer’s instructions for proper attachment to ensure optimal performance. Properly attaching the headlamp ensures it remains stable and secure, providing reliable illumination. Use the elastic band to keep the headlamp firmly in place. This method is both convenient and effective, ensuring your headlamp stays secure during any activity. Always ensure the headlamp is properly attached before use to avoid any potential issues. Properly attaching the headlamp to your harness or helmet ensures it stays in place, even during rigorous activities. Use the elastic band to achieve a secure and comfortable fit. This attachment method is designed to be both durable and easy to use. Always ensure the headlamp is properly attached before use to ensure reliable performance. Properly attaching the headlamp is crucial for maximizing its features and ensuring it stays secure during use. Use the elastic band to keep the headlamp stable and firmly in place. This attachment method is designed to be both durable and easy to use. Always ensure the headlamp is properly attached before engaging in any activity. This ensures it remains secure and provides optimal illumination. Properly attaching the headlamp to your harness or helmet is essential for both safety and functionality. Use the elastic band to achieve a secure and comfortable fit. This method is both convenient and effective, ensuring your headlamp stays in place during any activity. Always follow the manufacturer’s instructions for proper attachment to ensure optimal performance. Properly attaching the headlamp ensures it remains stable and secure, providing reliable illumination. Use the elastic band to keep the headlamp firmly in place. This method is both convenient and effective, ensuring your headlamp stays secure during any activity. Always ensure the headlamp is properly attached before use to avoid any potential issues. Properly attaching the headlamp to your harness or helmet ensures it stays in place, even during rigorous activities. Use the elastic band to achieve a secure and comfortable fit. This attachment method is designed to be both durable and easy to use. Always ensure the headlamp is properly attached before use to ensure reliable performance. Properly attaching the headlamp is crucial for maximizing its features and ensuring it stays secure during use. Use the elastic band to keep the headlamp stable and firmly in place. This attachment method is designed to be both durable and easy to use. Always ensure the headlamp is properly attached before engaging in any activity. This ensures it remains secure and provides optimal illumination. Properly attaching the headlamp to your harness or helmet is essential for both safety and functionality. Use the elastic band to achieve a secure and comfortable fit. This method is both convenient and effective, ensuring your headlamp stays in place during any activity. Always follow the manufacturer’s instructions for proper attachment to ensure optimal performance. Properly attaching the headlamp ensures it remains stable and secure, providing reliable illumination. Use the elastic band to keep the headlamp firmly in place. This method is both convenient and effective, ensuring your headlamp stays secure during any activity. Always ensure the headlamp is properly attached before use to avoid any potential issues. Properly attaching the headlamp to your harness or helmet ensures it stays in place, even during rigorous activities. Use the elastic band to achieve a secure and comfortable fit. This attachment method is designed to be both durable and easy to use. Always ensure the headlamp is properly attached before use to ensure reliable performance. Properly attaching the headlamp is crucial for maximizing its features and ensuring it stays secure during use. Use the elastic band to keep the headlamp stable and firmly in place. This attachment method is designed to be both durable and easy to use. Always ensure the headlamp is properly attached before engaging in any activity. This ensures it remains secure and provides optimal illumination. Properly attaching the headlamp to your harness or helmet is essential for both safety and functionality. Use the elastic band to achieve a secure and comfortable fit. This method is both convenient and effective, ensuring your headlamp stays in place during any activity. Always follow the manufacturer’s instructions for proper attachment to ensure optimal performance. Properly attaching the headlamp ensures it remains stable and secure, providing reliable illumination. Use the elastic band to keep the headlamp firmly in place. This method is both convenient and effective, ensuring your headlamp stays secure during any activity. Always ensure the headlamp is properly attached before use to avoid any potential issues. Properly attaching the headlamp to your harness or helmet ensures it stays in place, even during rigorous activities. Use the elastic band to achieve a secure and comfortable fit. This attachment method is designed to be both durable and easy to use. Always ensure the headlamp is properly attached before use to ensure reliable performance. Properly attaching the headlamp is crucial for maximizing its features and ensuring it stays secure during use. Use the elastic band to keep the headlamp stable and firmly in place. This attachment method is designed to be both durable and easy to use. Always ensure the headlamp is properly attached before engaging in any activity. This ensures it remains secure and provides optimal illumination. Properly attaching the headlamp to your harness or helmet is essential for both safety and functionality. Use the elastic band to achieve a secure and comfortable fit. This method is both convenient and effective, ensuring your headlamp stays in place during any activity. Always follow the manufacturer’s instructions for proper attachment to ensure optimal performance. Properly attaching the headlamp ensures it remains stable and secure, providing reliable illumination

Mounting on Packs and Waistbelts

The Black Diamond headlamp can be securely mounted on packs and waistbelts using the elastic band. Simply wrap the band around the webbing of your pack or waistbelt, ensuring a snug fit. This method provides stability and keeps the light in place during outdoor activities. The elastic band ensures a secure attachment without damaging your gear. This feature allows for versatile use on various types of outdoor equipment, making it convenient for climbers, hikers, and skiers. Properly mounting the headlamp on your pack or waistbelt ensures reliable illumination when needed.

Battery Care and Management

Proper battery care ensures optimal performance of your Black Diamond headlamp. Always use rechargeable lithium-ion batteries for extended lifespan and reliability in various conditions.

Rechargeable Lithium-Ion Battery

Your Black Diamond headlamp is powered by a high-performance rechargeable lithium-ion battery, designed for long-lasting reliability in extreme conditions. Regular charging via USB ensures consistent power delivery. Battery life varies based on brightness settings and environmental factors. To maintain optimal performance, avoid extreme temperatures and fully discharge the battery before recharging. Proper care extends lifespan, ensuring your headlamp remains a dependable companion for climbing, skiing, and outdoor adventures. Always follow recommended charging practices to preserve battery health and functionality over time.

Safety Precautions and Warnings

Best Practices for Battery Replacement

Always power off your headlamp before replacing batteries to prevent electrical shorts. Open the battery compartment and carefully remove the old batteries. Inspect the contacts for corrosion or debris and clean them if necessary. Insert new batteries ensuring correct orientation, as indicated by the polarity markers. Use only high-quality, rechargeable lithium-ion batteries recommended by Black Diamond for optimal performance. Avoid mixing old and new batteries to maintain consistent power output. Properly dispose of used batteries and store spares in a cool, dry place to prolong their lifespan. Following these steps ensures reliable operation and extends battery life. Always refer to the user manual for specific guidelines.

Posts navigation

1 2 3
Scroll to top