Open post

long eared bunny crochet pattern free pdf

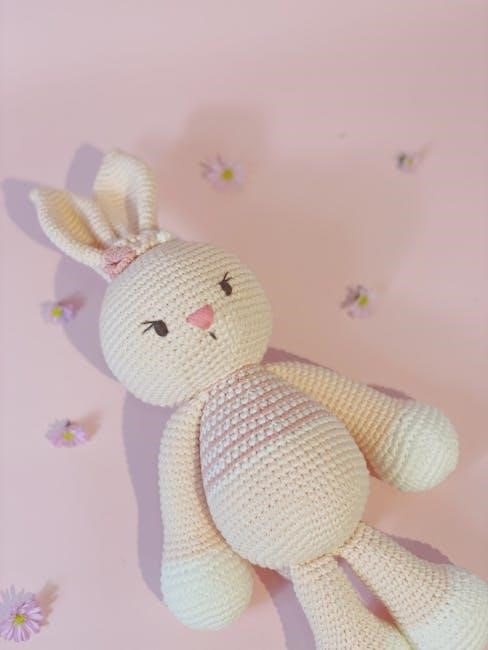
Discover adorable long-eared bunny crochet patterns‚ perfect for creating cute amigurumi toys․ These designs‚ available as free PDF downloads‚ are great for gifts‚ Easter decor‚ or cuddly companions․

Materials and Tools Needed for the Project

Gather essential materials like plush-type yarn‚ fiber fill for stuffing‚ and basic crochet tools such as hooks‚ scissors‚ and tapestry needles to create your long-eared bunny․

2․1․ Yarn Selection for a Plush Bunny

Choose soft‚ plush-type yarn for a cuddly texture‚ such as Stylecraft Sweet Dreams DK or similar fibers․ These yarns ensure a soft‚ huggable finish for your long-eared bunny‚ perfect for amigurumi toys․

2․2․ Crochet Hook Sizes

For a long-eared bunny‚ use a 3mm or 3․5mm crochet hook to achieve the right texture and size․ These sizes work best with medium-weight yarns‚ ensuring your bunny is soft and cuddly․ Adjust the hook size based on the yarn you choose to maintain the desired stitch tension․

2․3․ Stuffing Materials

Use polyester fiberfill for a soft‚ cuddly bunny․ Stuff firmly but evenly to maintain shape‚ ensuring ears and limbs hold their form․ Avoid over-stuffing to keep the bunny huggable․ For added stability‚ a small bag of polyester pellets can be placed inside before stuffing․

Basic Crochet Techniques for Beginners

Master essential skills like holding the hook‚ yarn tension‚ and basic stitches․ Practice single crochet and slip stitch to build confidence․ Start with simple projects to refine your technique․

3․1․ Understanding Crochet Stitches

Mastering basic crochet stitches is essential for creating a long-eared bunny․ Start with the single crochet (sc) for a smooth texture‚ and the half double crochet (hdc) for slightly taller stitches․ The slip stitch (sl st) is used to join rounds seamlessly․ Practice these stitches to ensure even tension‚ which is critical for the bunny’s shape and structure‚ especially the iconic long ears․

3․2․ Sewing Amigurumi Parts Together

Sewing amigurumi parts together requires precision and care․ Use a tapestry needle and the yarn tail to whipstitch pieces like ears‚ arms‚ and legs securely to the body․ Align parts carefully for a balanced look‚ ensuring tight stitches to prevent gaps․ For accuracy‚ pin components in place before sewing․ This step brings your long-eared bunny to life‚ creating a cohesive and adorable design from separate crocheted elements․

3․3․ Stuffing the Bunny Properly

Stuffing your long-eared bunny evenly is essential for its shape and appearance․ Use fiber fill to fill the body firmly but not overly‚ ensuring a soft yet defined form․ Stuff the ears lightly to maintain their iconic floppiness․ Use a chopstick or pencil tip to push stuffing into tight spaces․ Once stuffed‚ sew openings securely to keep the filling in place‚ bringing your bunny to life as a cuddly‚ adorable toy․

Design Features of a Long Eared Bunny

The long-eared bunny features iconic‚ floppy ears that add charm to its design․ Its soft‚ plush texture and endearing facial expression make it a beloved crochet creation for all occasions․

4․1․ Creating the Iconic Long Ears

The long ears are a defining feature‚ typically crocheted using plush yarn for softness․ Patterns often include tips for achieving the perfect flop‚ such as using curly yarn or specific stitching techniques․ Some designs offer photo tutorials to guide beginners in shaping and attaching the ears securely to the bunny’s head for an authentic‚ charming look․

4․2․ Crafting the Face and Expression

Crafting the bunny’s face involves simple embroidery or stitching techniques․ Use embroidery floss to create expressive eyes and a nose‚ while a few stitches can form a charming mouth․ Some patterns suggest using black yarn for details‚ ensuring a cute and personalized expression․ Tips for aligning features and achieving symmetry are often included in free PDF guides for beginners․

Popular Occasions for Making a Long Eared Bunny

Long-eared bunnies are perfect for Easter gifts‚ baby showers‚ or as cozy companions for special occasions․ They also make charming decor items for spring celebrations․

5․1․ Easter-themed Bunnies

Easter-themed long-eared bunnies are a delightful way to celebrate the holiday․ With their floppy ears and cuddly designs‚ these patterns are perfect for creating Easter gifts or decorations․ Many free PDF patterns feature spring-inspired colors and styles‚ making them ideal for holiday-themed crochet projects․ They can be customized with curly yarn for a festive touch‚ ensuring each bunny is uniquely charming․

5․2․ Gift Ideas for Special Occasions

Long-eared bunnies make thoughtful gifts for birthdays‚ baby showers‚ or holidays․ Their charm and versatility ensure they suit any occasion․ Customize them with personalized touches like colorful yarn or embellishments to make each gift unique․ Free PDF patterns are readily available‚ allowing you to create heartfelt presents for loved ones effortlessly․ Perfect for sharing joy and warmth on special days․

Sizes and Variations of the Pattern

Long-eared bunny patterns come in various sizes‚ from tiny decorations to large cuddly toys․ Choose the perfect size for your project‚ whether it’s a small charm or a big companion‚ ensuring versatility and personalization for any desired use․

6․1․ Miniature Bunnies for Decor

Miniature long-eared bunnies are perfect for decorative purposes‚ adding charm to any space․ These small‚ cute designs are ideal for Easter decorations‚ gift toppers‚ or shelf displays․ Their compact size makes them quick to crochet‚ and they can be customized with various yarn colors to match your home decor or seasonal themes․ Free PDF patterns make it easy to create these adorable mini bunnies for any occasion․

6․2․ Large Bunnies for Cuddly Toys

Larger long-eared bunnies make perfect cuddly toys‚ offering comfort and charm․ These soft‚ plush designs are ideal for snuggling and gifting․ Using chunky yarns or thicker hooks creates a cozy texture‚ while floppy ears add extra appeal․ Free PDF patterns often include tips for stuffing and shaping to ensure your bunny is extra huggable and durable‚ making it a delightful companion for all ages․

Free Resources and Downloads

Explore a variety of free resources and downloadable PDFs for long-eared bunny crochet patterns․ Find adorable designs on platforms like Ravelry and enjoy crafting cute amigurumi bunnies easily․

7․1․ Free PDF Patterns Available Online

Find a wide range of free PDF patterns for long-eared bunnies online․ Platforms like Ravelry and Etsy offer downloadable designs‚ perfect for Easter or gifts․ These patterns often include step-by-step instructions and photos‚ making them ideal for both beginners and experienced crocheters․ Whether you’re crafting for decor or as a cuddly toy‚ these resources provide everything needed to create adorable bunnies with ease․

7․2․ Printable Versions for Convenience

Printable versions of long-eared bunny crochet patterns offer ease and convenience․ Many free PDFs are available on platforms like Ravelry and Etsy‚ allowing you to download and print them instantly․ These patterns are often ad-free and formatted for clarity‚ making them perfect for crafting on the go․ They ensure a seamless crocheting experience‚ whether you’re a beginner or an experienced crafter․

Step-by-Step Crochet Guide

This guide provides a detailed‚ easy-to-follow approach for crafting a long-eared bunny․ It includes clear instructions‚ photos‚ and tips to ensure a perfect finish‚ even for beginners․

8․1․ Detailed Instructions for Beginners

Start with a magic ring‚ then work in rounds using single crochet stitches․ Follow step-by-step guidance on shaping ears‚ body‚ and limbs․ Ensure tight stitching for proper shaping․ Use a stitch marker to track rounds and maintain consistent tension․ Perfect for Easter or as a heartfelt gift‚ these instructions are designed to help beginners craft a charming long-eared bunny with ease․

8․2․ Photo Tutorials for Complex Steps

Photo tutorials provide visual guidance for intricate steps like ear shaping and assembly․ Close-up images illustrate how to seamlessly join parts and achieve the desired floppy ear texture․ These visuals‚ often included in free PDF patterns‚ ensure clarity and confidence‚ especially for beginners tackling complex stitches or assembly techniques for their long-eared bunny projects․

Customization Ideas

Personalize your long-eared bunny with unique yarn colors‚ bows‚ or buttons․ These touches make each crochet creation distinct‚ perfect for gifts or home decor․

9․1․ Adding Personalized Embellishments

Add a personal touch with buttons‚ bows‚ or patches to make your long-eared bunny unique․ Use embroidery for facial features or appliques for a custom look․ These small details enhance the charm‚ making each bunny special․ Find inspiration in free PDF patterns or create your own designs for a one-of-a-kind gift or keepsake․

9․2․ Using Different Yarn Colors

Experiment with various yarn colors to create unique long-eared bunnies․ Choose soft pastels for a classic look or vibrant hues for a modern twist․ Seasonal colors like red for Christmas or pink for Valentine’s Day add festive charm․ Metallic yarns can also add a luxurious touch․ Mix-and-match colors or opt for multi-tonal yarns to make each bunny truly one-of-a-kind․

Gifting and Presentation Tips

Present your long-eared bunny as a unique gift‚ perfect for Easter‚ birthdays‚ or special occasions․ Use decorative boxes‚ ribbons‚ or personalized notes for a charming touch․ Pairing with other crochet items creates a thoughtful set‚ making it an extra-special present for loved ones․

10․1․ Packaging Ideas for Gifts

Enhance your gift-giving with creative packaging ideas․ Use decorative boxes‚ tissue paper‚ or fabric wraps to add a personal touch․ Include a handwritten note or a small card with care instructions․ For a seasonal feel‚ incorporate ribbons or bows in pastel colors․ Consider adding a mini version of the free PDF pattern as a thoughtful bonus for the recipient to create their own bunny․

10․2․ Creating a Set with Other Crochet Items

Elevate your gift by pairing the long-eared bunny with complementary crochet items․ Consider adding matching eggs‚ baskets‚ or flowers for a themed Easter set․ Include a tiny blanket or carrot accessory to enhance the charm․ These additions create a cohesive collection‚ making your gift even more special and thoughtfully curated; Use free PDF patterns to explore these extras and craft a delightful set․

Troubleshooting Common Issues

Troubleshoot common issues like uneven stitches or misshapen ears․ Adjust tension for stitches and reshape ears while stuffing․ Refer to free PDF guides for detailed fixes․

11․1․ Fixing Uneven Stitches

Uneven stitches can ruin the bunny’s appearance․ Check your tension and hook size․ If stitches are too loose or tight‚ adjust accordingly․ Use a stitch marker to stay on track․ Rip back and re-crochet uneven rows․ Ensure consistent tension for a professional finish․ Refer to free PDF guides for step-by-step solutions to common stitching issues․

11․2․ Adjusting Ear Shapes

If the bunny’s ears appear misshapen‚ gently reshape them while stuffing is still accessible․ Adjust the crochet stitches or add more stuffing for definition․ Use a tapestry needle to tighten loose stitches․ For floppy ears‚ try increasing the number of decrease rounds․ Refer to your free PDF pattern for specific tips on achieving the perfect long-eared shape․

With a free PDF pattern‚ crafting a long-eared bunny is easy and fun․ Perfect for Easter or gifts‚ this project is both rewarding and adorable for crafters of all levels․

12․1․ Encouragement to Try the Pattern

Don’t hesitate to try this charming long-eared bunny crochet pattern! It’s a delightful project for crafters of all skill levels‚ offering a sense of accomplishment and joy․ Whether for Easter‚ gifts‚ or home decor‚ these bunnies bring warmth and personality․ With free PDF patterns available‚ you can easily start creating․ Embrace the creativity and happy crocheting!

12․2․ Resources for Further Learning

Enhance your crochet journey with resources like Ravelry‚ Pinterest‚ and YouTube‚ offering free PDF patterns and tutorials․ Explore step-by-step guides‚ video demonstrations‚ and crochet communities for tips and inspiration․ These platforms provide endless opportunities to refine your skills and discover new techniques‚ ensuring your long-eared bunny projects turn out perfectly every time․

Open post

elenos transmitter 500w manual pdf free download

The Elenos 500W transmitter is a state-of-the-art FM broadcasting solution, renowned for its reliability and high performance․ Compact, energy-efficient, and designed for professional radio applications, it delivers exceptional audio quality and stability․ Ideal for broadcasters seeking a robust and versatile transmitter, the Elenos 500W model is widely praised for its durability and advanced features, making it a top choice in the industry․

Overview of the Elenos 500W Transmitter and Its Importance

The Elenos 500W transmitter is a compact and energy-efficient FM broadcasting solution, operating within the 87․5-108 MHz frequency range․ Its stable power output ensures high-quality audio transmission, making it ideal for professional radio applications․ Designed for reliability and durability, this transmitter is a critical component in modern broadcasting systems․ The availability of its manual in PDF format is essential for users to understand installation, operation, and maintenance procedures, ensuring optimal performance and longevity․ As a leader in FM transmitter technology, Elenos continues to deliver innovative solutions that meet the demands of today’s broadcasting industry․

Key Features of the Elenos 500W Transmitter

The Elenos 500W transmitter operates in the 87․5-108 MHz band with direct F3 modulation, ensuring stable power output of +/- 0․1 dB․ Its compact design and durability make it ideal for professional broadcasting, offering reliable performance and high-quality audio transmission․

Operating Band, Modulation Type, and Power Output Stability

The Elenos 500W transmitter operates within the 87․5-108 MHz frequency band, ideal for FM radio broadcasting․ It employs direct F3 modulation, ensuring precise and efficient signal transmission․ The unit maintains power output stability of +/- 0․1 dB, delivering consistent performance and minimizing signal fluctuations․ These features, combined with its robust design, make the Elenos 500W transmitter a reliable choice for professional broadcasters seeking high-quality audio and stable operation in demanding environments․

Why You Need the Elenos 500W Transmitter Manual

The manual provides essential instructions for proper installation, operation, and maintenance, ensuring optimal performance and troubleshooting guidance to maximize the transmitter’s efficiency and longevity․

Importance of Proper Installation, Operation, and Maintenance

Proper installation, operation, and maintenance are crucial for ensuring the Elenos 500W transmitter functions optimally․ The manual provides detailed steps for setting up the device correctly, configuring its parameters, and performing routine checks․ This guidance helps prevent technical issues and ensures reliable broadcasting․ Improper handling can lead to reduced performance, damage, or safety risks․ By following the manual’s instructions, users can avoid common pitfalls, extend the transmitter’s lifespan, and maintain high-quality audio output․ Regular maintenance also helps identify and address potential problems early, safeguarding your investment and ensuring uninterrupted service․

Benefits of Downloading the Elenos 500W Manual

Downloading the Elenos 500W manual provides troubleshooting tips, clear instructions, and ensures optimal performance․ It offers instant access to detailed guides for installation, operation, and maintenance, enhancing efficiency and reliability․

Troubleshooting Tips and Clear Instructions for Optimal Performance

The Elenos 500W manual offers comprehensive troubleshooting tips to quickly identify and resolve common issues, ensuring uninterrupted broadcasting․ With clear, step-by-step instructions, users can optimize transmitter performance, adjust settings, and maintain reliability․ Detailed diagrams and technical specifications guide operators through complex configurations, while error codes and solutions simplify diagnostics․ The manual also provides insights into power supply stability, modulation adjustments, and frequency calibration, empowering users to achieve peak efficiency․ By following the guidelines, broadcasters can minimize downtime and ensure high-quality audio transmission, making the Elenos 500W a dependable choice for professional radio applications․

How to Download the Elenos 500W Manual for Free

Visit the official Elenos support website, select the appropriate category, and download the PDF manual instantly․ No signup required—access troubleshooting tips and clear instructions for free․

Step-by-Step Guide to Accessing the PDF Manual

To download the Elenos 500W transmitter manual for free, visit the official Elenos support website․ Navigate to the “Manuals” section and select the appropriate category for your transmitter model․ Choose the “ETG 500” or “ETG 500․1” option from the list․ Click on the PDF link to initiate the download․ No registration or signup is required—access the manual instantly․ Ensure your device has a PDF reader installed to view the document․ The manual includes detailed instructions, troubleshooting tips, and technical specifications to help you optimize your transmitter’s performance․ Download now and start using your Elenos 500W transmitter efficiently․

Technical Specifications of the Elenos 500W Transmitter

The Elenos 500W transmitter operates on 87․5-108 MHz with direct F3 modulation, ensuring ±0․1 dB power stability․ Its compact design measures 48․5 x 45․5 x 13․5 cm․

Dimensions, Frequency Range, and Power Supply Details

The Elenos 500W transmitter measures 48․5 x 45․5 x 13․5 cm, making it compact and space-efficient․ It operates within the 87․5-108 MHz frequency range, ideal for FM broadcasting․ The transmitter is designed with a robust power supply system, supporting 90-264V AC input for global compatibility․ Its high-efficiency design ensures minimal power consumption while maintaining stable output․ Built-in monitoring and protection circuits safeguard against overload and overheating, ensuring reliable performance․ These specifications make the Elenos 500W transmitter a versatile and dependable choice for professional radio applications, combining power, efficiency, and durability in a compact form factor․

Troubleshooting Common Issues

Resolve issues like power supply problems, overheating, or frequency instability by checking connections and ensuring proper ventilation․ Consult the manual for detailed diagnostic steps and solutions․

Identifying and Resolving Frequently Encountered Problems

Common issues with the Elenos 500W transmitter include power supply malfunctions, overheating, and frequency instability․ Users can resolve these by checking connections, ensuring proper ventilation, and referring to the manual’s diagnostic guides․ The manual provides step-by-step solutions for troubleshooting, such as resetting the system or replacing faulty components․ Additionally, error codes are explained in detail, helping users identify root causes quickly․ Regular maintenance, like cleaning filters and updating firmware, can prevent many issues․ By following the manual’s instructions, users can restore optimal performance and minimize downtime effectively․

Safety Precautions and Guidelines

The Elenos 500W transmitter requires careful handling of high voltages and proper ventilation to prevent overheating․ Always follow the manual’s safety guidelines to avoid accidents and ensure reliable operation․ Posting first aid instructions and providing clear emergency procedures are essential for safe equipment management․

Essential Safety Measures for Handling the Transmitter

Handling the Elenos 500W transmitter requires strict adherence to safety protocols to avoid accidents․ Always disconnect the power supply before performing maintenance or repairs․ Use insulated tools to prevent electrical shocks, and ensure proper ventilation to avoid overheating․ Never overload the system, as this can lead to component failure․ Post clear first aid instructions in the equipment room and provide emergency contact information․ Regularly inspect cables and connections for damage․ Ensure all personnel are trained on safety procedures and adhere to the guidelines outlined in the manual for optimal performance and reliability․

Comparing the Elenos 500W with Other Models

The Elenos 500W transmitter stands out for its compact design and low energy consumption, offering superior reliability compared to similar models in its power range․

Understanding the Unique Features and Advantages

The Elenos 500W transmitter excels with its direct F3 modulation and stable power output, ensuring consistent performance across its 87․5-108 MHz operating range․ Its compact dimensions (48․5 x 45․5 x 13․5 cm) and lightweight design make it ideal for space-constrained environments․ The transmitter’s energy-efficient operation reduces power consumption while maintaining high audio quality․ Advanced features like power output stability of ±0․1 dB and robust construction ensure reliability in professional broadcasting․ These advantages, combined with its user-friendly interface, make the Elenos 500W a preferred choice for broadcasters seeking a reliable and high-performance solution․ Its manual further enhances usability, providing clear guidance for optimal operation․

User Reviews and Feedback

Users have positively reviewed the Elenos 500W transmitter, praising its reliability, compact design, and high performance․ The manual is deemed essential for smooth operation and troubleshooting․

Real-World Experiences and Recommendations

Many broadcasters highlight the Elenos 500W transmitter’s reliability and performance in real-world applications․ Users emphasize the importance of the manual for proper setup and troubleshooting․ Positive feedback includes praise for its compact design, energy efficiency, and stable output․ Professionals recommend registering for a free Elenos account to access exclusive downloads and support․ The transmitter’s durability and high-quality audio output make it a favorite for small to medium-sized radio stations․ Overall, the Elenos 500W is a cost-effective, user-friendly solution for FM broadcasting needs, backed by comprehensive documentation and reliable customer support․

Elenos continues to innovate, ensuring the 500W transmitter remains a top choice for broadcasters․ Stay informed about updates and support by visiting the official Elenos website regularly․

Staying Informed About New Releases and Support

To ensure optimal performance and stay updated with the latest advancements, regularly check the official Elenos website for new transmitter releases and support updates․ Elenos frequently releases updated manuals, firmware, and technical guides to enhance functionality and address user needs․ Subscribers to their newsletter or registered users receive priority access to these resources․ Additionally, the Elenos support portal offers troubleshooting guides, FAQs, and downloadable PDF manuals for the 500W transmitter․ Engaging with their customer support team or online forums can also provide valuable insights and solutions․ By staying informed, users can maximize their transmitter’s potential and benefit from Elenos’ commitment to innovation and reliability․

Open post

mysteries for students to solve pdf free

Engage students with intriguing mysteries that sharpen critical thinking and problem-solving skills. Free PDF resources offer captivating cases, riddles, and brain teasers, making learning interactive and fun for all ages.

Why Mystery Solving is Engaging for Students

Mystery solving captivates students by immersing them in intriguing scenarios that spark curiosity and creativity. Solving mysteries requires active thinking, making it an engaging way to develop critical thinking and analytical skills. Students are drawn to the thrill of uncovering hidden clues, piecing together puzzles, and revealing unexpected outcomes.

The interactive nature of mysteries allows students to take on detective roles, fostering a sense of ownership and excitement. Whether through free PDF resources or classroom activities, mysteries cater to diverse learning styles, encouraging collaboration and problem-solving. The process of unraveling a mystery builds confidence and satisfaction, making it a powerful tool for educational engagement.

How Mysteries Enhance Critical Thinking and Problem-Solving Skills

Mysteries challenge students to analyze complex scenarios, evaluate clues, and form logical conclusions. By solving mysteries, students develop deductive reasoning and analytical skills, as they must carefully consider each piece of information to uncover the truth. This process fosters critical thinking by encouraging students to question assumptions and explore multiple perspectives.

The problem-solving aspect of mysteries requires students to organize thoughts, identify patterns, and eliminate red herrings. This intellectual exercise enhances their ability to approach challenges methodically and think creatively; Additionally, mysteries often involve teamwork, as students collaborate to discuss clues and theories, further refining their communication and problem-solving abilities.

Popular Free PDF Resources for Student Mysteries

Discover free PDFs filled with engaging mysteries, riddles, and brain teasers designed for students. These resources offer captivating cases and puzzles to challenge young detectives of all ages.

Top Websites Offering Free Mystery PDFs

Several websites provide free mystery PDFs designed for students, offering a variety of cases, riddles, and puzzles. These resources cater to different age groups and skill levels, ensuring engaging and educational experiences. Popular options include downloadable mystery stories, logic games, and detective activities. Websites like High Rocks and educational platforms offer minute mysteries, perfect for quick problem-solving exercises. Additionally, some sites feature interactive mysteries, such as murder scenarios with clues for students to solve. These resources are ideal for classrooms or home use, fostering critical thinking and teamwork while making learning fun and interactive.

Minute Mysteries and Quick Puzzle Activities

Minute mysteries are short, engaging activities designed to challenge students’ problem-solving skills. These quick puzzles present a scenario with clues, and participants can only ask yes or no questions to solve the mystery. Ideal for classrooms or on-the-go, they foster critical thinking and teamwork; For example, one popular minute mystery involves a goldfish found dead in water and glass, with the killer being a cat named Ted. These activities are simple to set up and can be completed in minutes, making them perfect for brainstorming sessions or icebreakers. They also enhance deductive reasoning and encourage creative thinking, providing an interactive way to develop essential skills in a fun and dynamic environment.

Recommended Mysteries for Different Age Groups

Discover age-appropriate mysteries for students, from simple puzzles for younger learners to complex cases for older students. Free PDFs offer engaging stories and brain teasers tailored to their skills.

Mysteries for Younger Students (Grades 4-6)

Engage younger students with age-appropriate mysteries designed to spark curiosity and develop problem-solving skills. Free PDF resources like The Mystery of the Stolen Ring and The Cornucopia Mystery offer simple yet captivating cases. These stories feature relatable scenarios, such as solving a theft or uncovering a hidden treasure, making them perfect for grades 4-6. Interactive activities, like the mystery box game, encourage students to ask yes or no questions to deduce the object inside. These exercises enhance critical thinking and deductive reasoning while fostering teamwork. Additionally, printable mystery stories and puzzles are available online, providing educators with easy-to-use materials to create an engaging learning environment. These resources are ideal for introducing young students to the world of mystery solving in a fun and educational way.

Advanced Mysteries for Older Students (Grades 7-12)

Challenge older students with complex mysteries that require advanced critical thinking and analytical skills. Free PDF resources like murder mystery games and logic puzzles are perfect for grades 7-12. Stories such as A Study in Charlotte and The Mystery of the Man in the Dark involve intricate plots and moral dilemmas, encouraging deeper analysis. These mysteries often feature multi-layered clues and unexpected twists, promoting deductive reasoning and teamwork. Additionally, printable activities like Whodunit games and crime-solving worksheets are available online, offering engaging ways to develop problem-solving abilities. These advanced mysteries not only entertain but also prepare students for more challenging academic and real-world scenarios, fostering a love for detective work and analytical thinking.

Interactive Mystery Activities for the Classroom

Engage students with mystery boxes containing secret objects. They ask yes/no questions to deduce what’s inside, fostering critical thinking and deduction skills. Perfect for all ages!

Mystery Boxes and Yes/No Question Games

Mystery boxes and yes/no question games are engaging activities that challenge students to solve puzzles using limited information. Teachers bring a box with a secret object, and students ask yes/no questions about its size, shape, or function to guess what’s inside. This activity fosters critical thinking, deduction, and problem-solving skills. It encourages teamwork and communication as students collaborate to narrow down possibilities. The game is simple to set up and works well in various classroom settings. Mystery boxes can be adapted for different age groups, making them a versatile tool for promoting analytical reasoning. These activities also make learning fun, keeping students motivated and eager to uncover the mystery!

Group Detective Games and Team-Building Exercises

Group detective games and team-building exercises are excellent ways to foster collaboration and problem-solving skills among students. These activities involve students working together to solve complex mysteries, often by analyzing clues, interviewing characters, and piecing together evidence. Roles such as detectives, witnesses, and suspects encourage creativity and engagement. Teamwork is essential as students share insights and theories to uncover the truth. These exercises not only enhance analytical thinking but also strengthen communication and interpersonal skills. Many free PDF resources offer pre-designed scenarios, making it easy for educators to implement these games in the classroom. They are ideal for promoting unity and critical thinking while making learning fun and interactive for students of all ages.

Educational Benefits of Solving Mysteries

Solving mysteries enhances analytical and deductive reasoning, fostering problem-solving abilities, creativity, and critical thinking in students, preparing them for real-world challenges effectively.

Improving Analytical and Deductive Reasoning

Solving mysteries challenges students to think logically and make connections between clues, enhancing their analytical and deductive reasoning skills. By evaluating evidence, identifying patterns, and eliminating irrelevant information, students develop a systematic approach to problem-solving. Mysteries require critical thinking, as learners must piece together fragmented details to uncover solutions. This process mirrors real-world scenarios, preparing students to tackle complex challenges. Engaging with mysteries also fosters creativity, as students consider multiple possibilities and outcomes. Over time, these activities refine their ability to approach problems methodically, making them more effective thinkers and learners. The logical structure of mysteries helps students build confidence in their reasoning abilities, essential for academic and lifelong success.

Enhancing Teamwork and Communication Skills

Solving mysteries in groups fosters teamwork and communication, as students collaborate to uncover solutions. By sharing clues, discussing theories, and assigning roles, learners develop essential interpersonal skills. Mystery activities encourage active listening, clear expression of ideas, and respectful dialogue. Students learn to rely on one another’s strengths, building trust and camaraderie. These interactions refine their ability to work cohesively toward a common goal. Mystery-solving also enhances problem-solving dynamics, teaching students to value diverse perspectives and approaches. Through teamwork, they gain confidence in their ability to contribute effectively, preparing them for real-world collaboration. These shared experiences create a supportive environment where communication flourishes and teamwork thrives, benefiting students academically and socially.

Explore free PDF mysteries to engage students in problem-solving and teamwork. Visit websites like Highrocks.com for additional resources and activities that foster critical thinking and collaboration.

Final Thoughts on the Value of Mystery Solving

Mystery solving is a powerful tool for fostering critical thinking, creativity, and teamwork among students. By engaging with free PDF mysteries, students develop essential problem-solving skills while enjoying interactive learning experiences. These resources, ranging from quick puzzles to complex cases, cater to diverse age groups and skill levels, ensuring every student can participate. Activities like mystery boxes and yes/no question games encourage deductive reasoning and collaboration. The availability of free PDF downloads makes it easy for educators to incorporate these exercises into their curriculum. Ultimately, mystery solving transforms learning into an exciting adventure, preparing students to tackle real-world challenges with confidence and analytical minds.

Additional Free PDF Resources and Downloads

Explore a wide range of free PDF resources designed to challenge and entertain students. Websites like MysteryScience and Storytime Magazine offer interactive mysteries and puzzles tailored for various age groups. Downloadable activities such as Murder at the Museum and The Missing Heirloom provide immersive experiences for young detectives. These resources include printable mystery games, logic grids, and riddles to enhance problem-solving skills. Many PDFs are specifically designed for classroom use, offering structured lessons and group activities. Educators can also find themed mystery packs for holidays and special events. With these free downloads, students can engage in thrilling adventures while sharpening their analytical minds. Start your mystery-solving journey today with these easily accessible resources!

florida food truck requirements pdf

Operating a food truck in Florida requires licenses, permits, and adherence to health codes. Understanding the regulatory framework is crucial for smooth operations and legal compliance.

1.1 Understanding the Regulatory Framework

Florida’s food truck regulations are governed by state and local laws, including Chapter 500, F.S., and Chapter 5K-4, F.A.C. These rules ensure food safety, proper licensing, and operational standards. The Florida Department of Agriculture and Consumer Services (FDACS) and the Department of Business and Professional Regulation (DBPR) oversee compliance. Understanding these regulations is essential for legal operation and avoiding penalties.

Licenses and Permits Needed for Florida Food Trucks

A Mobile Food Permit from FDACS is essential, along with a business license and food safety compliance. Additional local permits may apply depending on the location.

2.1 State-Level Food Truck Licenses

To operate a food truck in Florida, you must obtain a Mobile Food Permit from the Florida Department of Agriculture and Consumer Services (FDACS). This permit ensures compliance with Chapter 500, Florida Statutes, and the 2017 FDA Food Code. A state-level license is mandatory for all mobile food establishments, and regular inspections are required to maintain compliance and ensure food safety standards are met.

2.2 Local Permits and Registrations

Local permits and registrations are essential for food truck operations in Florida. Cities like Palm Bay require adherence to local codes, such as Section 185.138, to ensure safety. While some areas may not charge fees, compliance with specific regulations is mandatory. Always check with local authorities for permits and registrations before operating to avoid penalties and ensure smooth business operations.

2.3 Special Event Permits

Special event permits are required for food trucks operating at temporary events in Florida. These permits ensure compliance with local health and safety regulations. Event organizers often require proof of licensure and insurance. Submit applications in advance, as approval processes vary. Failure to obtain necessary permits can result in fines or prohibited operation. Always verify requirements with local authorities before participating in events.

Food Safety and Health Regulations

Food trucks in Florida must comply with the 2017 FDA Food Code and maintain strict food safety standards. Proper food handling, storage, and waste disposal are mandatory to ensure public health safety.

3.1 Compliance with the 2017 FDA Food Code

Florida food trucks must comply with the 2017 FDA Food Code, ensuring proper food handling, storage, and waste disposal. Regular cleaning schedules, correct temperature controls, and employee health protocols are mandatory. Inspections by health officials verify adherence to these standards, protecting public health and safety. Compliance is non-negotiable to avoid penalties and maintain operational legitimacy;

3.2 Required Food Handling Certifications

Food truck staff in Florida must obtain Food Manager Certification for at least one person in charge, typically requiring an ANSI-accredited exam. All food handlers need Food Handler Certification, ensuring knowledge of safe food practices. These certifications are essential for passing health inspections and legally operating a food truck in Florida. Certificates must be displayed and renewed as required by the Florida Department of Agriculture and Consumer Services (FDACS).

Vehicle and Equipment Requirements

Florida food trucks must meet specific vehicle and equipment standards, including fire safety systems and proper food handling tools. Regular inspections ensure compliance with state health regulations. All trucks must be equipped with a functional fire extinguisher and a hood suppression system with current service tags, ensuring safety and operational readiness.

4.1 Mobile Food Establishment (MFE) Standards

Mobile Food Establishments (MFEs) in Florida must comply with Chapter 500, Florida Statutes, and Chapter 5K-4, Florida Administrative Code. They must adhere to the 2017 FDA Food Code and ensure proper food handling, storage, and preparation. Vehicles must be equipped with necessary safety equipment, such as fire suppression systems, and maintain cleanliness to meet health standards. Regular inspections are required to verify compliance with these regulations.

4.2 Fire Safety Equipment and Suppression Systems

Florida mandates that food trucks be equipped with functional fire safety equipment, including a hood suppression system and a portable fire extinguisher rated at least 3A-40BC. These systems must be inspected regularly, with current service tags visible. Proper maintenance and accessibility of fire safety devices are critical to ensure compliance with state and local fire codes, protecting both personnel and customers from potential hazards.

4.3 Vehicle Inspection and Maintenance

Regular vehicle inspections and maintenance are essential to ensure safety and compliance. Food trucks must undergo checks of engines, brakes, tires, and electrical systems. A current service tag for fire suppression systems is mandatory. The Mobile Food Dispensing Vehicle Plan Review Specification Worksheet outlines all necessary inspections and maintenance requirements to be completed before licensing, ensuring the vehicle meets all safety and operational standards.

Location and Operational Restrictions

Food trucks in Florida must operate in permitted locations and comply with local codes. Some cities require Conditional Use Permits for vending. Parking and storage regulations vary by jurisdiction, ensuring public safety and welfare.

5.1 Permitted Locations for Food Trucks

Food trucks in Florida must operate in permitted locations, adhering to local zoning laws. Some cities require Conditional Use Permits for vending. Wheel chocks are mandatory to prevent movement, and public seating inside trucks is prohibited. Parking and storage regulations vary by jurisdiction, ensuring compliance with safety and welfare standards.

5.2 Parking and Storage Regulations

Food trucks must park in designated areas and comply with local zoning laws. Storage of inactive trucks must follow specific regulations, ensuring they do not obstruct public spaces. Wheel chocks are required during operation to prevent movement. Trucks must be stored in approved facilities when not in use, maintaining adherence to safety and community standards.

Business Registration and Tax Requirements

Registering your food truck business in Florida requires a business license and compliance with state and local tax laws. Ensure proper sales tax reporting and obtain necessary permits for legal operation.

6.1 Obtaining a Business License

Obtaining a business license is a critical step for operating a food truck in Florida. This license, also known as a business tax receipt, ensures compliance with state and local tax regulations. Fees and requirements vary by jurisdiction, so check with local authorities. Some counties may require additional permits or registrations. Ensure all documentation is complete to avoid delays in launching your food truck business.

6.2 Sales Tax and Revenue Reporting

Florida food truck operators must collect and remit sales tax on all food and beverage sales. Accurate revenue reporting is essential to comply with state tax laws. Business owners must file periodic sales tax reports and maintain detailed financial records. Failure to meet these obligations may result in penalties. Ensure your business license includes proper tax registration to avoid compliance issues.

Plan Review and Approval Process

A plan review ensures your food truck meets Florida’s safety and sanitation standards, required for new, remodeled, or reopened vehicles after 18 months of closure.

7.1 When a Plan Review is Required

A plan review is necessary for new food trucks, remodeled vehicles, or those reopening after 18 months of closure. This process ensures compliance with sanitation and safety standards, verifying equipment layout and proper systems installation. Submit detailed plans, including equipment specifications and floor layouts, to the Florida Department of Agriculture and Consumer Services for approval before operations begin.

7.2 Submitting Plans for Inspection

Submit detailed plans, including a floor plan, equipment specifications, and fire suppression system details, to the Florida Department of Agriculture and Consumer Services. Use the Mobile Food Dispensing Vehicle Plan Review Specification Worksheet for guidance. Plans must be submitted via email to DHR.PlanReview@myfloridalicense.com for review. Ensure all documents are complete to avoid delays in the approval process.

Insurance and Liability Requirements

Food truck operators in Florida must carry general liability insurance and vehicle insurance. Ensure coverage meets state requirements to protect against accidents and business-related risks.

8.1 General Liability Insurance

Florida food truck operators must obtain general liability insurance to cover potential risks like customer injuries or property damage. This insurance protects against third-party claims and is essential for legal operation. Minimum coverage requirements vary, but it’s advisable to secure adequate limits to safeguard your business. Always verify insurance requirements with local authorities to ensure full compliance and avoid penalties.

8.2 Vehicle Insurance Requirements

Florida food truck operators must maintain vehicle insurance that meets state requirements. A valid registration with the Florida Department of Motor Vehicles is mandatory. Insurance must cover the truck and its equipment, with minimum liability coverage as specified by law. Additionally, fire safety equipment like hood suppression systems and portable extinguishers must have current service tags. Ensure your policy aligns with your business operations to avoid penalties;

Health Department Inspections

Regular inspections by the Florida Department of Health ensure compliance with food safety standards and the FDA Food Code. Maintain cleanliness and proper food handling practices to pass inspections successfully.

9.1 Preparing for Inspections

To prepare for health inspections, ensure your food truck meets all FDA Food Code standards. Clean and sanitize all surfaces, verify proper food storage temperatures, and maintain accurate food handling records. Ensure all food safety equipment, such as handwashing stations and waste disposal systems, is functional. Fire suppression systems must be inspected and accessible. Keep all required permits and certifications organized for review during inspections.

9.2 Common Violations and How to Avoid Them

Common violations include improper food storage, lack of handwashing facilities, and non-compliance with fire safety regulations. To avoid these, ensure all food is stored at correct temperatures, maintain a clean water supply for handwashing, and regularly inspect fire extinguishers. Stay updated on health codes and conduct staff training to prevent recurring issues during inspections.

Ongoing Compliance and Renewals

Maintaining compliance involves annual license renewals and staying updated on regulatory changes. Regularly inspect vehicles, ensure food safety standards, and keep financial records up to date to avoid penalties.

10.1 Annual License Renewal Process

Renewing your food truck license annually is essential. Submit a renewal application with required fees and updated documentation. Ensure your vehicle inspection and certifications are current. Some jurisdictions may require additional paperwork or health department approvals. Plan ahead to avoid operational disruptions and maintain compliance with Florida’s food truck regulations.

10.2 Staying Updated on Regulatory Changes

Regularly check the Florida Department of Agriculture and Consumer Services (FDACS) and Department of Business and Professional Regulation (DBPR) websites for updates. Subscribe to email newsletters and follow local health departments for changes in food truck regulations. Attend industry seminars or join food truck associations to stay informed and adapt to new requirements promptly.

Launching a food truck in Florida requires navigating licenses, health codes, and regulatory compliance. Stay informed and adapt to changes to ensure long-term success in this dynamic industry.

11.1 Summary of Key Requirements

Starting a food truck in Florida requires obtaining a Mobile Food Permit, complying with Chapter 500, F.S., and the 2017 FDA Food Code. Essential steps include securing a business license, meeting health and safety standards, passing inspections, and ensuring fire safety equipment is operational. Plan reviews are mandatory for new or remodeled units, and ongoing compliance with state and local regulations is crucial for sustained operation.

11.2 Final Tips for Starting a Food Truck Business in Florida

Research and comply with all state and local regulations. Ensure your truck meets health and safety standards, including fire suppression systems. Secure necessary licenses and permits before launching. Understand parking and location restrictions. Maintain proper equipment and pass regular inspections. Keep accurate financial records for tax purposes. Stay informed about regulatory updates to avoid violations and ensure long-term success.

Open post

amana gas stove manual

Welcome to the Amana Gas Stove Manual. This guide provides essential information for safe installation, operation, and maintenance of your appliance. It helps you understand features, troubleshoot issues, and optimize performance.

Installation Requirements and Setup

Ensure proper ventilation, a gas line connection, and electrical supply. Follow local codes and manufacturer guidelines for safe installation. Use a UL-approved gas detector and verify connections to avoid leaks.

Pre-Installation Requirements

Before installing your Amana gas stove, ensure the area is clear and well-ventilated. Check local building codes and regulations for specific requirements. Verify the gas line compatibility and ensure it is properly sized. Install a UL-approved gas shut-off valve and ensure the electrical supply meets the stove’s specifications. Use a UL or CSA-certified gas detector to monitor for leaks. Ensure the stove’s location allows for proper clearance from combustible materials. Consult a licensed professional if unsure about any aspect of the installation. Proper preparation ensures safety and optimal performance of your stove.

Step-by-Step Installation Guide

Begin by carefully unpacking the stove and ensuring all components are included. Place the stove on a level surface, ensuring it fits securely in the designated area. Connect the gas line to the stove, using a UL-approved connector and ensuring no leaks. Next, connect the electrical supply, verifying polarity and grounding according to the manual. Install the venting system, if applicable, following local codes. Once connections are made, test the burners and oven to ensure proper ignition. Check for gas leaks using a UL-approved detector. Finally, review the manual for any additional model-specific instructions and complete a final inspection to ensure all components are securely installed and functioning properly.

Safety Guidelines

Always use a UL-approved gas detector to ensure safety. Never leave cooking unattended and keep flammable materials away from the stove. Proper ventilation is essential to prevent carbon monoxide buildup.

General Safety Precautions

Ensure proper ventilation when using your Amana gas stove to prevent carbon monoxide buildup. Never leave cooking unattended, especially when children are present. Keep flammable materials, such as curtains or towels, away from the stove. Always turn off the burner when not in use and avoid using abrasive cleaners that could damage surfaces. Regularly inspect the burner caps and igniter for cleanliness and functionality. If you smell gas, immediately turn off the supply and open windows for ventilation. Never attempt to repair the stove yourself; contact a qualified technician. Use cookware with flat bottoms that fit securely on the burners to avoid accidents. Keep children away from the stove and never allow them to play with the controls. Ensure the oven door is fully closed during operation to maintain safe temperatures. By following these guidelines, you can ensure a safe and efficient cooking experience with your Amana gas stove.

Operating the Amana Gas Stove

Operate your Amana gas stove by igniting burners with the ignition button or match. Adjust flame height using control knobs. Preheat the oven by setting the temperature and waiting for the preheat indicator. Use the timer for precise cooking. Always ensure burners are fully lit within 4 seconds for safe operation.

Using the Surface Burners

To use the surface burners on your Amana gas stove, start by ensuring the burner caps and grates are properly aligned. Press and turn the burner knob to select the desired flame size. If your stove has electronic ignition, press the ignition button until the burner lights. For models without electronic ignition, use a match or lighter to ignite the burner once the gas is released. Always check that the flame lights within 4 seconds for safe operation.

Choose the right burner for your cooking needs—large burners for high heat and small burners for simmering. Adjust the flame height using the control knob for precise heat control. Always use cookware with flat bottoms for even heating and avoid oversized or warped pans that may disrupt heat distribution. Keep the cooking area clean and free of debris to ensure proper burner function. Never leave cooking unattended, especially when using high flames.

Operating the Oven

To operate the oven on your Amana gas stove, start by preheating it to the desired temperature using the control panel. Ensure the oven rack is in the correct position for your dish. Once preheated, place your food inside and close the door gently to maintain even heat distribution. Use the timer function to set cooking duration, and the oven will automatically shut off once the time expires.

For precise temperature control, use the “+” and “-” buttons to adjust the heat in 5°F increments. If you notice consistent temperature discrepancies, refer to the manual for calibration instructions. The oven also features a storage drawer for convenient storage of baking sheets or cookware. Always use oven mitts when handling hot dishes, and avoid opening the door excessively during cooking to maintain heat. If error codes appear, such as F1, F3, or F9, consult the troubleshooting section to address potential issues like faulty sensors or ignition problems. Proper use and maintenance ensure optimal performance and longevity of your Amana gas stove’s oven.

Troubleshooting Common Issues

Common issues with your Amana gas stove may include error codes like F1, F3, or F9, indicating problems with the control board or ignition system. If the oven fails to ignite, check the gas supply and burner cleanliness. For gas leaks, use a UL-approved detector and follow safety instructions if a leak is detected. Refer to the manual for specific solutions and ensure proper maintenance to prevent recurring issues.

Understanding Error Codes

Understanding error codes on your Amana gas stove is crucial for diagnosing and resolving issues promptly. Common error codes include F1, F3, and F9. The F1 code typically indicates a problem with the control board or its communication with other components. The F3 code suggests an issue with the oven temperature sensor, such as a faulty connection or malfunction. The F9 code points to a problem with the oven igniter or its circuit. These codes guide you to specific areas needing attention. Always refer to the manual for detailed explanations and solutions. Regular maintenance, such as cleaning burners and checking connections, can prevent many of these issues. If you encounter persistent errors, contact a certified technician. Additionally, always follow safety guidelines, especially if a gas leak is suspected, and use a UL-approved gas detector for detection. Proper troubleshooting ensures optimal performance and safety of your Amana gas stove.

Maintenance and Care

Regular cleaning of burners, igniter, and oven surfaces prevents food residue buildup. Use non-abrasive cleaners and avoid harsh chemicals. Ensure cookware has flat bottoms for even heat distribution. Refer to the manual for specific cleaning solutions and schedules to maintain optimal performance and safety of your Amana gas stove.

Cleaning the Stove and Oven

Regular cleaning is essential to maintain your Amana gas stove and oven’s performance and appearance. For the stove, wipe down surfaces daily with a non-abrasive cleaner and water. Remove grates and burners monthly, soaking them in warm soapy water before scrubbing. For tough stains, mix baking soda and water to create a paste and apply overnight. Avoid harsh chemicals that may damage finishes. The oven can be cleaned with a vinegar and water solution, or by running a self-cleaning cycle if available. Always refer to the manual for specific cleaning recommendations. Proper maintenance ensures longevity and prevents grease buildup, which can affect cooking efficiency. For exterior surfaces, use a mild detergent to avoid scratching. Cleaning racks and shelves in warm soapy water keeps them in good condition. Avoid using abrasive sponges or scouring pads, as they may damage enamel or stainless steel surfaces. Regular cleaning also helps prevent odors and ensures even heat distribution. Always unplug the stove before deep cleaning for safety.

Open post

7 habits of a highly effective teenager pdf

The 7 Habits of Highly Effective Teenagers by Sean Covey is a transformative guide tailored for teens, offering practical wisdom to navigate life’s challenges with confidence.

This book empowers teens to build strong relationships, make wise decisions, and cultivate a positive self-image, equipping them with essential life skills for lasting success.

Overview of the Book and Its Importance

Sean Covey’s The 7 Habits of Highly Effective Teenagers is a practical guide tailored for teens, offering timeless wisdom to navigate life’s challenges. The book provides actionable advice on improving self-image, building strong relationships, and making wise decisions. Its relatable approach and real-life applications make it an essential resource for teenagers seeking to enhance their personal growth and effectiveness in everyday life.

Why These Habits Matter for Teenagers

These habits empower teenagers to take control of their lives, fostering independence and self-confidence. By adopting proactive approaches and focusing on personal growth, teens can effectively manage challenges, build strong relationships, and make informed decisions. The habits provide a foundation for resilience, helping teenagers navigate the complexities of adolescence and prepare for future success in all areas of life.

Habit 1: Be Proactive

Being proactive means taking responsibility for your life and choices, focusing on things you can control, and making deliberate decisions to shape your future positively.

Understanding Personal Responsibility

Personal responsibility is about taking ownership of your actions, choices, and their consequences. It means recognizing that your life is shaped by the decisions you make, not by circumstances. By being proactive, you acknowledge that you have the power to choose how you respond to challenges, fostering self-confidence and accountability. This mindset helps you overcome excuses and focus on what you can control, leading to greater self-awareness and personal growth.

How to Take Control of Your Life

Taking control of your life begins with proactive choices and self-awareness. Identify what you can influence and focus on those areas, letting go of things beyond your control. Set clear, personal goals aligned with your values, and prioritize actions that align with them. Practice self-discipline, and accept responsibility for your decisions. By doing so, you empower yourself to create the life you envision and build a foundation for lasting success.

Habit 2: Begin with the End in Mind

Habit 2 teaches teens to envision their future, create a clear plan, and align their actions with their goals, giving them a sense of purpose and direction.

Setting Long-Term Goals

Setting long-term goals helps teenagers create a clear vision for their future, enabling them to focus on what truly matters. By defining their aspirations, teens can break larger objectives into smaller, manageable steps, fostering accountability and progress. This habit encourages them to prioritize meaningful achievements, aligning daily actions with their desired outcomes and cultivating a sense of purpose and direction in life.

Creating a Personal Mission Statement

A personal mission statement is a powerful tool that helps teenagers define their purpose and values. It serves as a compass, guiding decisions and actions toward meaningful goals. By reflecting on core values, strengths, and aspirations, teens can craft a statement that captures their uniqueness and vision for the future. Regularly revisiting and refining this statement ensures it remains relevant as they grow and evolve.

Habit 3: Put First Things First

Time management is crucial for teenagers to prioritize tasks effectively, ensuring they focus on what truly matters and avoid procrastination, leading to greater productivity and success.

Time Management for Teenagers

Effective time management helps teenagers prioritize tasks, balance schoolwork, and enjoy social life. By using planners or digital tools, teens can organize their schedules, avoid procrastination, and meet deadlines. Setting realistic goals and breaking tasks into smaller steps enhances productivity. Learning to say “no” to non-essential activities reduces stress and allows focus on what truly matters. Mastering this skill fosters independence, accountability, and a strong foundation for future success.

Prioritizing Tasks Effectively

Prioritizing tasks helps teenagers focus on what truly matters, reducing stress and increasing productivity. By identifying urgent vs. important activities and using tools like the Eisenhower Matrix, teens can allocate time wisely. Learning to delegate or eliminate non-essential tasks allows them to concentrate on high-impact activities. This skill fosters a sense of control, enabling teens to achieve their goals while maintaining balance in their lives.

Habit 4: Think Win-Win

Habit 4: Think Win-Win encourages teenagers to seek mutually beneficial solutions, fostering positive relationships and trust. It teaches the value of fairness and collaboration in all interactions.

Building Positive Relationships

Building positive relationships is fundamental to the “Think Win-Win” habit, fostering trust and cooperation. It encourages teenagers to value mutual benefit, ensuring everyone feels respected and heard. By practicing active listening and empathy, teens can understand others’ perspectives, leading to stronger, more meaningful connections. This approach helps create a supportive social network, where collaboration and fairness thrive, benefiting all parties involved in any interaction or situation. Relationships flourish when both sides feel valued and understood.

Understanding Mutual Benefit

Understanding mutual benefit is core to the “Think Win-Win” habit, emphasizing solutions where everyone gains. It teaches teens to seek outcomes that satisfy all parties, fostering trust and collaboration. By focusing on mutual benefit, teenagers learn to balance their needs with others’, building stronger relationships and a reputation for fairness. This mindset helps them succeed without compromising others’ well-being, creating a win-win scenario in all interactions.

Habit 5: Seek First to Understand, Then to Be Understood

This habit emphasizes active listening and empathy, encouraging teens to truly comprehend others’ perspectives before expressing their own. It fosters deeper connections and effective communication.

Active Listening Skills

Active listening is a powerful tool that involves fully engaging with others by maintaining eye contact, nodding, and asking clarifying questions. It helps teens understand diverse perspectives without interrupting or planning their response. By truly hearing others, they build trust, resolve conflicts, and foster meaningful connections. This skill, emphasized in Habit 5, enhances communication and empathy, leading to deeper relationships and mutual understanding.

Empathy in Communication

Empathy in communication involves understanding and sharing the feelings of others, fostering deep connections and trust. By putting themselves in others’ shoes, teens can navigate conflicts and misunderstandings more effectively. Habit 5 encourages teens to seek understanding before being understood, promoting compassion and openness. This approach strengthens relationships and helps teens build a supportive and inclusive environment around them, leading to meaningful interactions and personal growth.

Habit 6: Synergize

Synergy is about valuing differences and combining strengths to achieve something greater. Teens learn to collaborate, fostering creativity and mutual success, leading to stronger relationships and better solutions.

Collaboration and Teamwork

Collaboration and teamwork are essential for synergy, where diverse perspectives and strengths combine to achieve greater results. Teens learn to value differences and work together towards common goals.

By fostering open communication, active listening, and mutual respect, they create a positive environment for shared success, turning conflicts into opportunities for growth and understanding.

Combining Strengths for Success

Teenagers thrive when they recognize and utilize their unique strengths, complementing others’ abilities to achieve collective success. This synergy fosters innovation and problem-solving, turning individual talents into powerful team achievements.

By valuing diversity and collaboration, teens create environments where everyone’s contributions are maximized, leading to outcomes that exceed what one person could accomplish alone, driving both personal and shared success.

Habit 7: Sharpen the Saw

Habit 7: Sharpen the Saw focuses on self-care and personal growth. It emphasizes balancing physical, social, and emotional health to renew energy and achieve holistic well-being.

Self-Care and Personal Growth

Self-care and personal growth are essential for maintaining energy and motivation. By balancing physical, social, emotional, and spiritual well-being, teens can renew their strength and focus. Regular exercise, healthy eating, and adequate sleep are foundational. Additionally, activities like journaling, reflection, and connecting with loved ones foster emotional resilience. Investing time in personal growth ensures teens stay refreshed, motivated, and better equipped to handle life’s challenges effectively.

Balancing Physical, Social, and Emotional Health

Regular physical activity, a balanced diet, and sufficient sleep form the foundation of physical health, enhancing energy and vitality. Social health thrives through meaningful connections with friends and family, fostering support and belonging. Emotional well-being is cultivated by practicing mindfulness, journaling, or engaging in hobbies, helping teens manage stress and build resilience. By harmonizing these elements, teenagers create a holistic approach to self-care, ensuring they are well-rounded and better equipped to face life’s challenges with confidence and stability.

Real-Life Applications of the 7 Habits

The 7 Habits help teens improve self-image, build strong friendships, resist peer pressure, and achieve their goals, fostering confidence and resilience in real-life scenarios daily.

Improving Self-Image and Confidence

The 7 Habits guide teens to recognize their worth and potential, helping them develop a positive self-image. By being proactive and setting personal goals, teenagers can build confidence and self-esteem, enabling them to tackle challenges and make wise decisions. This empowerment fosters resilience and a strong sense of identity, crucial for navigating adolescence successfully and achieving long-term success.

Resisting Peer Pressure and Making Wise Choices

The 7 Habits empower teenagers to resist peer pressure by fostering self-awareness and personal responsibility. By being proactive and setting clear goals, teens can make wise choices aligned with their values. Habit 2 encourages envisioning a future, helping them prioritize decisions that support their long-term aspirations. This mindset enables teens to stand firm against negative influences, staying true to themselves while navigating social challenges confidently.

The 7 Habits of Highly Effective Teenagers empowers teens to embrace personal growth, resilience, and purpose. By applying these timeless principles, they can unlock their full potential and thrive in all areas of life.

Summarizing the Key Takeaways

The 7 Habits of Highly Effective Teenagers provides a clear roadmap for personal growth, helping teens build confidence, resist peer pressure, and achieve their goals. By being proactive, setting clear priorities, and fostering strong relationships, teens can master essential life skills. These habits empower young people to take control of their lives, embrace responsibility, and create a foundation for long-term success and happiness.

Encouragement for Implementation

Embracing the 7 Habits is an empowering journey that can transform your life. Start small, be consistent, and watch how these principles help you build confidence, improve relationships, and achieve your goals. Remember, small steps today lead to big changes tomorrow. Take the first step—it’s worth it!

Open post

da epoch r chemotherapy protocol pdf

Overview of the DA-EPOCH-R Chemotherapy Protocol

The DA-EPOCH-R regimen is an intensive chemotherapy protocol primarily used for aggressive B-cell lymphomas, including Burkitt’s lymphoma and diffuse large B-cell lymphoma (DLBCL). It combines six drugs—rituximab, etoposide, prednisone, vincristine, cyclophosphamide, and doxorubicin—and adjusts doses based on patient tolerance and blood counts to maximize efficacy while reducing toxicity. The goal is to shrink tumors and achieve remission or cure, often in high-risk patients.

1.1. Definition and Purpose

DA-EPOCH-R (Dose-Adjusted Etoposide, Prednisone, Vincristine, Cyclophosphamide, Doxorubicin, Rituximab) is a chemotherapy regimen designed to treat aggressive B-cell lymphomas, including Burkitt’s lymphoma and diffuse large B-cell lymphoma (DLBCL). The protocol adjusts drug doses based on patient tolerance and blood counts to optimize efficacy while minimizing toxicity. Its primary purpose is to achieve complete remission or cure by targeting rapidly dividing cancer cells, particularly in high-risk patients. The regimen combines chemotherapy drugs with rituximab, a targeted therapy, to enhance effectiveness. This approach ensures personalized treatment, balancing aggressive cancer control with manageable side effects for improved patient outcomes. It is often used for patients with advanced or high-risk disease.

1.2. Targeted Cancers and Patient Eligibility

DA-EPOCH-R is primarily used to treat aggressive B-cell lymphomas, such as Burkitt lymphoma, diffuse large B-cell lymphoma (DLBCL), and high-grade B-cell lymphoma with MYC and BCL2 rearrangements (double-hit lymphoma). It is also effective for mediastinal large B-cell lymphoma. Eligibility includes patients with newly diagnosed or relapsed/refractory disease. Suitable candidates are those with adequate organ function and manageable comorbidities. The regimen is particularly recommended for young, fit patients or those with high tumor burden due to its intensive nature. Patient selection involves assessment of tumor biology, performance status, and ability to tolerate dose-adjusted therapy, ensuring safe and effective treatment administration.

Components of the DA-EPOCH-R Regimen

DA-EPOCH-R includes rituximab, etoposide, prednisone, vincristine, cyclophosphamide, and doxorubicin. Each drug targets cancer cells through distinct mechanisms, optimizing efficacy while minimizing toxicity.

2.1. Drugs Involved and Their Roles

The DA-EPOCH-R regimen consists of six key drugs: rituximab, etoposide, prednisone, vincristine, cyclophosphamide, and doxorubicin. Rituximab targets CD20 proteins on B-cells, enhancing cancer cell destruction. Etoposide and doxorubicin are chemotherapeutics that interfere with DNA replication. Vincristine disrupts microtubule formation, halting cell division. Cyclophosphamide alkylates DNA, causing damage. Prednisone reduces inflammation and enhances chemotherapy effects. Together, these drugs work synergistically to target aggressive lymphoma cells, optimizing treatment outcomes.

2.2. Dosing and Adjustment Criteria

Dosing in DA-EPOCH-R is tailored to patient tolerance and blood counts. Rituximab is administered at 375 mg/m² on Day 1. Etoposide, doxorubicin, and vincristine are given as continuous IV infusions over 96 hours (Days 1-4). Cyclophosphamide is dosed on Day 5. Prednisone is taken orally twice daily. Doses are adjusted based on neutrophil and platelet counts, aiming to balance efficacy and toxicity. Adjustments may involve delaying cycles or reducing doses to avoid severe myelosuppression. This flexible approach ensures personalized treatment, optimizing outcomes while managing side effects effectively.

Administration of DA-EPOCH-R

DA-EPOCH-R can be administered in both inpatient and outpatient settings. Treatment typically involves continuous IV infusions over 96 hours, with cycles repeated every 21-28 days.

3.1. Inpatient vs. Outpatient Treatment Options

DA-EPOCH-R can be administered in both inpatient and outpatient settings, offering flexibility based on patient needs. Inpatient treatment typically involves a 5- to 6-day hospital stay, ensuring close monitoring during continuous IV infusions. Outpatient options allow patients to receive infusions at home using a portable pump, with clinic visits on Days 1 and 5. This approach reduces hospitalization time while maintaining treatment efficacy. The choice depends on patient health, ability to manage side effects at home, and availability of caregiver support. Both settings aim to deliver the full chemotherapy regimen safely and effectively.

3.2. Duration of Infusion and Cycle Frequency

DA-EPOCH-R involves continuous IV infusions of etoposide, doxorubicin, and vincristine over 96 hours (24 hours per day on Days 1-4). Rituximab is administered on Day 1, and cyclophosphamide on Day 5. Each cycle lasts 21-28 days, allowing recovery between treatments. The total duration varies, typically up to 8 cycles, depending on response and tolerability. Infusion times may shorten in subsequent cycles as patients and staff adapt. This schedule balances aggressive treatment with recovery periods to manage side effects and maintain efficacy.

Monitoring and Side Effect Management

Regular blood tests and imaging monitor treatment response and toxicity. Common side effects include infections and neutropenia, managed with growth factors and antiemetics. Doses are adjusted based on lab results to minimize adverse effects while maintaining efficacy.

4.1. Required Blood Tests and Imaging

Regular blood tests, including CBC, CMP, uric acid, and LDH levels, are essential to monitor toxicity and guide dose adjustments. Imaging such as CT scans or PET scans is performed periodically to assess tumor response. Blood tests are typically done twice weekly during treatment to ensure safe dosing. Hepatitis B screening and HIV testing are also conducted before starting therapy. These assessments help identify potential issues early, allowing for timely interventions. Imaging frequency depends on the disease’s progression and treatment response, ensuring optimal care and minimizing complications.

4.2. Common Side Effects and Mitigation Strategies

Common side effects of DA-EPOCH-R include infections, neutropenia, nausea, and constipation. To mitigate these, patients are often prescribed anti-nausea medications, antibiotics, and stool softeners. Rituximab may cause infusion reactions, managed with premedications like diphenhydramine and hydrocortisone. Filgrastim or pegfilgrastim is used to stimulate white blood cell production. Allopurinol prevents tumor lysis syndrome, especially in the first cycle. Patients are advised to maintain hydration and follow dietary guidelines to manage side effects. Regular blood tests help identify issues early, allowing for timely interventions and dose adjustments to ensure safety and treatment effectiveness.

Clinical Trials and Efficacy

DA-EPOCH-R has shown high efficacy in clinical trials, particularly for high-risk lymphomas, demonstrating superior outcomes compared to standard regimens in certain aggressive B-cell lymphoma subtypes.

5.1. Published Studies and Success Rates

DA-EPOCH-R has demonstrated significant efficacy in published studies, particularly for aggressive B-cell lymphomas. A study in the New England Journal of Medicine showed high remission rates and improved survival in patients with Burkitt’s lymphoma and DLBCL. Clinical trials, including those presented at ASH 2014, highlighted its effectiveness in MYC-rearranged lymphomas, achieving complete remission in a majority of cases. Success rates often exceed those of standard R-CHOP regimens, especially in high-risk populations. These studies underscore DA-EPOCH-R’s role as a potent and reliable treatment option for aggressive lymphomas, with durable responses observed in long-term follow-up.

5.2. Comparison with Other Chemotherapy Regimens

DA-EPOCH-R has shown superior efficacy compared to R-CHOP in certain aggressive lymphomas, particularly in MYC-rearranged cases. Studies like those by Dunleavy et al. and Howlett et al. demonstrate its effectiveness over other intensive regimens such as CODOX-M/R-IVAC and R-HyperCVAD. DA-EPOCH-R achieves higher remission rates and lower toxicity in high-risk patients. Its dose-adjusted approach allows for personalized treatment, reducing adverse effects while maintaining potency. Clinical trials highlight its advantage in managing double-hit lymphomas, making it a preferred option for patients with aggressive disease. This regimen’s flexibility and efficacy position it as a leading choice for high-risk B-cell lymphomas compared to standard treatments.

Patient Support and Resources

  • Financial assistance programs help reduce treatment costs for eligible patients.
  • Emotional wellness resources support mental health during chemotherapy.
  • Access to clinical trials offers innovative treatment opportunities.

6.1. Financial Assistance and Copay Programs

Financial assistance programs are available to help patients cover the cost of DA-EPOCH-R. For insured patients, copay cards and patient assistance programs may reduce out-of-pocket expenses. Medicare and Medicaid patients should work with their treatment center for pre-authorization and cost navigation. Additional resources include nonprofit organizations offering grants or copay assistance. Eligibility varies based on income and insurance status. Patients are encouraged to discuss financial concerns with their healthcare team or navigate to clinicaltrials.gov or specific assistance program websites for detailed information and application processes.

6.2. Emotional Wellness and Treatment Navigation

Emotional wellness is crucial during DA-EPOCH-R treatment, as it directly impacts overall well-being and recovery. Patients are encouraged to maintain a positive outlook while acknowledging their emotions. Resources such as counseling, support groups, and mindfulness practices can help manage stress and anxiety. Nonprofit organizations and cancer centers often provide emotional support services tailored to patients undergoing chemotherapy. Open communication with healthcare providers and loved ones is also vital for navigating the challenges of treatment. Emotional wellness initiatives aim to improve treatment outcomes by fostering resilience and a proactive approach to care.

Open post

guided antelope hunts

Guided antelope hunts offer an exceptional opportunity for hunters to experience thrilling adventures with expert guides, ensuring a memorable and successful experience․ From pre-hunt briefings to strategic stalking techniques, these hunts blend excitement with ethical practices, making them a premier choice for both novice and seasoned hunters․

Overview of Antelope Hunting

Antelope hunting is a thrilling outdoor pursuit that combines skill, strategy, and a deep connection with nature․ Known for their agility and speed, antelopes present a challenging yet rewarding target for hunters․ Guided hunts are particularly popular, offering expert knowledge of habitats, seasonal patterns, and stalking techniques․ Hunters typically use rifles, as precision is key․ The experience often involves early mornings, vast landscapes, and physical endurance․ Conservation efforts ensure sustainable practices, making antelope hunting both exciting and ethically responsible, with expert guides enhancing the overall adventure․

Cost and Pricing for Guided Hunts

The cost of guided antelope hunts varies based on location, duration, and services included․ Prices typically range from $2,000 to $5,000 or more, covering guide fees, accommodations, and meals․ Additional expenses may include licenses, permits, and gear rentals․ High-end packages often offer luxury amenities and experienced guides, increasing the overall cost․ It’s essential to clarify what’s included in the pricing to ensure a transparent and satisfying experience for hunters of all budgets and preferences․

Licensing and Regulations

Licensing for guided antelope hunts requires obtaining specific permits, which vary by state or province․ Hunters must apply through designated wildlife agencies, adhering to strict deadlines and regulations․ Costs for licenses and tags range widely, depending on residency and hunting location․ Guides often assist with navigating these requirements, ensuring compliance with local laws․ Understanding and following regulations is crucial for a legal and ethical hunting experience, protecting both hunters and wildlife populations․

Choosing the Right Guide or Outfitter

Selecting a reputable guide or outfitter is crucial for a successful antelope hunt․ Look for experienced professionals with proven track records, ensuring they align with your hunting goals and values․

Researching Reputable Outfitters

Researching reputable outfitters is essential for a successful guided antelope hunt․ Start by reading online reviews, testimonials, and forums where hunters share their experiences․ Verify licenses and permits with local wildlife agencies to ensure legality․ Check success rates and trophy quality to gauge their expertise․ Look for outfitters with extensive knowledge of the terrain and animal behavior; Consider their years in operation and ask for references to ensure reliability․ A thorough investigation ensures a trustworthy and rewarding hunting experience․

Questions to Ask Before Booking

Before booking a guided antelope hunt, ask essential questions to ensure clarity and confidence; Inquire about the outfitter’s experience, success rates, and licensing․ Request references and ask about their knowledge of the hunting area․ Clarify the hunt’s duration, physical demands, and type of terrain․ Understand what services are included, such as food, lodging, and transportation․ Ask about weapon preferences and strategies for stalking antelope․ Finally, confirm their policy on permits, tags, and trophy handling to ensure a smooth experience․

Best Locations for Guided Antelope Hunts

Wyoming, Montana, and Texas are top destinations for guided antelope hunts, offering vast prairies and abundant herds․ Alberta, Canada, also provides exceptional hunting opportunities with experienced guides․

Top Regions in the Western United States

The western United States boasts prime regions for antelope hunting, with Wyoming and Montana leading as top destinations․ These states offer vast, open landscapes and healthy pronghorn populations, making them ideal for guided hunts․ Experienced outfitters in these areas provide expert knowledge and ensure a successful hunting experience․ The combination of scenic beauty and abundant wildlife creates unforgettable adventures for hunters seeking trophy-quality antelope․

Antelope Hunting in Texas

Texas offers unique opportunities for antelope hunting, particularly in its western regions․ Guided hunts in Texas are popular due to the state’s manageable regulations and abundant pronghorn populations․ Experienced guides provide local knowledge, increasing the chances of a successful hunt․ The diverse terrain, from desert landscapes to rolling plains, adds to the adventure․ Hunters can expect a challenging yet rewarding experience, with trophy-quality antelope often within reach under expert guidance․

Guided Hunts in Alberta, Canada

Alberta, Canada, is a prime destination for guided antelope hunts, offering a unique blend of challenging terrain and abundant pronghorn populations․ The province’s vast grasslands and badlands provide an ideal habitat for antelope, making it a hotspot for hunters․ Local guides possess deep knowledge of the landscape and wildlife patterns, enhancing the likelihood of a successful hunt․ Alberta’s well-managed conservation efforts ensure sustainable hunting practices, making it a favorite among both local and international hunters seeking a thrilling experience․

Hunting Season and Application Process

Understanding the hunting season timeline and navigating the application and permit system are crucial steps, with guided hunts often aiding in securing licenses and permits effectively․

Understanding the Hunting Season Timeline

The antelope hunting season typically runs from mid-August to early October, with specific dates varying by state and region․ Application periods for permits often open in spring, requiring careful planning and research․ Guides and outfitters play a key role in helping hunters navigate these timelines, ensuring they meet deadlines and select prime hunting periods․ Proper preparation during the pre-season is essential for a successful hunt, emphasizing the importance of timely applications and permits․

Navigating the Application and Permit System

Securing permits for antelope hunts involves a detailed application process, often requiring state-specific deadlines and fees․ Most states use a draw system, with applications typically submitted in spring․ Guides and outfitters can assist in understanding these complex systems, ensuring compliance with regulations․ Fees vary by state, with some offering preference points for unsuccessful applicants․ Understanding the permit process is crucial for a smooth hunting experience, especially in popular regions like Wyoming and Montana․

What to Expect During a Guided Hunt

A guided hunt offers a structured experience with expert guides providing strategic support․ Hunters can expect detailed briefings, stalking techniques, and ethical practices, ensuring a memorable adventure․

Pre-Hunt Preparation and Briefings

Pre-hunt preparation involves detailed briefings, gear checks, and strategy discussions․ Guides ensure hunters are well-informed about terrain, antelope behavior, and safety protocols․ This thorough approach maximizes success and ensures a safe, enjoyable experience for all participants․ Proper planning and communication are key to a successful hunt, making pre-hunt briefings an essential part of the guided experience․

The Hunting Experience and Strategies

The hunting experience with guided antelope hunts is both exhilarating and strategic․ Guides employ expert stalking techniques, utilizing terrain and animal behavior to ensure optimal opportunities․ Hunters benefit from tailored strategies, enhancing their chances of success․ The combination of skill, knowledge, and adaptability creates a dynamic and rewarding adventure, making each hunt unique and memorable․ This approach ensures that participants are well-equipped to navigate the challenges of antelope hunting effectively․

Tipping Etiquette for Guides and Staff

Tipping is a standard practice, reflecting satisfaction with service․ Guides, cooks, and wranglers typically receive $100–$200 each, based on performance and hunt duration․

Standard Practices for Tipping

Tipping is customary in guided antelope hunts, reflecting satisfaction with services․ Guides typically receive $100–$200 per hunter, while cooks and wranglers may get $50–$100 each․ Tips are usually handed out at the end of the hunt․ Factors like hunt success, effort, and overall experience influence tipping amounts․ Some outfitters suggest pooling tips for equal distribution among staff․ Always check with the outfitter for specific tipping guidelines, as practices may vary․ This ensures fair compensation for all involved․

Gear and Equipment for Antelope Hunting

Essential gear includes high-quality rifles, scopes, binoculars, and sturdy footwear․ Camouflage apparel and rangefinders enhance success․ Pack lightweight, durable equipment for long-range accuracy and mobility in challenging terrains․

Essential Gear and Rifles for Success

A high-caliber rifle, such as a ․243 or ․300 Winchester Magnum, is crucial for antelope hunting due to their flat trajectories․ Pair it with a quality scope for precision․ Binoculars and rangefinders help spot and measure distances accurately․ Camouflage clothing aids in blending into open terrain, while sturdy, waterproof boots are vital for long treks․ Additional gear includes a backpack, first-aid kit, and hydration system․ Proper equipment ensures comfort and effectiveness, maximizing the chances of a successful hunt․

Success Rates and Trophy Quality

Guided antelope hunts typically boast high success rates, offering hunters the chance to harvest impressive trophies․ Experienced guides and prime habitats contribute to both successful outcomes and exceptional trophy quality․

Factors Influencing Hunt Success

Several factors contribute to the success of guided antelope hunts․ Season timing, habitat quality, and guide expertise play crucial roles․ Weather conditions, animal migration patterns, and permit availability also impact outcomes․ Physical preparation and gear quality are essential, while ethical hunting practices ensure sustainable conservation․ Guides often have in-depth knowledge of terrains and animal behaviors, enhancing chances of success․ Effective communication between hunters and guides further maximizes opportunities, leading to fulfilling and productive hunting experiences․

DIY vs․ Guided Antelope Hunts

DIY antelope hunts offer independence and cost savings but require extensive planning and expertise․ Guided hunts provide professional guidance, increasing success rates and ease, though at higher costs․

Pros and Cons of Each Approach

Guided antelope hunts offer expert knowledge, higher success rates, and convenience, making them ideal for novices․ However, they are costly and may limit flexibility; DIY hunts provide cost savings and independence but require extensive planning, research, and self-reliance․ Success in DIY hunts heavily depends on the hunter’s experience and preparation․ Balancing budget, skill level, and desired outcomes helps determine the best approach for a fulfilling antelope hunting experience․

Conservation and Ethical Considerations

Guided antelope hunts emphasize ethical practices, ensuring sustainable wildlife management․ While controversial, regulated hunting supports conservation efforts by funding habitat preservation and controlling populations, promoting biodiversity and ecosystem health․

The Role of Hunting in Wildlife Conservation

Hunting plays a dual role in wildlife conservation, generating revenue through permits and licenses that fund habitat preservation and species management․ Regulated antelope hunting helps maintain population balance, preventing overgrazing and ensuring ecosystem health․ However, debates arise over trophy hunting’s ethical implications and its effectiveness in supporting conservation efforts․ Despite this, many programs demonstrate that sustainable hunting practices can contribute positively to biodiversity and wildlife sustainability, making it a complex yet vital component of conservation strategies․

Open post

stanley fatmax user guide

Welcome to the Stanley FatMax User Guide, your comprehensive resource for understanding and utilizing Stanley FatMax tools effectively. This guide provides essential insights into product features, safety protocols, and maintenance tips to ensure optimal performance and longevity of your tools.

1.1 Overview of the Stanley FatMax Product Line

The Stanley FatMax product line offers a diverse range of tools designed for professionals and home users. Known for durability and versatility, these tools include cordless drills, impact drivers, jump starters, and more. They feature advanced battery technology and are suitable for various applications, ensuring reliable performance and safety in different environments, meeting user needs effectively.

1.2 Importance of Reading the User Manual

Reading the Stanley FatMax user manual is crucial for safe and effective tool operation. It provides essential safety guidelines, detailed instructions, and maintenance tips to ensure optimal performance and longevity of your tools. Understanding the manual helps prevent accidents and maximizes the tool’s potential for both professional and home use environments.

1.3 Safety Precautions and Warnings

Understanding safety symbols and labels is vital for safe operation. Always follow warnings to prevent accidents. Keep loose clothing tied back, avoid unsafe conditions, and ensure proper tool handling. Adhere to all safety guidelines to ensure safe and effective usage of Stanley FatMax tools, minimizing risks and enhancing productivity.

Key Features of the Stanley FatMax Power Tools

Stanley FatMax tools deliver powerful performance, durability, and versatility. Built with high-quality materials, they offer advanced battery technology, ensuring efficient operation across various tasks, making them reliable for professionals and DIYers alike.

2.1 Powerful Performance and Durability

Stanley FatMax tools are built with high-quality materials, ensuring exceptional performance and long-lasting durability. Designed to handle demanding tasks, they deliver consistent power and reliability across drilling, driving, and cutting applications, making them a trusted choice for professionals and DIY enthusiasts alike.

2.2 Versatile Applications Across Various Tools

Stanley FatMax tools offer versatility across a wide range of applications, from drilling and driving to cutting and sawing. Whether you’re using an impact driver, rotary laser, or jump starter, these tools are designed to adapt to various tasks, ensuring efficiency and precision in both professional and DIY projects.

2.3 Advanced Battery Technology

Stanley FatMax tools feature advanced battery technology designed for energy efficiency and long runtime. With overcharge protection and battery health indicators, these systems ensure reliable performance. The high-capacity cells provide consistent power, while smart charging technology optimizes battery life, reducing downtime and enhancing productivity for both professionals and DIY enthusiasts.

Operating Instructions for Stanley FatMax Tools

Follow detailed step-by-step guidelines for assembly, initial setup, and proper usage. Ensure safe and efficient operation by adhering to recommended handling and control techniques outlined in the manual.

3.1 Assembly and Initial Setup

Thoroughly read the manual before starting. Ensure all components are included and undamaged. Charge the battery according to instructions. Inspect and securely attach any accessories. Verify compatibility with Stanley FatMax parts. Double-check safety features before first use to ensure proper function and prevent accidents. Test tool operation to confirm readiness for tasks.

3.2 Step-by-Step Usage Guidelines

Always follow safety rules and guidelines before operating. Turn off the power source and ensure the tool is properly assembled. Attach accessories securely as instructed. Test the tool at a low setting to ensure proper function. Monitor performance and adjust settings as needed for optimal results. Consult the manual for specific task instructions.

3.3 Proper Handling and Control Techniques

Always maintain a firm grip on the tool’s handle for better control. Use both hands for stability, especially with heavier models. Keep loose clothing and long hair tied back to avoid entanglement. Ensure the tool is free from damage before use. Operate at a comfortable angle to prevent strain, and follow the manual’s technique guidelines for precise results.

Maintenance and Care Tips

Regularly clean your Stanley FatMax tools to prevent dust buildup. Store them in a dry, secure location. Check for wear and tear, and follow the manual’s maintenance schedule for optimal performance and longevity.

4.1 Cleaning and Storage Recommendations

Regularly clean Stanley FatMax tools with a soft cloth to remove dirt and debris. Store them in a dry, secure location away from direct sunlight. Avoid harsh chemicals and ensure all parts are dry before storage. Check for wear and tear, and follow the manual’s specific cleaning and storage guidelines.

4.2 Regular Maintenance Schedule

Perform routine inspections of Stanley FatMax tools to ensure optimal functionality. Check for wear, lubricate moving parts, and verify battery connections. Schedule professional servicing annually or as recommended in the manual. Regular maintenance extends tool lifespan, prevents malfunctions, and ensures warranty coverage remains valid.

4.3 Troubleshooting Common Issues

Identify and resolve common issues with Stanley FatMax tools by checking battery connections, ensuring proper charging, and verifying switch functionality. Consult the manual for specific error codes and solutions. For persistent problems, contact Stanley FatMax customer support or visit an authorized service center for professional assistance.

Safety Guidelines for Stanley FatMax Users

Always read the manual, wear protective gear, and follow safety symbols. Prevent accidents by ensuring proper tool handling and avoiding unsafe practices. Be aware of your surroundings to minimize risks and ensure safe operation of Stanley FatMax tools.

5.1 Understanding Safety Symbols and Labels

Familiarize yourself with safety symbols and labels on Stanley FatMax tools. These indicators highlight potential hazards, such as electrical risks or hot surfaces. Always consult the manual to understand specific symbols, ensuring safe operation and compliance with safety guidelines to prevent accidents and injuries.

5.2 Preventing Accidents and Injuries

Preventing accidents requires strict adherence to safety guidelines; Always read the manual, wear protective gear, and avoid risky operations. Ensure tools are used as intended, and keep loose clothing tied back. Regularly inspect tools for damage and follow all warnings to minimize hazards and ensure safe operation.

5.3 Emergency Procedures and First Aid

In case of an emergency, turn off the tool and secure the area to prevent further accidents. Assess injuries, apply direct pressure to wounds, and use a fire extinguisher for burns. Administer basic first aid and immediately call for professional medical help. Follow the user manual’s guidelines for proper emergency handling.

Battery Charging and Management

Always use the correct Stanley FatMax charger to avoid damage. Avoid overcharging and store batteries in a cool, dry place. Follow manual guidelines for optimal battery health.

6.1 Charging Procedures and Best Practices

Welcome to the charging procedures section. Always use the correct Stanley FatMax charger to ensure safety and efficiency. Avoid overcharging, as it can damage the battery. Monitor the charge level and store batteries in a cool, dry place. Follow the manual’s guidelines for optimal charging and battery longevity. Clean terminals before charging for better performance.

6.2 Monitoring Battery Health and Performance

Monitor your Stanley FatMax battery’s health by checking charge levels and ensuring proper function. Avoid extreme temperatures to prevent degradation. Regularly inspect for signs of wear or damage. Use the built-in charge indicators to track performance and maintain optimal power output for reliable tool operation.

6.3 Storage and Disposal of Batteries

Store Stanley FatMax batteries in a cool, dry place away from metal objects to prevent short circuits. Fully discharge batteries before long-term storage and use protective covers. Dispose of batteries responsibly by recycling or following local regulations to minimize environmental impact. Always refer to the manual for specific disposal guidelines.

Accessories and Compatible Parts

Stanley FatMax accessories are designed to enhance tool functionality and durability. Use genuine parts like replacement spools and batteries for optimal performance and longevity of your tools.

7.1 Recommended Accessories for Optimal Performance

For enhanced functionality, use genuine Stanley FatMax accessories like replacement spools (STZST1169), 18V batteries, and chargers. These ensure consistent performance, durability, and compatibility. Always verify part numbers and compatibility with your specific tool model for optimal results and extended tool life.

7.2 Identifying Genuine Stanley FatMax Parts

Ensure authenticity by verifying the STANLEY logo and part numbers. Genuine parts are marked with “STANLEY Black & Decker” trademarks. Always purchase from authorized dealers or the official Stanley FatMax website. Check packaging for official branding and instruction manuals to avoid counterfeit products.

7.3 Installing and Using Additional Features

Install additional features like LED lights or battery indicators by following the manual’s step-by-step guide. Ensure compatibility with your Stanley FatMax tool to avoid malfunctions. Proper installation enhances functionality and safety. Always test new features after installation to confirm they work as intended for optimal performance and efficiency.

Troubleshooting Common Issues

Consult the manual for guidance on diagnosing malfunctions, addressing battery charging problems, and resolving operational errors. Always follow safety instructions and contact customer support if issues persist for optimal tool performance and user safety.

8.1 Diagnosing Power Tool Malfunctions

Identify issues by checking power sources, inspecting for physical damage, and reviewing error codes. Consult the manual for specific troubleshooting steps. Ensure proper battery installation and connections. Verify switch functionality and test tools on different tasks. If problems persist, contact Stanley FatMax customer support for professional assistance and maintenance guidance.

8.2 Resolving Battery Charging Problems

Check the charger and cable for damage or loose connections. Ensure the battery is properly aligned and seated. Use only Stanley FatMax-approved chargers. Monitor charging times and avoid overcharging. If issues persist, reset the battery or consult the manual for detailed troubleshooting steps to restore optimal charging performance.

8.3 Addressing Operational Errors and Alerts

If your Stanley FatMax tool displays error codes or alerts, refer to the manual for specific solutions. Check for loose connections, ensure proper battery installation, and verify tool settings. Reset the tool if necessary. For persistent issues, contact Stanley FatMax customer support for professional assistance and guidance to restore normal operation.

Warranty and Customer Support Information

Your Stanley FatMax tools are backed by a comprehensive warranty. For details, contact Stanley FatMax customer service or visit authorized service centers for assistance and support.

9.1 Understanding Your Warranty Coverage

Your Stanley FatMax tools are protected by a limited warranty covering manufacturing defects for a specified period. Register your product to ensure coverage and refer to the manual or official website for full warranty terms, conditions, and exclusions. Proper use and maintenance are essential to uphold warranty validity.

9.2 Contacting Stanley FatMax Customer Service

For assistance, contact Stanley FatMax customer service at 1300 660 457 (Australia) or 0800 474 876 (New Zealand). Visit their official website at www.stanleyproducts.com.au for support, or refer to the manual for additional contact options. Representatives are available to address inquiries, provide troubleshooting, and assist with warranty-related matters.

9.3 Finding Authorized Service Centers

Locate authorized Stanley FatMax service centers via the official website or by contacting customer support. These centers provide genuine parts, repairs, and maintenance, ensuring your tools remain in optimal condition. Visit www.stanleyproducts.com.au for a comprehensive list of authorized service providers in your region.

Environmental Considerations

Stanley FatMax tools promote eco-friendly practices. Always dispose of batteries and tools responsibly, following local regulations. Energy-efficient designs help reduce environmental impact, supporting sustainable usage and waste reduction.

10.1 Eco-Friendly Practices for Tool Usage

Adopt eco-friendly practices by using Stanley FatMax tools responsibly. Opt for energy-efficient settings, minimize waste, and ensure proper disposal of batteries and materials. Regular maintenance enhances tool longevity, reducing the need for frequent replacements and supporting sustainable usage.

10.2 Proper Disposal of Tools and Batteries

Ensure environmentally responsible disposal of Stanley FatMax tools and batteries. Separate batteries from tools and recycle them at designated facilities. Follow local regulations for hazardous waste disposal to minimize environmental impact. Always consult the user manual for specific disposal guidelines.

10.3 Energy Efficiency and Conservation Tips

Optimize energy use with Stanley FatMax tools by utilizing advanced battery technology and energy-saving features. Turn off tools when idle, use power-saving modes, and charge batteries efficiently. Regular maintenance ensures optimal performance and reduces energy waste, promoting sustainability and extending tool lifespan.

Advanced Tips for Professional Users

Maximize efficiency with Stanley FatMax tools by customizing settings for specific tasks and integrating them seamlessly into your workflow. Utilize advanced features to streamline operations and enhance productivity, ensuring professional-grade results consistently.

11.1 Maximizing Tool Efficiency on the Job Site

Optimize Stanley FatMax tool performance by ensuring proper maintenance, using appropriate accessories, and managing battery life effectively. Regularly inspect tools before use, and train your team to handle equipment correctly to minimize downtime and enhance productivity on professional job sites. Always follow the manufacturer’s guidelines for optimal results.

11.2 Customizing Tool Settings for Specific Tasks

Customize Stanley FatMax tool settings to suit specific tasks by adjusting speed, torque, and other parameters. Refer to the user manual for guidance on optimizing settings for different materials or applications. Proper customization enhances precision, reduces material waste, and ensures efficient task completion, aligning with professional demands and project requirements.

11.3 Integrating Stanley FatMax Tools into Your Workflow

Seamlessly integrate Stanley FatMax tools into your workflow by leveraging their ergonomic design and advanced features. Optimize productivity by pairing tools with compatible accessories and organizing tasks based on tool capabilities. Regularly review the user manual for tips on maximizing efficiency and ensuring tools align with your workspace and project demands.

Congratulations! You’ve completed the Stanley FatMax User Guide. By following these insights, you’ll maximize tool performance, ensure safety, and enhance productivity. Happy crafting and creating!

12.1 Recap of Key User Guide Points

This guide covered essential topics like safety precautions, tool maintenance, battery care, and efficient usage. By adhering to these guidelines, you ensure optimal performance, longevity, and safe operation of your Stanley FatMax tools, helping you achieve professional results in various projects and tasks.

12.2 Encouragement for Safe and Effective Usage

Always prioritize safety and proper techniques when using Stanley FatMax tools. By following the guidelines in this user guide, you can prevent accidents, extend tool life, and achieve professional-grade results. Emphasize safe handling, regular maintenance, and adherence to instructions for optimal performance and reliability in every project.

12.3 Importance of Continuous Learning and Adaptation

Continuous learning and adaptation are crucial for maximizing the potential of Stanley FatMax tools. Stay updated with new techniques, product updates, and safety guidelines to enhance your skills and ensure safe, efficient usage. Adaptation to evolving tool features and best practices fosters long-term proficiency and satisfaction with your Stanley FatMax equipment.

Posts navigation

1 2
Scroll to top