
Kirkland Chicken Wings are a popular, convenient, and flavorful frozen snack. Pre-seasoned and ready to cook, they offer a quick solution for delicious meals at home.
Overview of Kirkland Chicken Wings
Kirkland Chicken Wings, available at Costco, have gained popularity for their convenience and flavor. Priced around $29.99 for a 3kg bag, they offer an affordable and tasty option for home cooking. The wings are pre-seasoned with simple ingredients like water and kosher salt, making them a gluten-free choice. Suitable for various cooking methods such as oven, air fryer, or deep fry, they cater to diverse preferences. Their pre-seasoned nature and easy preparation make them a favorite for quick, delicious meals, perfect for gatherings or snacks.
Popularity and Convenience
Kirkland Chicken Wings have become a favorite for their ease of preparation and delicious flavor. Sold in bulk at Costco, they offer great value at $29.99 for a 3kg bag. Their pre-seasoned nature saves time, making them ideal for quick meals or entertaining. Gluten-free and simple in ingredients, they cater to various dietary needs. Suitable for oven, air fryer, or deep fry cooking, they provide versatility for any kitchen setup. Their crispy texture and juicy interior make them a crowd-pleaser, perfect for game days, parties, or casual snacks, ensuring they remain a popular choice for many households.
Ingredients and Packaging
Kirkland Chicken Wings primarily contain chicken wings, water, and kosher salt, making them a gluten-free option. They are sold in a convenient 3kg bag for easy storage.
Key Ingredients in Kirkland Chicken Wings
Kirkland Chicken Wings are made with just three main ingredients: chicken wings, water, and kosher salt. This simple composition ensures a clean, savory flavor while keeping the wings gluten-free. The absence of complex additives makes them a great option for those with dietary restrictions. The kosher salt enhances the natural taste of the chicken without overpowering it, while the water helps maintain moisture during cooking. These ingredients work together to create a product that is both flavorful and versatile, allowing consumers to customize with sauces or seasonings as desired. Perfect for various cooking methods, Kirkland wings deliver consistent quality and taste.
Nutritional Information
Kirkland Chicken Wings are a protein-rich snack with approximately 250-300 calories per serving. They contain about 20 grams of protein and 15 grams of fat, primarily from natural sources. Sodium content is moderate, around 500-600 mg per serving, due to the kosher salt seasoning. With no added sugars and minimal ingredients, they offer a relatively clean nutritional profile. However, cooking methods like deep-frying can increase calorie and fat content. Always check the packaging for exact nutritional details, as values may vary slightly by batch or cooking method. Pair with sides like veggies or dips for a balanced meal.

Preparation and Thawing
Thaw Kirkland Chicken Wings in the refrigerator for optimal results or use cold water for quicker preparation. Pat dry to ensure crispy skin when cooking.
Importance of Thawing
Thawing Kirkland Chicken Wings is crucial for even cooking and food safety. It prevents ice crystals from causing uneven cooking and ensures crispy skin. Proper thawing avoids bacterial growth, keeping the wings safe to eat. Refrigerator thawing is recommended for better texture, while cold water thawing is faster but requires constant monitoring. Never thaw at room temperature, as it risks contamination. Pat dry after thawing to enhance crispiness during cooking. Proper thawing ensures a juicy, flavorful result without compromising safety or quality.
Refrigerator Thawing vs. Cold Water Thawing
Refrigerator thawing is a slow, safe method that keeps chicken wings at a consistent temperature, preventing bacterial growth. It’s ideal for advance planning, requiring minimal effort. Cold water thawing is faster, suitable for last-minute needs, but demands frequent water changes to maintain safety. Both methods ensure even cooking and food safety when done correctly. Refrigerator thawing offers convenience for planning ahead, while cold water thawing provides quick results with proper monitoring.
Cooking Methods
Kirkland Chicken Wings can be cooked in various ways, including oven baking, air frying, and deep-frying. Each method offers a unique texture and flavor experience.
Oven Cooking Instructions
Preheat your oven to 400°F (200°C). Place Kirkland Chicken Wings in a single layer on a baking sheet lined with foil. Bake for 25-30 minutes, flipping halfway. For crispier skin, pat dry with paper towels before baking and ensure proper air circulation. Wings are fully cooked when they reach an internal temperature of 165°F (74°C). Optional: Season with additional spices or sauces during the last 10 minutes of cooking for extra flavor. Thawing first can enhance crispiness, but frozen wings can be baked directly following package guidelines.
Air Fryer Cooking Instructions
Preheat the air fryer to 400°F (200°C). Place Kirkland Chicken Wings in a single layer, ensuring proper spacing for even cooking. Cook for 20-25 minutes, shaking the basket halfway. For crisper skin, lightly mist with oil or pat dry before cooking. If thawed, cook at 400°F for 15-20 minutes; if frozen, increase time to 25-30 minutes. Wings are done when golden brown and reach an internal temperature of 165°F (74°C). Optional: Toss in sauce during the last 2-3 minutes for added flavor. This method yields crispy results with minimal effort and cleanup.
Deep-Frying Instructions
For crispy Kirkland Chicken Wings, heat oil in a deep frying pan or fryer to 375°F (190°C). Pat wings dry with paper towels to ensure crispiness. Carefully add wings in batches to avoid overcrowding. Cook for 8-12 minutes, or until golden brown and fully cooked. Do not thaw frozen wings before frying, as this can cause splattering. Use a thermometer to maintain the oil temperature. Once cooked, remove with a slotted spoon and drain on paper towels. Serve hot with your favorite sauce or seasoning for the best flavor.
Cooking Safety and Tips
Always cook Kirkland Chicken Wings to an internal temperature of 185°F (85°C) for food safety. Prevent oil splatters by patting wings dry before frying and avoid overcrowding pans. Ensure safe handling to maintain crispiness and flavor, and never reuse cooking oil to prevent contamination. Following these tips ensures a crispy texture and juicy interior while maintaining safety standards for a perfect cooking experience every time.
Internal Temperature Guidelines
For safe consumption, Kirkland Chicken Wings must reach an internal temperature of 185°F (85°C). Use a food thermometer to ensure accuracy, especially in the thickest part of the wing; Proper cooking prevents foodborne illness and ensures tenderness. Always check multiple wings to confirm uniform doneness. Avoid guessing, as undercooked meat poses health risks.
Ensuring Crispy Skin
Achieving crispy skin on Kirkland Chicken Wings involves proper preparation and cooking techniques. Patting the wings dry with paper towels before cooking removes excess moisture, promoting crispiness. For oven or air fryer methods, baking at higher temperatures (around 400°F) helps crisp the skin. Thawing wings in the refrigerator or cold water before cooking also aids in even drying. Air circulation is key—use a rack to elevate wings, allowing air to circulate beneath. Marinating or seasoning before cooking can further enhance texture and flavor, ensuring a satisfying crunch.
Serving and Storage
For optimal flavor, serve Kirkland Chicken Wings hot with your favorite dipping sauce. Store leftovers in an airtight container in the refrigerator within two hours of cooking, and freeze for longer storage to maintain freshness.

Best Practices for Serving
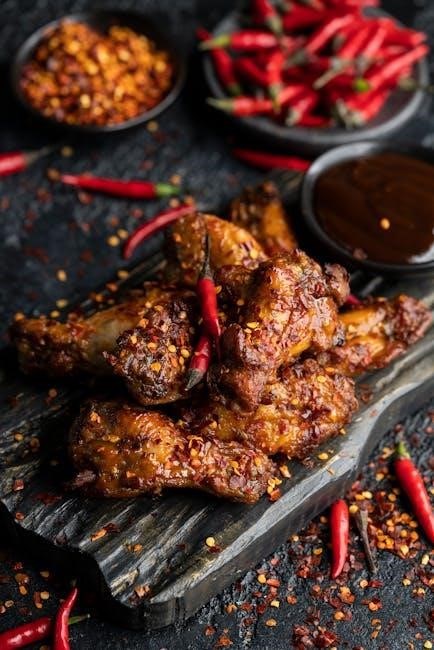
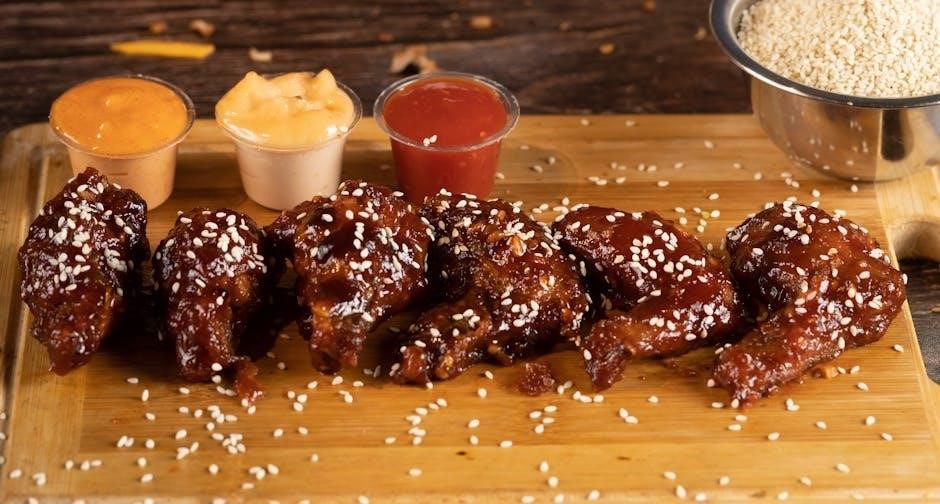
Serve Kirkland Chicken Wings hot for maximum flavor and crispiness. Toss them in your favorite sauce immediately after cooking for even coating. Offer a variety of dips like blue cheese, ranch, or celery sticks for a well-rounded snack. Pair with fresh vegetables or sides like coleslaw to balance the richness. For a visually appealing presentation, arrange the wings on a platter or individual plates with garnishes like parsley or chili flakes. Ensure everyone enjoys them fresh by serving promptly, as reheating can affect texture. This approach enhances both taste and dining experience.
Proper Storage and Reheating
Store Kirkland Chicken Wings in the freezer at 0°F (-18°C) or below to maintain quality. Keep them in their original packaging or transfer to an airtight container to prevent freezer burn. For reheating, preheat your oven to 350°F (175°C) and bake for 10-12 minutes, or until crispy. Microwave reheating is possible but may result in less crispiness. Never reheat chicken wings more than once, and ensure they reach an internal temperature of 165°F (74°C) for food safety. Proper storage and reheating preserve flavor and texture effectively.
Additional Tips and Variations
Marinate wings in yogurt, lime juice, and spices to balance saltiness. Try seasoning with garlic powder and paprika for extra flavor. For a low-calorie option, bake instead of fry. Enhance with a homemade buffalo sauce made from hot sauce and butter for a tangy twist. Experiment with these variations to personalize your Kirkland Chicken Wings experience.
Seasoning and Sauce Options
Kirkland Chicken Wings can be seasoned with garlic powder, paprika, or your favorite spices for added flavor. For a tangy twist, try tossing them in a mixture of hot sauce and butter for a classic buffalo style. To balance the saltiness, marinate the wings in a mix of plain yogurt, lime juice, and olive oil before cooking. You can also experiment with honey, soy sauce, or BBQ sauce for a sweeter or smokier taste. These seasoning and sauce options allow you to customize the wings to your taste preferences, making them a versatile dish for any occasion.
Enhancing Flavor
To enhance the flavor of Kirkland Chicken Wings, consider marinating them before cooking. A mixture of olive oil, lime juice, and plain yogurt can add moisture and balance saltiness. For crispy skin, pat the wings dry with paper towels or let them air-dry in the fridge for a few hours. After cooking, toss the wings in your favorite sauce while they’re hot to ensure even coating. For extra flavor, broil the wings for a few minutes to caramelize the sauce. Experimenting with different seasonings and sauces allows you to customize the wings to your taste preferences, making them a versatile dish for any occasion.
Kirkland Chicken Wings are a convenient, flavorful option for home cooking. With various cooking methods and seasoning tips, they deliver delicious results every time, satisfying any craving.
Final Thoughts
Kirkland Chicken Wings are a convenient and flavorful option for home cooking. With versatile cooking methods like oven, air fryer, or deep-frying, they cater to all preferences. Proper thawing and seasoning enhance their crispy texture and juicy interior. Whether for a quick meal or a party, these wings deliver consistent taste and satisfaction. Experiment with sauces or seasonings for personalized flavor. Always ensure safe cooking temperatures for the best results. Kirkland Chicken Wings are a crowd-pleasing choice, offering ease and deliciousness in every bite.