Open post

ge bottom freezer refrigerator manual

Welcome to the GE Bottom Freezer Refrigerator Manual! This guide helps you understand your appliance’s features, adjust temperature settings, and access key information for optimal performance. Discover how to maintain your refrigerator and find the full manual at GEAppliances.com for comprehensive support.

1.1 Overview of the Manual’s Importance

The GE Bottom Freezer Refrigerator manual is essential for understanding your appliance’s operation, troubleshooting, and maintenance. It provides factory-recommended temperature settings, guidance on adjusting controls, and tips for optimal performance. Explore how to address common issues like poor cooling or frost buildup and learn about energy-saving features. The manual also directs you to GEAppliances.com for comprehensive support, ensuring your refrigerator runs efficiently and effectively for years.

1.2 Key Features of the GE Bottom Freezer Refrigerator

The GE Bottom Freezer Refrigerator offers advanced features for optimal performance. It includes energy-efficient settings, a temperature control dial with 1-5 settings, and a spacious design. The appliance also features child safety locks and an advanced water filtration system. Regular maintenance, such as cleaning condenser coils and replacing filters, ensures longevity. These features, detailed in the manual, help you maximize your refrigerator’s functionality and energy savings while maintaining fresh food quality.

Temperature Settings and Adjustments

The GE Bottom Freezer Refrigerator has temperature controls located in the fresh food compartment. Factory settings recommend 37°F for the fridge and 0°F for the freezer. Adjusting these settings ensures optimal cooling and energy efficiency, maintaining fresh food quality and preventing frost buildup. Regular checks and adjustments are essential for proper performance.

2.1 Factory-Recommended Temperature Settings

The factory-recommended temperature settings for your GE Bottom Freezer Refrigerator are 37°F for the fresh food compartment and 0°F for the freezer. These settings ensure optimal food freshness and energy efficiency. Maintaining these temperatures prevents frost buildup and keeps your food at the ideal storage conditions. 37°F and 0°F are the default settings designed to balance performance and energy consumption effectively. Adjustments may be necessary based on personal preferences or specific food storage needs.

2.2 How to Adjust Temperature Controls

To adjust the temperature controls on your GE Bottom Freezer Refrigerator, locate the temperature control knob or digital controls in the fresh food compartment. The dial typically ranges from 1 to 5 or 1 to 9, with 1 being the coldest setting. Turn the dial clockwise to increase the temperature or counterclockwise to decrease it. Allow 24 hours for the temperature to stabilize before making further adjustments. Always refer to the manual for precise instructions.

2.3 Understanding the Temperature Control Dial (1-5 Settings)

The temperature control dial on your GE Bottom Freezer Refrigerator operates on a 1-5 setting scale. Setting 1 is the coldest, while setting 5 is the warmest. Adjust the dial to achieve optimal cooling performance. It’s important to note that factory settings are typically around 3-4 for balanced operation. Always allow 24 hours for the temperature to stabilize after adjustments. Refer to the manual for specific guidance.

Common Issues and Troubleshooting

Common issues with your GE Bottom Freezer Refrigerator may include poor cooling, frost buildup on evaporator coils, or clogged condenser coils. These problems can often be resolved with proper maintenance. For troubleshooting guides and detailed solutions, visit the GE Appliances website;

3.1 Poor Cooling Performance

Poor cooling performance in your GE Bottom Freezer Refrigerator can result from heavy frost buildup on evaporator coils or clogged condenser coils. Regular maintenance, such as defrosting and cleaning, can resolve these issues. Ensure doors seal properly to maintain consistent temperatures. Overcrowding the fridge can also restrict airflow, leading to inefficient cooling. Refer to the troubleshooting section of your manual or visit GE Appliances for detailed solutions.

3.2 Frost Build-Up on Evaporator Coils

Frost buildup on evaporator coils can reduce your refrigerator’s efficiency and cooling performance. This occurs when moisture from the air freezes onto the coils. Regular defrosting is essential to maintain proper airflow and temperature regulation. Check your manual for defrosting instructions or visit GE Appliances for guidance. Ensure the defrost drain is clear to prevent water accumulation during the process.

3.3 Clogged Condenser Coils

Clogged condenser coils can significantly reduce your refrigerator’s cooling efficiency. Dust, lint, and dirt accumulation block airflow, causing poor performance. Regular cleaning is essential to maintain optimal function. Use a vacuum or soft brush to gently remove debris. For detailed cleaning instructions, refer to your GE manual or visit GE Appliances for support. Clean condenser coils every 6-12 months to prevent issues;

Maintenance Tips for Optimal Performance

Regular maintenance ensures your GE Bottom Freezer Refrigerator runs efficiently. Clean condenser coils, replace water filters, and check door seals to maintain performance and longevity.

4.1 Cleaning the Condenser Coils

Cleaning the condenser coils is crucial for maintaining your GE Bottom Freezer Refrigerator’s efficiency. Dust and dirt buildup can reduce performance and increase energy consumption. To clean, unplug the refrigerator and locate the coils, usually at the back or bottom. Use a vacuum or soft brush to gently remove debris. This simple task ensures optimal cooling and prolongs the appliance’s lifespan. Regular cleaning is recommended every 6-12 months.

4.2 Checking and Replacing the Water Filter

Regularly checking and replacing the water filter ensures clean drinking water and optimal ice production. The filter is typically located in the upper-right corner of the fresh food compartment or behind the bottom drawer. Replace it every 6 months or when the indicator light turns red. Use only GE Appliances filters meeting NSF standards to maintain quality and safety. This simple maintenance step keeps your water fresh and your refrigerator running smoothly.

4.3 Ensuring Proper Door Seal and Alignment

Proper door alignment and sealing are crucial for maintaining optimal cooling and energy efficiency. Inspect the door seals regularly for signs of wear or damage. Ensure the doors align evenly with the frame and close securely. Clean the seals with mild soap and water to maintain their effectiveness. Misaligned doors can cause air leaks, increasing energy consumption and reducing performance. Regular checks help prevent these issues.

User Manual and Support Information

Access the full GE Bottom Freezer Refrigerator Manual at GEAppliances.com. Find model-specific guidance, troubleshooting tips, and maintenance schedules to optimize your appliance’s performance and extend its lifespan.

5.1 Where to Find the Full Owner’s Manual

The full owner’s manual for your GE Bottom Freezer Refrigerator is available on the official GE Appliances website. Visit the site, search for your specific model, and download the manual in PDF format. This resource provides detailed instructions, troubleshooting guides, and maintenance tips. For additional support, register your appliance or contact GE Customer Service for assistance.

5.2 GE Appliances Official Website and Resources

The GE Appliances official website offers a wealth of resources for your Bottom Freezer Refrigerator. From downloadables like owner’s manuals and installation guides to troubleshooting tips and maintenance advice, the site is your go-to for all appliance-related needs. Explore the support section for FAQs, repair service options, and warranty information to ensure your refrigerator operates at its best; Regular updates and new features are also available to enhance your user experience.

5.3 Contacting GE Customer Support

For assistance with your GE Bottom Freezer Refrigerator, visit the GE Appliances website and navigate to the “Support” section. Use the “Contact Us” page to submit inquiries or call their customer service at 1-800-626-2005. Live chat is also available for quick help. Representatives are ready to address questions, troubleshooting, or repair needs. Ensure to have your model number handy for faster assistance.

Energy Efficiency and Settings

This section explores the energy-saving features of your GE Bottom Freezer Refrigerator and provides guidance on adjusting settings for optimal energy efficiency while maintaining performance.

6.1 Energy-Saving Features

Your GE Bottom Freezer Refrigerator is equipped with advanced energy-saving technologies to reduce power consumption. Features include adaptive defrost controls, smart sensors, and high-efficiency compressors. These innovations ensure optimal cooling while minimizing energy use. By maintaining proper temperature settings and following maintenance tips, you can further enhance energy efficiency. Visit GEAppliances.com for detailed information on these features and how to maximize their benefits.

6.2 Adjusting Settings for Energy Efficiency

To optimize energy efficiency, set your refrigerator between 37-40°F and the freezer at 0-5°F. These factory-recommended settings balance energy savings and food freshness. Avoid extreme temperatures to prevent unnecessary energy consumption. Regularly cleaning condenser coils and ensuring proper door seals also enhance efficiency. For detailed guidance, refer to the GE Bottom Freezer Refrigerator Manual available on GEAppliances.com.

Replacement Parts and Filters

For optimal performance, replace the water filter every 6-12 months. Genuine GE replacement parts ensure reliability and maintain your appliance’s warranty. Visit GEAppliances.com for authorized parts.

7.1 Replacing the Water Filter

Regularly replacing the water filter ensures clean water and ice. Replace the filter every 6-12 months or when the indicator lights up. Use GE Appliances filters, which meet NSF standards for quality. Turn off the water supply, locate the filter, and twist to remove. Insert the new filter and flush it by running water through the dispenser. Visit GEAppliances.com for genuine parts. Proper replacement maintains performance and warranty.

7.2 Finding Genuine GE Replacement Parts

For reliable performance, always use genuine GE replacement parts. Visit the GE Appliances official website and search by model number to find authentic components. Ensure compatibility and maintain your warranty by avoiding third-party parts. GE parts are designed to meet strict quality standards. Locate your model number on the left side of the refrigerator compartment for accurate ordering. This ensures optimal performance and longevity of your appliance.

Installation and Setup Guide

Ensure your GE Bottom Freezer Refrigerator is installed correctly for optimal performance. Follow the pre-installation requirements, secure the appliance, and level it properly. Plug it in after 24 hours.

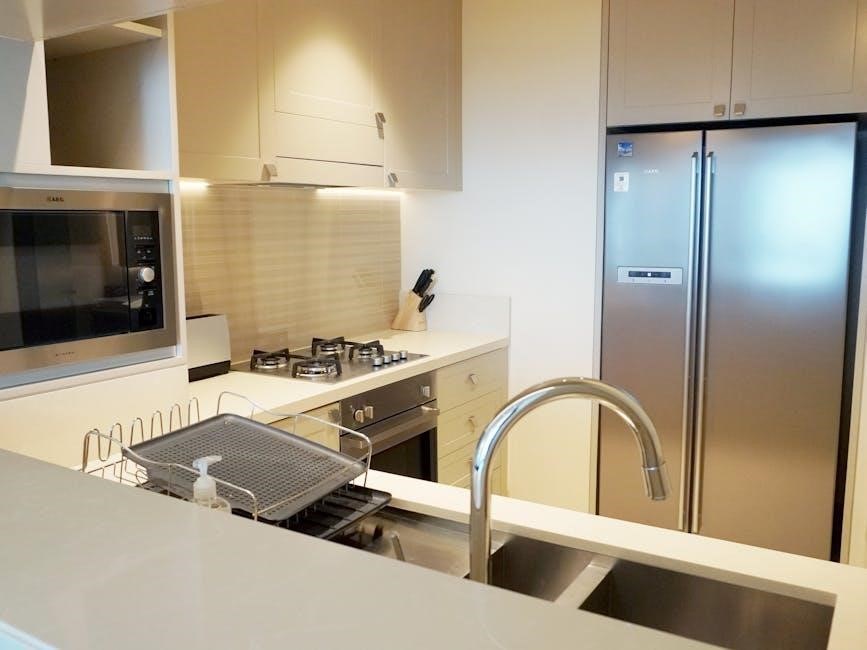
8.1 Pre-Installation Requirements

Before installing your GE Bottom Freezer Refrigerator, ensure the site is level and clear of obstructions. Measure the space to confirm it fits. Check the electrical outlet is nearby and compatible. Ensure the flooring is sturdy and even. Allow 24 hours after delivery before plugging it in. Verify the area is well-ventilated and meets all safety guidelines for proper operation.

8.2 Step-by-Step Installation Instructions

Carefully place the refrigerator in its designated space, ensuring it is level and stable. Connect the water supply line if your model has an ice maker or water dispenser. Plug in the appliance and allow it to cool for 24 hours before adding food. Check that all doors align properly and seals are tight. Follow the manual’s guidelines for final adjustments and settings to ensure optimal performance.

Warranty and Repair Information

Your GE Bottom Freezer Refrigerator is backed by a comprehensive warranty. Visit GEAppliances.com to register your appliance and review coverage details. Regular maintenance ensures warranty validity. For repairs, contact GE Customer Support for authorized service.

9.1 Understanding the Warranty Coverage

The GE Bottom Freezer Refrigerator comes with a comprehensive warranty covering parts and labor for defective components. Most models include a 1-year limited warranty, with extended coverage for sealed systems and compressors up to 5 years. Visit GEAppliances.com to review your specific warranty terms and register your appliance for seamless support. Proper maintenance ensures warranty validity and optimal performance.

9.2 How to Register Your Appliance

To register your GE Bottom Freezer Refrigerator, visit GEAppliances.com and navigate to the “Support” section. Create an account or log in if you already have one. Enter your appliance’s model and serial numbers, found on the label inside the refrigerator compartment. Registration ensures warranty validation and provides access to exclusive resources and updates. For assistance, contact GE customer support at 1-800-626-2005.

Safety Precautions

Always unplug your refrigerator before cleaning or servicing. Keep children away from electrical components and ensure doors are securely closed to prevent accidents.

10.1 Electrical Safety Guidelines

Ensure your GE Bottom Freezer Refrigerator is installed on a grounded electrical circuit to prevent shocks. Avoid using extension cords or overloaded outlets. Always unplug the appliance before cleaning or servicing. Keep electrical components dry and avoid touching them with wet hands. Never attempt repairs yourself; contact a qualified technician for safety. Proper electrical practices ensure optimal performance and prevent hazards.

10.2 Child Safety Features

The GE Bottom Freezer Refrigerator includes child safety locks to prevent accidental opening. These locks ensure children cannot access the interior, keeping them safe. Additionally, some models feature door alarms that sound if doors are left open, preventing energy waste and potential hazards. Always secure heavy drawers and shelves to avoid tipping. Regularly check and maintain these features to ensure your appliance remains child-friendly and safe.

This guide provides essential insights into your GE Bottom Freezer Refrigerator, ensuring proper usage and maintenance. For more details, visit GEAppliances.com to access the full manual and support resources.

11.1 Summary of Key Points

The GE Bottom Freezer Refrigerator Manual provides essential guidance for optimal performance, including temperature settings, troubleshooting common issues like poor cooling, and maintenance tips. Regularly clean condenser coils, check door seals, and replace water filters for efficiency. Adjust settings wisely to balance performance and energy savings. For detailed instructions, refer to the full manual available on GEAppliances.com. Proper care ensures longevity and reliable operation of your appliance.

11.2 Final Tips for Maintaining Your GE Bottom Freezer Refrigerator

To ensure your GE Bottom Freezer Refrigerator performs optimally, regularly clean condenser coils, inspect door seals, and replace water filters as needed. Maintain proper temperature settings and avoid overloading compartments. Check for frost buildup and defrost when necessary. Keep the appliance level and ensure proper ventilation. Refer to the full manual for detailed guidance. By following these tips, you’ll extend the lifespan and efficiency of your refrigerator.

Open post

unravel me pdf google drive

“Unravel Me” by Tahereh Mafi is a captivating young adult dystopian novel, part of the Shatter Me series․ Its unique writing style, emotional depth, and strong characters have made it a fan favorite, driving demand for accessible formats like PDFs on platforms such as Google Drive․

1․1 Overview of the Book and Its Author

Tahereh Mafi is the acclaimed author of “Unravel Me”, the second installment in the Shatter Me series․ Known for her lyrical prose and emotional storytelling, Mafi captivates readers with Juliette Ferrars’ journey in a dystopian world․ The book explores themes of power, rebellion, and self-discovery, resonating deeply with young adult audiences․ Its popularity has led to widespread demand, including searches for PDF versions on platforms like Google Drive, highlighting its enduring appeal and engaging narrative style․

1․2 Reasons Behind the Book’s Popularity

“Unravel Me” captivates readers with its unique writing style, blending poetic prose and raw emotion․ The strong, complex protagonist, Juliette Ferrars, and her gripping journey resonate deeply with audiences․ Themes of self-discovery, rebellion, and love, set against a dystopian backdrop, further amplify its appeal․ The book’s emotional depth and character development have fostered a loyal fan base, driving the demand for accessible formats like PDFs on platforms such as Google Drive․

Understanding the Importance of Google Drive for PDF Sharing

Google Drive offers a secure, accessible platform for sharing PDFs, enabling easy collaboration and storage․ Its user-friendly interface and cloud-based accessibility make it a popular choice for users globally․

2․1 How Google Drive Facilitates File Sharing

Google Drive simplifies file sharing by allowing users to upload and store PDFs, like “Unravel Me,” in the cloud․ It provides shareable links, customizable access permissions, and real-time collaboration features․ Users can easily send files to others via email or direct links, ensuring quick and secure access without the need for physical storage devices․ This makes it an efficient tool for distributing and managing digital content․

2․2 Advantages of Using Google Drive for PDF Storage

Google Drive offers several advantages for storing PDFs like “Unravel Me․” It provides cloud-based access, allowing files to be accessed from any device with an internet connection․ Automatic syncing ensures updates are reflected across all devices․ Additionally, Drive offers version control, collaboration features, and secure sharing options, making it an ideal platform for managing and distributing digital content efficiently and safely․

Step-by-Step Guide to Finding “Unravel Me PDF” on Google Drive

  • Search for “Unravel Me PDF” using specific terms․
  • Use filters to narrow results by file type and date․
  • Ensure files are publicly accessible or shared appropriately․
  • Verify file authenticity and copyright compliance․

3․1 Effective Search Strategies for PDF Files

To effectively find “Unravel Me PDF” on Google Drive, use specific keywords like “Unravel Me Tahereh Mafi PDF” or “Shatter Me series PDF․” Employ boolean operators (e․g․, “OR,” “AND”) to refine results․ Utilize quotes for exact phrases, such as “Unravel Me PDF free․” Check “File type” filters to narrow down to PDFs․ Additionally, explore public folders or shared links, ensuring compliance with copyright laws․ Verify file authenticity by reviewing the source and document properties․

3․2 Tips for Locating the File Quickly

To quickly locate “Unravel Me PDF” on Google Drive, use precise search terms like “Unravel Me Tahereh Mafi PDF” or “Shatter Me series PDF․” Check public folders or shared links, and filter results by file type (PDF)․ Sort by date to find recent uploads․ Avoid generic searches to reduce irrelevant results․ Verify the file’s authenticity by reviewing the source and document properties before downloading․

Legal and Ethical Considerations of Accessing Copyrighted Material

Accessing copyrighted material like “Unravel Me” without permission is illegal and unethical․ Respect copyright laws by purchasing or borrowing legally to support authors and creators․

4․1 Understanding Copyright Laws and Their Implications

Copyright laws protect original works like “Unravel Me” from unauthorized use or distribution․ Violating these laws can lead to legal consequences, including fines and penalties․ Understanding these implications emphasizes the importance of respecting intellectual property rights․ Authors and creators rely on these protections to maintain control over their work and receive fair compensation․ Ignorance of copyright laws is not a valid defense, making it crucial to adhere to legal guidelines when accessing or sharing content;

4․2 Ethical Alternatives to Accessing the Book

Ethical alternatives to accessing “Unravel Me” include purchasing the book from authorized retailers or borrowing it from libraries․ Platforms like Amazon Kindle, Google Books, or local libraries offer legal access․ Supporting authors through legitimate channels ensures they receive fair compensation for their work․ Respect for intellectual property rights fosters a culture of creativity and fairness, benefiting both creators and readers․

Key Themes and Plot Points in “Unravel Me”

“Unravel Me” delves into themes of love, power, and self-discovery, with Juliette’s journey exploring complex relationships, leadership, and identity․ The plot intensifies emotional conflicts, driving character growth and reshaping alliances․

5․1 Summary of the Book’s Main Plot

“Unravel Me”, by Tahereh Mafi, follows Juliette Ferrars as she navigates a world of supernatural abilities and political upheaval․ The story explores her complex relationships with Warner and Adam, while she confronts the Reestablishment’s tyranny․ Juliette’s journey is marked by self-discovery, loyalty, and the struggle for power, as she learns to control her abilities and make sacrifices to protect those she loves․ The plot unfolds with intense emotional depth and high stakes․

5․2 Analysis of Major Themes and Characters

“Unravel Me” explores themes of self-discovery, power, and loyalty, with Juliette Ferrars at the center, evolving from a vulnerable girl to a powerful leader․ The complex relationships between Juliette, Warner, and Adam drive the emotional core of the story․ Warner’s multifaceted personality and Juliette’s internal struggles highlight the book’s depth, while the fight against the Reestablishment underscores the broader battle for freedom and justice in a fractured world․

Alternative Sources for Accessing the Book Legally

Access “Unravel Me” legally through platforms like Amazon, Barnes & Noble, Google Books, or your local library․ These sources offer convenient and reliable ways to purchase or borrow the book, ensuring you support the author and publisher ethically․

6․1 Recommended Platforms for Purchasing or Borrowing the Book

Popular platforms for accessing “Unravel Me” include Amazon Kindle, Barnes & Noble Nook, Google Books, and Apple Books․ Libraries like OverDrive also offer e-book rentals․ These platforms provide legal and convenient ways to purchase or borrow the book in various formats, ensuring a seamless reading experience while supporting the author and publisher․

6․2 Benefits of Supporting Authors Through Legal Channels

Purchasing or borrowing “Unravel Me” through legal channels ensures financial support for the author and publisher, promoting continued creativity․ It also guarantees access to high-quality, virus-free content․ Legal purchases encourage authors to produce more works and contribute to the literary ecosystem․ Additionally, it fosters a culture of respect for intellectual property, ensuring that creators are fairly compensated for their efforts․ This ethical approach benefits both readers and writers alike․

Common Mistakes to Avoid When Searching for PDFs

Using vague terms can lead to irrelevant results․ Avoiding excessive search terms and unreliable websites is crucial for effective PDF searches․ Stay specific and cautious․

7․1 Pitfalls of Using Incorrect Search Terms

Using vague or overly broad search terms can lead to irrelevant results and wasted time․ For example, searching for “Unravel Me PDF” without specific keywords may yield unrelated files․ Additionally, using incorrect spellings or incomplete titles can prevent you from finding the desired document․ To avoid this, ensure your search terms are precise and include relevant details, such as the author’s name or specific editions․ This increases the likelihood of finding the correct PDF quickly and efficiently․

7․2 Avoiding Unreliable or Malicious Websites

When searching for “Unravel Me PDF” on Google Drive, be cautious of unreliable or malicious websites․ Some links may contain malware or phishing attempts․ To stay safe, verify the source’s credibility and avoid suspicious download prompts․ Stick to trusted platforms and be wary of too-good-to-be-true offers․ Always prioritize legal and ethical access to avoid risks associated with unverified sources․

The Role of Search Engines in Finding PDF Files

Search engines play a crucial role in locating PDF files by indexing and ranking them based on relevance and keywords․ This helps users efficiently find specific documents like “Unravel Me” on Google Drive․

8․1 How Search Engines Index and Rank PDF Files

Search engines like Google use advanced algorithms to index PDF files by analyzing their content, metadata, and keywords․ They rank PDFs based on relevance, user engagement, and the reliability of the hosting platform, such as Google Drive․ This process ensures that users can quickly find specific documents like “Unravel Me” by prioritizing files with clear titles and descriptions that match search queries․

8․2 Optimizing Your Search Query for Better Results

To find “Unravel Me PDF” on Google Drive effectively, refine your search query by using specific keywords like “Unravel Me Tahereh Mafi PDF․” Applying quotes around the title, such as “Unravel Me” PDF, enhances precision․ Utilize Google Drive filters to narrow results by file type and date․ Incorporate advanced search operators like filetype:pdf or site:drive․google․com to target PDFs․ Experiment with additional terms such as “ebook” or “free download,” while ensuring legality․ Regularly refine your search based on results to optimize outcomes․

9․1 Recap of the Best Practices for Accessing “Unravel Me”

When searching for “Unravel Me PDF” on Google Drive, use specific search terms and verify sources for reliability․ Always respect copyright laws and consider legal alternatives like purchasing or borrowing the book․ Prioritize ethical access to support authors and ensure a quality reading experience․ Avoid unofficial or unverified links to maintain security and integrity in your search process․

9․2 Encouragement to Explore Legal and Ethical Options

Exploring legal and ethical options to access “Unravel Me” ensures you support the author and the publishing industry․ Purchasing the book or borrowing it from libraries respects copyright laws and promotes creativity․ Legal platforms like Amazon, Barnes & Noble, or your local library offer convenient and guilt-free access․ By choosing these options, you contribute to the literary community and enjoy a high-quality reading experience․

Open post

how to memorize scripture pdf

Memorizing Scripture is a powerful way to deepen your spiritual growth, gain wisdom, and share the gospel effectively. It helps internalize biblical truths for quick reference and inspiration, fostering a closer connection to God’s Word and its timeless message.

1.1 The Importance of Scripture Memorization

Memorizing Scripture is a powerful practice that fosters spiritual growth, transforming hearts and minds. It equips believers to resist temptation, share the gospel, and apply biblical truths in daily life. By internalizing God’s Word, individuals gain comfort, guidance, and a deeper understanding of His will, enabling them to live more faithfully and confidently in their walk with Christ.

1.2 Setting Goals for Effective Memorization

Setting clear, achievable goals is essential for effective Scripture memorization. Start by selecting specific passages that align with your spiritual needs or interests. Break larger sections into manageable portions, focusing on a few verses at a time. Establish a consistent routine, dedicating a set time daily to memorization. Tracking your progress through journaling or apps can also help maintain motivation and accountability as you work toward your goals.

Repetition Techniques for Memorization

Repetition is a cornerstone of effective Scripture memorization. Reading verses aloud, reciting from memory, and listening while reading reinforce retention and build familiarity with the text.

2.1 Reading the Scripture Aloud Repeatedly

Reading Scripture aloud repeatedly is a proven method for memorization. Engage your senses by reading the text multiple times, focusing on rhythm and clarity. This technique helps imprint the words in your memory. Start by reading the verse 10 times, then cover the text and recite it from memory. Consistency and repetition build familiarity, making the process effective for long-term retention and spiritual growth.

2.2 Reciting the Scripture from Memory Daily

Daily recitation strengthens memory and reinforces learning. After initial memorization, set aside time each day to recite the verses without aids. This practice builds confidence and retention, helping to solidify Scripture in your long-term memory. Consistency is key; even brief daily sessions yield significant progress over time, making the Word accessible for reflection, guidance, and sharing throughout your life.

2.3 Listening to the Scripture While Reading

Combining reading with listening enhances memorization by engaging both visual and auditory senses. Play an audio recording of the Scripture while following along in your Bible or notes. This dual approach helps reinforce the words and their rhythm, making them easier to remember. Regularly using this method improves retention and provides an additional layer of understanding, aiding in memorization and internalization of the text.

Engagement Methods for Better Retention

Engagement methods enhance Scripture memorization by making the process interactive and meaningful. Techniques like singing verses to music, writing them on flashcards, and using visual aids create a deeper connection to the text, fostering better retention and understanding. These active approaches inspire creativity and make memorization enjoyable while reinforcing spiritual growth and application in daily life.

3.1 Singing Scripture to Music

Singing Scripture to music is a vibrant and effective memorization method. Melodies help encode verses in memory, making them easier to recall. Choose familiar tunes or create new ones to match the rhythm of the text. Singing engages both auditory and musical memory, enhancing retention. It also adds emotional depth, fostering a deeper connection to God’s Word. This method is enjoyable, shareable, and versatile, making it a powerful tool for memorizing Scripture effectively.

3.2 Writing Down Verses on Paper or Flashcards

Writing Scripture verses on paper or flashcards is a practical memorization technique. It engages visual and kinesthetic memory, reinforcing retention. Flashcards can be reviewed anywhere, making them a portable study tool. Writing verses repeatedly helps commit them to memory, while seeing the words on paper strengthens recall. This method is simple, effective, and accessible, making it a valuable addition to any Scripture memorization routine for learners of all ages and backgrounds. It also aids in identifying challenging sections that may require extra practice. Additionally, jotting down verses in a dedicated notebook allows for reflection and long-term review, deepening spiritual understanding and appreciation.

3.4 Using Visual Aids Like Post-it Notes

Using visual aids such as Post-it notes is a dynamic way to reinforce Scripture memorization. Place verses in visible locations like mirrors, desks, or refrigerators for constant reminders. This method keeps the text in your line of sight, aiding in repetition and retention. Additionally, you can use different colors or symbols to highlight key phrases, making the verses more memorable. Regularly reviewing these notes helps create mental associations, ensuring the words stay fresh in your mind and heart.

Practical Tips for Consistency

Consistency is key to effective Scripture memorization. Incorporate memorization into your daily routine, select passages of appropriate length, and use tools like recording to track progress and stay motivated.

4.1 Incorporating Memorization into Your Daily Routine

Allocate a specific time each day for memorization, such as first thing in the morning or before bed. Start by reading the verse aloud multiple times, then recite it from memory. Consistency is crucial; even a few minutes daily can lead to significant progress over time. Use tools like apps or voice memos to track your sessions and stay persistent in your practice for long-term retention.

4.2 Selecting Passages of Appropriate Length

Choose passages that are manageable in length to avoid feeling overwhelmed. Start with shorter verses or phrases and gradually increase the length as your confidence grows. Select passages that resonate personally or align with specific themes, making memorization more meaningful. This approach helps build momentum and keeps the process enjoyable and sustainable over time.

4.3 Recording Yourself to Track Progress

Recording yourself reciting Scripture is a valuable tool for tracking progress. It helps identify areas needing improvement and builds confidence. Use voice memos or apps to capture your recitations. Listening back allows you to refine pronunciation and pacing. Over time, this method enhances retention and provides a clear measure of growth, making memorization more effective and satisfying.

Mindfulness and Focus in Memorization

Mindfulness and focus are crucial for effective Scripture memorization. Create a quiet, distraction-free environment to concentrate fully. Closing your eyes or Bible while reciting helps maintain attention and improve retention.

5.1 Creating a Quiet and Distraction-Free Environment

Establishing a quiet, distraction-free space is essential for effective Scripture memorization. Find a location where you can focus without interruptions, such as a dedicated study area or prayer room. Minimize noise by using tools like noise-cancelling headphones or playing soft background music. Ensure your phone and other devices are silenced to avoid distractions. A calm and organized environment helps maintain concentration, allowing you to fully engage with the Scripture you’re memorizing. Consistency in your space also enhances retention and focus.

5.2 Closing Your Eyes or Bible While Reciting

Closing your eyes or Bible while reciting Scripture helps test your recall and ensures you’re not relying on visual cues. This method strengthens memory retention by engaging your brain more actively. It also builds confidence in reciting verses accurately. By removing distractions and focusing solely on memory, you can better internalize the text and maintain long-term retention. Incorporate this practice regularly to enhance your memorization effectiveness.

The Role of Community and Accountability

Engaging with a group or partner enhances accountability, providing mutual encouragement and motivation. Sharing progress and memorizing together fosters a supportive environment, ensuring consistent effort and spiritual growth.

6.1 Memorizing with a Group or Partner

Memorizing Scripture with a group or partner adds accountability and motivation. Shared goals create a sense of community, fostering mutual encouragement and support. Regular meetings ensure consistent progress, while collective celebration of milestones enhances engagement and joy in learning God’s Word together, making the process both effective and enjoyable for everyone involved.

6.2 Sharing Progress with Others for Motivation

Sharing your memorization progress with others provides motivation and accountability. Vocalizing achievements boosts confidence, while challenges encourage perseverance. Discussing verses in groups deepens understanding and fosters camaraderie, making the journey more fulfilling and spiritually enriching for all participants, as collective celebration strengthens commitment to memorizing Scripture.

Leveraging Technology for Memorization

Utilize apps for flashcards and reminders to track progress. Record audio recordings of verses to listen and recite. Technology enhances memorization efficiency and accessibility anywhere.

7.1 Using Apps for Flashcards and Reminders

Apps like Bible Memory, Fighter Verses, and Scripture Typer offer digital flashcards and reminders to aid memorization. These tools allow you to create custom decks, track progress, and set daily reminders. Some apps also feature audio recordings and quizzes to test retention. Utilizing these resources can make memorization more engaging and convenient, ensuring consistent practice and long-term retention of Scripture.

7.2 Recording and Playing Back Audio Recordings

Recording yourself reading Scripture and playing it back is an effective memorization tool. Use voice memos or apps to capture audio, then listen to the recordings repeatedly. Hearing your own voice helps reinforce memory, and you can playback while commuting or doing chores. This method allows for consistent exposure to the text, making memorization easier and more convenient over time.

Overcoming Challenges in Memorization

Overcoming challenges in memorization requires patience and persistence. Forgetfulness and frustration are common, but adjusting your method and staying consistent can help. Repetition and prayer are key tools to overcome obstacles and maintain motivation during the process.

8.1 Dealing with Forgetfulness and Frustration

Forgetfulness and frustration are natural when memorizing Scripture. Start by breaking verses into smaller parts and repeating them frequently. Use visualization or associations to aid memory. Stay patient and persistent, celebrating small victories. Incorporate prayer for clarity and focus. Regular review helps reinforce memorized passages and reduces frustration over time, ensuring long-term retention and spiritual growth.

8.2 Adjusting Your Method for Better Results

Experiment with different techniques to find what works best for you. If reading aloud isn’t effective, try singing or writing verses. Adjust your routine to fit your schedule and learning style. Incorporate visual aids or technology, like apps, to enhance retention. Regularly assess and modify your approach to stay engaged and motivated, ensuring steady progress in memorization.

Review and Long-Term Retention Strategies

Consistent review is crucial for long-term retention of memorized Scripture. Regularly revisit verses, incorporating them into daily life and prayer to reinforce their meaning and significance over time.

9.1 Regularly Reviewing Memorized Verses

Regular review is essential for retaining memorized Scripture. Set aside time daily or weekly to recite verses from memory, ensuring they remain fresh in your mind. This consistent practice helps prevent forgetfulness and strengthens your ability to recall passages accurately. Over time, this habit will solidify the verses in your long-term memory, making them a lasting source of guidance and encouragement.

9.2 Incorporating Verses into Daily Life and Prayer

Incorporating memorized verses into daily life and prayer strengthens their impact. Use them to guide decisions, comfort others, or express gratitude. During prayer, recite verses to align your heart with God’s truth, fostering a deeper spiritual connection. Reflect on their meaning in everyday situations, allowing Scripture to transform your thoughts and actions, and share them with others to encourage and inspire.

Celebrate your progress and stay committed to lifelong Scripture memorization. Thank God for the journey, knowing persistence in memorizing His Word brings spiritual growth and inspiration.

10.1 Celebrating Progress and Staying Committed

Celebrating milestones in Scripture memorization fosters motivation and reinforces commitment. Acknowledge achievements, no matter how small, to stay inspired. Sharing progress with others can enhance accountability and joy. Remember, consistency is key to long-term retention and spiritual growth. Keep God’s Word central in your heart, and let it guide your daily life for enduring impact and transformation.

10.2 Encouragement for Lifelong Scripture Memorization

Embrace Scripture memorization as a lifelong journey, not a short-term goal. It enriches your faith, equips you for witnessing, and provides comfort in challenging times. Stay encouraged by reflecting on how God’s Word transforms your life. Persevere, knowing that each verse learned brings you closer to Him and strengthens your spiritual foundation for years to come.

Open post

gem premier 5000 user manual pdf

Welcome to the GEM Premier 5000 User Manual, your comprehensive guide to operating and maintaining this advanced blood gas and electrolyte analyzer. Designed for healthcare professionals, this manual ensures safe and effective use, covering setup, operation, maintenance, and troubleshooting procedures.

1.1 Overview of the GEM Premier 5000 System

The GEM Premier 5000 is a portable critical care analyzer designed for rapid whole blood analysis at the point of care. It measures pH, pCO2, pO2, Na, K, Cl-, Ca, glucose, lactate, hematocrit, total bilirubin, and CO-oximetry parameters. Its compact design and advanced features like iQM2 technology ensure accurate, real-time results in clinical and laboratory settings.

1;2 Importance of Reading the Manual

Reading the GEM Premier 5000 User Manual is essential for safe and effective operation. It provides detailed instructions for setup, analysis, and maintenance, ensuring accurate results and compliance with safety standards. Adhering to the manual prevents errors, optimizes performance, and guarantees reliable diagnostic outcomes in clinical settings.

1.3 Target Audience for the Manual

This manual is intended for healthcare professionals, including trained operators, laboratory technicians, and clinical support staff. It is essential for anyone responsible for operating, maintaining, or troubleshooting the GEM Premier 5000 analyzer. Readers should have prior knowledge of blood gas analysis and medical laboratory practices to fully utilize the information provided.

System Overview and Key Features

The GEM Premier 5000 is a portable critical care system designed for rapid blood gas and electrolyte analysis. It features real-time detection, automated QC, and integration with GEMweb Plus 500 for enhanced functionality and connectivity, ensuring accurate and efficient point-of-care testing in clinical settings.

2.1 Technical Specifications of the GEM Premier 5000

The GEM Premier 5000 measures pH, pCO2, pO2, Na, K, Cl-, Ca, glucose, lactate, hematocrit, total bilirubin, and CO-oximetry parameters. It features iQM2 technology for real-time detection, ensuring accurate and reliable results. The system is portable, integrates with GEMweb Plus 500, and supports automated quality control, making it ideal for point-of-care testing in critical care settings.

2.2 Measurement Capabilities and Parameters

The GEM Premier 5000 measures pH, pCO2, pO2, Na, K, Cl-, Ca, glucose, lactate, hematocrit, total bilirubin, and CO-oximetry parameters (tHb, O2Hb, COHb, MetHb, HHb). It provides accurate, quantitative results for whole blood samples, supporting critical care diagnostics with advanced measurement capabilities and real-time detection technology for reliable patient care outcomes.

2.3 Benefits of Using the GEM Premier 5000

The GEM Premier 5000 offers portable, rapid analysis of blood gas, electrolytes, and metabolites, ensuring accurate results at the point of care. Its advanced iQM2 technology provides real-time quality monitoring, while automated corrections enhance reliability. Integration with GEMweb Plus 500 streamlines data management, making it an efficient solution for critical care settings and laboratory use.

Installation and Setup

This section provides step-by-step instructions for unpacking, connecting interfaces, and powering on the GEM Premier 5000. Follow the manual to ensure proper setup and functionality.

3.1 Unpacking and Initial Setup

Carefully unpack the GEM Premier 5000 and inspect for damage. Place the analyzer on a stable, flat surface. Connect all peripherals and ensure proper power supply. Follow the manual’s guidelines for initial setup, including safety precautions and configuration steps to ensure optimal performance and compliance with operational standards.

3.2 Connecting Interfaces and Peripherals

Connect the GEM Premier 5000 to a power source and ensure all peripherals, such as printers and data management systems, are securely linked; Follow the manual’s instructions for configuring communication settings and verifying connectivity. Properly attach any external devices, such as barcode scanners or GEM PAK cartridges, to ensure seamless operation and data transfer.

3.3 Safety Precautions During Installation

Always wear protective gear when handling electrical components. Ensure the device is placed on a stable, flat surface away from moisture. Avoid exposing the analyzer to extreme temperatures or direct sunlight. Follow all grounding and power supply instructions carefully. Read the manual thoroughly before starting the installation process to ensure compliance with safety guidelines.

Operation and Sampling Procedures

This section guides users through preparing samples, conducting blood gas and electrolyte analysis, and understanding the analyzer’s operation to ensure accurate and reliable test results.

4.1 Preparing for Sample Analysis

Before analysis, ensure proper sample collection and handling. Use heparinized whole blood samples and follow safety guidelines. Calibrate the analyzer as per instructions and verify quality control standards. Regularly maintain equipment to ensure accuracy and reliability in test results.

4.2 Conducting Blood Gas and Electrolyte Analysis

Insert the sample into the analyzer, ensuring proper alignment and sealing. Select the appropriate analysis mode for blood gas, electrolytes, or combined parameters. The GEM Premier 5000 performs real-time detection and automatic correction, providing accurate measurements of pH, pCO2, pO2, Na, K, Cl-, Ca, glucose, lactate, and CO-oximetry parameters. Follow the manual’s guidelines for quality control and sample handling to ensure precise results.

4.3 Understanding the Analysis Process

The GEM Premier 5000 employs iQM2 technology for real-time detection and automatic correction during analysis. It continuously monitors samples before, during, and after testing, ensuring precise measurements of pH, pCO2, pO2, Na, K, Cl-, and other parameters. This process guarantees accurate, reliable results, meeting clinical standards and regulatory requirements efficiently.

Maintenance and Troubleshooting

Regular maintenance ensures optimal performance. Address error codes promptly, perform diagnostics, and follow calibration procedures. Refer to the manual for troubleshooting guides and technical specifications.

5.1 Routine Maintenance Requirements

Regular maintenance is crucial for optimal performance. Clean the sample port, check reagent levels, and verify expiration dates. Perform routine system checks, including iQM2 technology verification. Replace worn or expired components as specified. Schedule periodic professional servicing to ensure accuracy and reliability, adhering to the manual’s guidelines for sustained functionality and compliance.

5.2 Common Error Codes and Solutions

The GEM Premier 5000 displays error codes to indicate specific issues. Common codes include calibration errors, sensor malfunctions, or sample issues. Refer to the manual for code definitions and troubleshooting steps. Addressing errors promptly ensures accurate results and system reliability. Always follow recommended solutions and perform routine checks to minimize downtime and maintain optimal performance.

5.3 Diagnostic Tools and Calibration Procedures

The GEM Premier 5000 features advanced diagnostic tools, including real-time monitoring and error detection. Regular calibration is essential for accuracy. The system supports both automatic and manual calibration options. Follow the manual’s step-by-step guide to perform calibrations correctly. Proper use of diagnostic tools ensures optimal performance, reduces errors, and maintains compliance with quality standards. Regular checks are recommended.

Quality Management and Compliance

The GEM Premier 5000 ensures compliance with clinical standards through automated quality control and real-time monitoring. Regular QC checks and audits maintain accuracy and reliability in results.

6.1 Quality Control (QC) and Assurance

The GEM Premier 5000 incorporates advanced quality control (QC) measures, including real-time detection and automated checks. The iQM2 technology ensures accuracy throughout analysis, while traditional QC protocols maintain consistency. Regular audits and compliance with regulatory standards guarantee reliable results, making it a trusted system for critical care settings and laboratories.

6.2 Regulatory Certifications and Standards

The GEM Premier 5000 complies with global regulatory standards, including FDA and CE marking. It adheres to ISO certifications, ensuring reliability and safety. The system meets stringent industry requirements for blood gas and electrolyte analysis, providing assurance of accurate and compliant results for healthcare professionals in clinical and laboratory settings.

6.3 Documentation and Record-Keeping

The GEM Premier 5000 generates detailed reports and stores data securely. It supports electronic record-keeping, ensuring compliance with regulatory requirements. The system provides automated documentation of test results, calibration, and maintenance activities. Customizable reports and audit trails enhance transparency and facilitate compliance with laboratory and clinical standards for accurate and traceable patient care.

Advanced Features and Customization

The GEM Premier 5000 features iQM2 technology for real-time quality monitoring and customizable settings. It integrates seamlessly with GEMweb Plus 500, enhancing workflow and data management capabilities.

7;1 iQM2 Technology and Real-Time Detection

The GEM Premier 5000 incorporates iQM2 technology, providing real-time detection and continuous monitoring of sample analysis. This advanced system ensures accuracy by performing checks before, during, and after testing. Automatic corrections and documentation enhance reliability, while real-time alerts and customizable settings optimize workflow efficiency for precise blood gas and electrolyte measurements in clinical settings.

7.2 Customizable Settings and Configuration

The GEM Premier 5000 offers customizable settings to tailor system operation to specific clinical needs. Users can configure quality control parameters, operator permissions, and test settings. The system also supports personalized profiles and customizable alerts, enhancing workflow efficiency. Integration with GEMweb Plus 500 allows for remote configuration and centralized management of analyzer settings.

7.3 Integration with GEMweb Plus 500

The GEM Premier 5000 seamlessly integrates with GEMweb Plus 500, enabling advanced connectivity and data management. This integration allows for real-time monitoring, automated quality control, and centralized management of multiple analyzers. It streamlines workflows, enhances lab efficiency, and ensures compliance with regulatory standards, providing a comprehensive solution for healthcare facilities.

Training and Competency Assessment

This section outlines the essential training requirements and competency assessment processes for operators to ensure proficient use of the GEM Premier 5000 analyzer.

8.1 Training Requirements for Operators

Operators must complete comprehensive training modules, including theoretical and practical sessions, to ensure proficiency with the GEM Premier 5000. Training covers system operation, sample handling, and troubleshooting. Only authorized personnel who have completed competency assessments are permitted to perform blood gas and electrolyte analysis using the analyzer. Supervised hands-on training is strongly recommended.

8.2 Competency Assessment Process

The competency assessment ensures operators demonstrate proficiency in using the GEM Premier 5000. It includes written and practical evaluations to confirm understanding of system operation, sampling techniques, and troubleshooting. Authorized personnel conduct assessments to verify operators can perform tasks accurately and safely. Successful completion is mandatory before independent operation of the analyzer is permitted.

8.3 Ongoing Education and Support

Ongoing education and support are essential for optimal use of the GEM Premier 5000. Operators can access training programs, webinars, and updated documentation to enhance their skills. Customer support is available for troubleshooting and maintenance, ensuring users maintain proficiency and compliance with system requirements and advancements in technology.

Clinical Applications and Utility

The GEM Premier 5000 is ideal for critical care, emergency departments, operating rooms, and cath labs, providing rapid blood gas, electrolyte, and co-oximetry measurements to guide immediate treatment decisions.

9.1 Use in Critical Care Settings

The GEM Premier 5000 is essential in critical care for rapid analysis of blood gas, electrolytes, and co-oximetry, enabling timely clinical decisions. Its portability and reliability make it ideal for high-stakes environments, providing accurate results to guide immediate patient care in intensive care units and emergency situations.

9.2 Application in Emergency Departments

The GEM Premier 5000 is a vital tool in emergency departments for rapid blood gas, electrolyte, and co-oximetry analysis. Its portability and ease of use enable healthcare professionals to obtain critical results at the point of care, aiding in timely diagnosis and treatment of acute conditions such as respiratory distress and metabolic disorders.

9.3 Use in Operating Rooms and Cath Labs

The GEM Premier 5000 is essential in operating rooms and cath labs for real-time blood gas, electrolyte, and co-oximetry analysis. Its portability and ease of use enable anesthesiologists and cardiologists to monitor critical parameters during procedures, ensuring precise patient management and immediate decision-making to maintain patient stability and optimal outcomes.

Warranty and Support Information

The GEM Premier 5000 is backed by a comprehensive warranty and dedicated customer support. For details on warranty terms, service options, and contact information, refer to the manual.

10.1 Warranty Terms and Conditions

The GEM Premier 5000 warranty covers parts and labor for a specified period from the date of purchase. It ensures defect-free performance when used as directed.

Damage from misuse, unauthorized modifications, or failure to follow manual guidelines is not covered. Refer to the manual for full warranty terms and conditions.

10.2 Customer Support and Service Options

The GEM Premier 5000 offers comprehensive customer support, including 24/7 technical assistance via phone or email. Online resources, such as manuals and troubleshooting guides, are available for quick reference. Additionally, optional service contracts provide on-site maintenance and priority support to ensure optimal performance and minimize downtime.

10.3 Contact Information for Assistance

For assistance, contact Instrumentation Laboratory at +1-800-446-9967 or visit their official website. Email support is available at support@ilww.com. International users can find regional contact details in the manual or on the IL website. Support is available 24/7 for technical inquiries and service requests.

The GEM Premier 5000 User Manual ensures safe and effective operation, emphasizing proper maintenance and adherence to compliance protocols for optimal performance and patient care.

11.1 Summary of Key Features and Benefits

The GEM Premier 5000 offers advanced features like real-time detection, automated quality control, and comprehensive blood gas, electrolyte, and CO-oximetry measurements. Its portability, ease of use, and rapid results make it ideal for critical care settings, ensuring accurate diagnostics and enhanced patient care outcomes while minimizing operational errors.

11.2 Encouragement for Proper Usage and Maintenance

To ensure optimal performance and longevity of the GEM Premier 5000, always read this manual thoroughly before operation. Adhere to specified guidelines for maintenance, calibration, and safety protocols. Regular system checks and proper handling will ensure accurate results and extend the device’s lifespan.

11.3 Final Safety and Compliance Reminders

Always adhere to safety guidelines and compliance standards when using the GEM Premier 5000. Ensure proper training and follow regulatory certifications. Regularly update software and maintain documentation for quality assurance. Use only authorized consumables and follow disposal protocols. Stay informed about system updates and manufacturer recommendations to ensure optimal performance and patient safety.

Open post

tl-sg105 manual

Overview of the TP-Link TL-SG105

The TP-Link TL-SG105 is a 5-port gigabit desktop switch with a durable metal casing, designed for high-speed data transfer and reliable network performance․ It supports 10/100/1000 Mbps speeds, making it ideal for home and small business use․ The switch features plug-and-play functionality, requiring no configuration, and includes advanced features like QoS and IGMP snooping for optimized traffic management․ With its compact design and energy-saving technologies, the TL-SG105 is a cost-effective solution for expanding network capabilities․ Its fanless design ensures silent operation, making it suitable for quiet environments․ This switch is perfect for users seeking a robust, easy-to-use networking device to connect multiple devices seamlessly․

The TP-Link TL-SG105 is a reliable, 5-port gigabit switch designed for high-speed networking needs․ It offers a durable metal design and supports 10/100/1000 Mbps speeds, ensuring efficient data transfer․ With plug-and-play functionality, it eliminates the need for complex configurations, making it ideal for home and small business environments․ Its compact size and silent operation further enhance its versatility as a cost-effective solution for expanding network capabilities seamlessly․

1․2 Key Features of the TL-SG105

The TP-Link TL-SG105 offers exceptional performance with its 5-port gigabit connectivity, supporting speeds of up to 10/100/1000 Mbps․ It features plug-and-play functionality for easy setup and includes advanced features like Quality of Service (QoS) and IGMP snooping to optimize network traffic․ The switch is energy-efficient and has a compact, durable metal design․ Its fanless operation ensures silent performance, making it ideal for home and small business environments․

Installation and Setup Guide

The TP-Link TL-SG105 is a plug-and-play desktop switch, requiring minimal setup․ Simply connect devices via RJ45 ports, and it’s ready to use, ensuring a seamless networking experience․

2․1 Physical Installation of the TL-SG105

The TP-Link TL-SG105 is designed for easy physical installation․ Place it on a flat surface or mount it on a wall using the provided brackets․ Connect devices via RJ45 ports and power it on using the included adapter․ Its compact, metal design ensures durability and stability in any environment․ The fanless construction guarantees silent operation, making it ideal for office or home use․

2․2 Configuring the Switch for Initial Use

The TL-SG105 offers plug-and-play functionality, requiring no complex configuration․ Connect devices to the RJ45 ports, and the switch automatically negotiates speeds and detects cable types․ For advanced settings, access the web-based interface to configure QoS, IGMP snooping, and other features․ LED indicators provide status updates, ensuring easy monitoring of port activity and network performance․ This makes the switch user-friendly for both novice and experienced users․

Connecting Devices to the TL-SG105

Connect devices to the TL-SG105 using its 5 RJ45 ports, which support Auto-MDI/MDIX and Auto-Negotiation․ Plug-and-play functionality ensures easy, configuration-free connections․

3․1 Port Configuration and Auto-Negotiation

The TL-SG105 features 5 RJ45 ports supporting 10/100/1000 Mbps speeds and Auto-Negotiation․ This allows the switch to automatically detect and optimize connections for maximum performance․ The Auto-MDI/MDIX feature eliminates the need for crossover cables, ensuring seamless connectivity․ With its non-blocking architecture, the switch delivers full wire-speed data transfer, making it ideal for high-bandwidth applications․ Its energy-saving design reduces power consumption during low-data activity, ensuring efficient operation․

3․2 Establishing Connections with RJ45 Ports

The TL-SG105 provides 5 RJ45 ports for easy connectivity․ Simply plug in your Ethernet cables, and the switch automatically detects and configures the connection․ The plug-and-play design ensures a hassle-free setup․ The ports support Auto-Negotiation and Auto-MDI/MDIX, eliminating the need for crossover cables․ LED indicators on each port display connection status and link activity, making it easy to verify device connections at a glance․

Product Specifications

The TL-SG105 is a 5-port gigabit desktop switch with a metal casing, supporting 10/100/1000 Mbps speeds․ It features a compact, fanless design for silent operation and includes energy-saving technologies․ The switch supports plug-and-play functionality, Auto-Negotiation, and Auto-MDI/MDIX, ensuring seamless and efficient network connections for home and small business environments․

4․1 Technical Details of the TL-SG105

The TL-SG105 is a 5-port gigabit desktop switch supporting 10/100/1000 Mbps speeds․ It features a metal casing, Auto-Negotiation, and Auto-MDI/MDIX for seamless connections․ The switch supports QoS and IGMP Snooping for optimized traffic management․ With a MAC address table of 2K entries, it ensures efficient data handling․ Its compact, fanless design enables silent operation, while energy-saving technologies reduce power consumption․ The switch is ideal for expanding network capabilities in small business or home environments․

4․2 Compliance and Certifications

The TL-SG105 complies with international standards, including CE, FCC, and RoHS certifications, ensuring safety and environmental compliance․ It adheres to energy-saving protocols and meets global regulatory requirements․ The switch is designed to operate efficiently while minimizing environmental impact․ Compliance with these standards guarantees reliable performance and sustainability, making it a trusted choice for users worldwide․ Regional availability may vary, so check local certifications for specific models․

Advanced Features

The TL-SG105 offers Quality of Service (QoS) for traffic prioritization and IGMP Snooping for efficient multicast management․ It also features advanced energy-saving technologies to reduce power consumption․

5․1 Quality of Service (QoS) and IGMP Snooping

The TL-SG105 supports Quality of Service (QoS) for prioritizing critical network traffic, ensuring optimal performance for applications like video streaming or VoIP․ It also features IGMP Snooping, which optimizes multicast traffic delivery, reducing network congestion․ These advanced features enhance network efficiency, making the switch ideal for environments requiring stable and high-speed connectivity․ Users can effortlessly manage traffic prioritization and multicast data distribution without complex configurations․

5․2 Energy-Saving Technologies

The TL-SG105 incorporates advanced energy-saving technologies to reduce power consumption․ It features an innovative design that automatically adjusts power usage based on the status of connected ports and cable length․ This eco-friendly approach minimizes energy waste, lowering operational costs․ Additionally, the switch’s fanless design not only reduces noise but also contributes to its energy efficiency․ These technologies make the TL-SG105 an environmentally responsible choice for network expansion․

Troubleshooting the TL-SG105

This section addresses common issues like connectivity problems or LED malfunctions, offering solutions and tips to ensure the TL-SG105 operates efficiently and maintains network stability․

6․1 Common Issues and Solutions

Common issues with the TL-SG105 include connectivity problems, LED malfunctions, or firmware mismatches․ Solutions involve restarting the device, checking cable connections, or updating firmware․ For connectivity issues, ensure all ports are functioning and cables are securely connected․ If LEDs indicate errors, refer to the manual for meanings․ Firmware updates can resolve compatibility or performance problems․ Visit the TP-Link support page for troubleshooting guides and software updates․ Regular maintenance ensures optimal performance and network stability․

6․2 LED Indicators and Their Meanings

The TL-SG105 features LED indicators for power and port activity․ The power LED glows green when the switch is powered on․ Each port LED indicates connection status: green for active links and blinking green during data transfer․ If an LED is off, it signifies no connection or a disabled port․ These indicators provide quick visual feedback for diagnosing network issues and monitoring data activity․

Firmware and Software Updates

Regularly updating the TL-SG105’s firmware ensures optimal performance and security․ Visit the official TP-Link website to download the latest firmware and follow the update guide for installation․

7․1 Updating the TL-SG105 Firmware

To update the TL-SG105 firmware, visit the official TP-Link website and download the latest firmware version specific to your device․ Follow the provided installation guide for step-by-step instructions․ Ensure your device is connected to a stable power source during the update process․ Interrupting the update may cause permanent damage․ Always verify the firmware’s compatibility with your hardware version before proceeding․

7․2 Checking for the Latest Hardware Version

To check the latest hardware version of the TL-SG105, visit the official TP-Link website and navigate to the support section․ Enter the model number to view available hardware versions․ Ensure your device’s hardware version matches the latest firmware release․ Hardware versions may vary by region, so verify compatibility before downloading updates․ Always refer to the installation guide for detailed instructions․

User Manual and Additional Resources

The TP-Link TL-SG105 manual is available for download on the official TP-Link website and select online retailers like DNS․ It provides detailed installation guides, troubleshooting tips, and technical specifications to ensure optimal use of the switch․ Additional resources, such as firmware updates and compliance statements, are also accessible to support your networking needs․

8․1 Where to Download the TL-SG105 Manual

The TP-Link TL-SG105 manual can be downloaded from the official TP-Link website or authorized retailers like DNS․ Visit the support section, enter the model number, and select the appropriate resources․ Additional platforms such as ManualsLib also host the manual for easy access․ Ensure to download the correct version corresponding to your hardware for accurate guidance and troubleshooting information․ The manual is available in multiple languages and formats for user convenience․

8․2 Online Support and Documentation

The TP-Link TL-SG105 is backed by comprehensive online support and documentation․ Users can access the official TP-Link website for detailed guides, FAQs, and firmware updates․ Additional resources include installation manuals, troubleshooting tips, and compliance statements․ The TP-Link community forum offers peer-to-peer support, while direct customer service is available for technical inquiries․ These resources ensure users can maximize the switch’s performance and resolve issues efficiently․

The TP-Link TL-SG105 is a reliable and efficient 5-port gigabit switch, offering high performance and ease of use․ Its durable metal design and energy-saving features make it an excellent choice for expanding network capabilities in both home and small business environments․

9․1 Final Thoughts on the TL-SG105

The TP-Link TL-SG105 is a reliable and efficient 5-port gigabit switch, offering high performance and ease of use․ Its durable metal design ensures long-term durability, while its plug-and-play functionality makes it accessible to all users․ With support for 10/100/1000 Mbps speeds and advanced features like QoS and IGMP snooping, it delivers smooth and optimized network traffic․ The switch also includes energy-saving technologies, reducing power consumption without compromising performance․ Its compact size and silent operation make it ideal for both home and office environments․ Overall, the TL-SG105 is a cost-effective solution for expanding network capabilities, providing a seamless and efficient connectivity experience․

9․2 Recommended Uses for the TL-SG105

The TL-SG105 is ideal for small networks, offering reliable connectivity for home offices, gaming setups, or small businesses․ Its 5-port design supports high-speed data transfer, making it perfect for streaming, online gaming, or connecting multiple devices like computers, printers, and smart home devices․ The switch is also suitable for environments requiring silent operation and energy efficiency, ensuring optimal performance in any setting․

Open post

nclex study guide pdf 2023 free

The 2023 NCLEX Study Guide is a comprehensive resource designed to help nursing graduates prepare effectively for the exam. Updated for 2023, it offers detailed content, test-taking strategies, and interactive tools to ensure success. Available as a free PDF, it includes practice questions, flashcards, and study plans tailored to the latest test format, making it an essential tool for achieving licensure and transitioning smoothly into professional nursing practice.

1.1 Overview of the NCLEX Exam

The NCLEX exam is a standardized test for nursing graduates to assess their readiness for safe and effective patient care. It includes multiple-choice, select-all-that-apply, fill-in-the-blank, and hotspot questions. The exam evaluates clinical judgment, nursing knowledge, and critical thinking skills. Passing the NCLEX-RN or NCLEX-PN is mandatory for obtaining a nursing license in the U.S. The test format and content are updated regularly to reflect current nursing practices and standards.

1.2 Importance of Using a Study Guide

A study guide is crucial for effective NCLEX preparation, offering a structured approach to mastering exam content. It provides test-taking strategies, practice questions, and detailed explanations to enhance understanding. With tools like flashcards, mnemonics, and comprehensive content aligned with the test plan, a study guide ensures focused learning and time management. Regular use builds confidence, reduces exam anxiety, and increases the likelihood of success on the NCLEX.

Features of the 2023 NCLEX Study Guide

The 2023 NCLEX Study Guide features updated content, comprehensive topic coverage, interactive learning tools, practice questions, flashcards, and alignment with the latest test plan for optimal preparation.

2.1 Updated Content for 2023

The 2023 NCLEX Study Guide includes the latest clinical judgment measurement model, reflecting the new test plan. It covers updated nursing topics, pharmacology, patient care, and safety protocols, ensuring relevance and alignment with current exam standards, helping candidates stay informed and prepared for the most recent exam changes.

2.2 Comprehensive Coverage of Nursing Topics

The 2023 NCLEX Study Guide offers a detailed exploration of all nursing domains, including pharmacology, medical-surgical, pediatrics, obstetrics, and mental health. It includes visual aids and real-world examples to simplify complex concepts, ensuring a thorough understanding of essential care practices. This comprehensive approach, updated for 2023, provides a solid foundation for mastering the exam and excelling in professional nursing.

2.3 Interactive Learning Tools

The 2023 NCLEX Study Guide includes interactive learning tools like flashcards, mnemonics, and practice questions to enhance engagement; These tools help simplify complex nursing concepts and reinforce retention. With features like progress tracking and customizable study plans, learners can identify weak areas and focus their efforts effectively. Interactive elements make studying dynamic and accessible, ensuring a well-rounded preparation experience for the exam.

Study Strategies for NCLEX Success

Effective strategies include structured study plans, active learning techniques, and prioritizing high-yield topics. Utilize checklists, flashcards, and practice questions to maximize retention and exam readiness.

3.1 Effective Time Management

Effective time management is crucial for NCLEX success. Create a structured study schedule, allocating specific times for reviewing content, practicing questions, and analyzing mistakes. Use checklists to track progress and stay organized. Prioritize high-yield topics and dedicate ample time to understanding the Clinical Judgment Measurement Model (CJMM). Consistency is key; set daily goals and adhere to them to ensure comprehensive preparation without burnout.

3.2 Active Learning Techniques

Active learning techniques, such as using flashcards, creating concept maps, and teaching others, enhance engagement and retention. Practice questions and interactive tools in the NCLEX study guide help apply knowledge in real-world scenarios. Focus on understanding the Clinical Judgment Measurement Model (CJMM) through hands-on exercises to improve critical thinking and decision-making skills, ensuring a deeper grasp of nursing concepts and their practical application.

3.4 Prioritizing High-Yield Topics

Identify and focus on high-yield topics such as pharmacology, medical-surgical nursing, and pediatrics, which are frequently tested; Utilize the study guide’s checklists and timelines to prioritize these areas. Mastering these topics through active learning techniques and practice questions can significantly boost your test performance. The guide’s structured approach ensures you allocate time effectively, covering essential content for the NCLEX exam.

Practice Questions and Assessments

Engage with practice questions and assessments to improve understanding and identify weak areas. The guide offers sample tests and tools to enhance exam readiness and confidence effectively.

4.1 Types of Questions on the NCLEX

The NCLEX exam features multiple-choice, select-all-that-apply, fill-in-the-blank, and hot spot questions. These formats test clinical knowledge, prioritization, and decision-making skills. The free 2023 NCLEX study guide explains each question type, providing examples and strategies to master them. Understanding these formats is crucial for effective preparation and achieving success on the exam. The guide also focuses on the Clinical Judgment Measurement Model, central to the NCLEX structure.

4.2 Benefits of Practicing with Sample Questions

Practicing with sample questions enhances familiarity with the NCLEX format, boosting confidence and clinical reasoning. It helps identify weak areas, allowing focused study. The 2023 NCLEX study guide offers numerous practice questions and interactive tools, ensuring thorough preparation and improved performance on exam day.

4.3 Analyzing Mistakes for Improvement

Analyzing mistakes after practicing sample questions is crucial for improvement. The 2023 NCLEX study guide provides detailed explanations for correct and incorrect answers, helping identify knowledge gaps. By reviewing errors, candidates can focus on weak areas, refine test-taking strategies, and develop a deeper understanding of clinical judgment. This process ensures targeted studying, enhancing overall performance and confidence for the exam.

Managing Test Anxiety and Stress

Effective strategies to manage test anxiety include relaxation techniques, deep breathing, and visualization. A structured study plan and confidence-building exercises help reduce stress, ensuring a calm mindset for exam success.

5.1 Recognizing Signs of Anxiety

Recognizing anxiety signs is crucial for effective management. Common indicators include rapid heartbeat, sweating, and difficulty focusing. Emotional signs may involve self-doubt, fear of failure, or burnout. Identifying these early allows implementation of coping strategies, such as relaxation techniques and mindfulness, to maintain composure and focus during exam preparation and test day.

5.2 Relaxation Techniques for Test Day

Relaxation techniques are essential for managing stress on test day. Deep breathing exercises, visualization, and progressive muscle relaxation can help calm nerves. Positive affirmations and mindfulness practices reduce anxiety, while short breaks and physical activity maintain focus. These strategies create a balanced mindset, ensuring candidates approach the exam with confidence and clarity, ultimately enhancing their performance and overall well-being.

5.3 Building Confidence Through Preparation

Confidence is key to excelling on the NCLEX. A structured study plan, practice questions, and mastering high-yield topics ensure readiness. Utilizing flashcards, study guides, and mock exams helps reinforce knowledge. Consistent practice builds familiarity with the exam format, reducing uncertainty. Understanding strengths and weaknesses allows focused improvement, fostering a sense of control and self-assurance. This preparation breeds confidence, empowering candidates to approach the exam with clarity and determination.

Additional Free Resources for NCLEX Prep

Explore free NCLEX study guides, flashcards, and practice exams to enhance your preparation. Utilize recommended websites and study plans to stay organized and focused on key topics.

6.1 Recommended Websites for NCLEX Materials

Several websites offer valuable free NCLEX resources, including practice questions and study guides. NurseInTheMaking provides detailed study tools and flashcards, while Osmosis offers video tutorials and structured study plans. Test Prep Books and NCLEX-RN Review Notes are also excellent sources for downloadable PDF guides and interactive learning aids to complement your exam preparation effectively.

6.2 Utilizing Flashcards and Mnemonics

Flashcards and mnemonics are powerful tools for retaining nursing concepts. Websites like NurseInTheMaking offer downloadable flashcards covering over 480 topics, while Picmonics provides visual aids for complex subjects. Mnemonics, such as acronyms or rhymes, help simplify difficult information, like medication side effects or lab values. These resources enhance active learning and make studying efficient, ensuring key details are easily recalled during the exam.

6.3 Joining Study Groups and Forums

Joining study groups and forums connects you with fellow nursing students, fostering collaborative learning and peer support. Platforms like NurseInTheMaking and Osmosis offer communities where members share resources, discuss challenging topics, and provide encouragement. Active participation helps clarify doubts, enhances understanding, and keeps you motivated. These groups often share study materials, tips, and strategies, making them invaluable for a well-rounded NCLEX preparation experience.

Understanding the NCLEX Test Plan

The NCLEX Test Plan guides exam development and preparation, reflecting current nursing standards. It introduces the Clinical Judgment Measurement Model, emphasizing critical thinking and decision-making skills. Updated for 2023, it outlines content, question formats, and testing policies, ensuring candidates are well-prepared for the exam structure and requirements.

7.1 Clinical Judgment Measurement Model

The Clinical Judgment Measurement Model (CJMM) is central to the new NCLEX format, focusing on critical thinking and decision-making in patient care. It consists of four layers: recognizing cues, analyzing data, prioritizing hypotheses, and generating solutions. This model reflects real-world nursing scenarios, requiring candidates to demonstrate their ability to make sound clinical judgments effectively. Understanding this model is key to mastering the exam and delivering safe, evidence-based care;

7.2 Changes in the 2023 Test Plan

The 2023 NCLEX Test Plan introduced updates to reflect current nursing practices and licensure requirements. Key changes include new question formats, enhanced content areas, and a stronger emphasis on clinical judgment. The test now includes more questions on complex patient scenarios, prioritization of care, and evidence-based interventions. These updates ensure the exam accurately assesses the competencies needed for safe and effective nursing practice in today’s healthcare environment.

7.3 How to Use the Test Plan for Studying

Utilize the 2023 NCLEX Test Plan to structure your study routine effectively. Identify key content areas and focus on high-emphasis topics like clinical judgment and patient safety. Allocate study time based on the weight of each category in the test plan. Use it to guide your review of nursing concepts, ensuring alignment with the exam’s format and content. This strategic approach helps optimize your preparation and target areas needing improvement, enhancing your readiness for the exam.

Final Tips for Exam Day

Arrive early, stay calm, and manage your time wisely. Avoid last-minute cramming and focus on staying confident. Ensure you bring all required materials and remain composed throughout the exam.

8.1 What to Bring to the Testing Center

Bring valid identification, such as a driver’s license or passport, and your Pearson VUE confirmation email. Wear comfortable clothing and layers for temperature control. Avoid bringing personal items like phones or study materials, as secure storage may be provided. Check the testing center’s specific requirements beforehand to ensure compliance and avoid unnecessary stress on exam day.

8.2 Time Management During the Exam

Effective time management is crucial for success on the NCLEX. Allocate approximately one minute per question to avoid spending too much time on a single item. Prioritize high-probability topics and use the process of elimination to narrow down answers. Practice with timed sample questions to build speed and accuracy. Stay calm and systematically address each question to maximize your score within the allotted time frame.

8.3 Staying Focused and Calm

To maintain focus and calm during the NCLEX, employ relaxation techniques such as deep breathing or positive affirmations. Break the exam into smaller sections to avoid feeling overwhelmed. Use mindfulness to stay present and avoid distractions. Take short mental breaks between questions to refresh your mindset. A well-prepared study routine and belief in your abilities will help you remain composed and confident throughout the exam.

The 2023 NCLEX Study Guide provides comprehensive resources, including free PDF downloads, practice questions, and test strategies, ensuring nursing graduates are well-prepared for success and confident in their abilities.

9.1 Summarizing Key Points

The 2023 NCLEX Study Guide offers comprehensive resources, including free PDF downloads, updated content, and interactive tools, to help nursing graduates succeed. It emphasizes effective study strategies, active learning techniques, and time management. Prioritizing high-yield topics, practicing with sample questions, and analyzing mistakes are crucial for exam preparation. Additionally, managing test anxiety and staying focused on exam day are key to achieving success. These tools and strategies ensure confidence and readiness for future nurses.

9.2 Encouragement for Future Nurses

Aspiring nurses, remember that dedication and consistent effort will lead to success. Utilize the 2023 NCLEX Study Guide and its free resources to build confidence and mastery. Every question practiced and every concept understood brings you closer to your goal. Embrace the journey, stay focused, and trust in your preparation. The nursing profession awaits your passion and dedication to make a meaningful impact in healthcare.

Open post

attachment style test pdf

An attachment style test helps individuals understand their relationship patterns, identifying how they form emotional bonds․ Available as a PDF, it offers a structured way to assess attachment styles, promoting self-discovery and relationship improvement through insightful questions and reflection․

What is an Attachment Style?

An attachment style is a psychological concept describing how individuals form and maintain emotional bonds with others․ Rooted in early relationships, it shapes expectations and behaviors in adult interactions․ Four primary styles exist: secure, anxious-preoccupied, avoidant, and disorganized-disoriented․ Secure individuals feel comfortable with intimacy and independence, while anxious-preoccupied types fear abandonment․ Avoidant styles often prioritize emotional distance, and disorganized-disoriented styles result from traumatic experiences․ Understanding your attachment style, through tools like the attachment style test PDF, can enhance self-awareness and improve relationship dynamics․ By identifying patterns, individuals can address challenges and foster healthier connections․ This self-reflection promotes personal growth and empowers individuals to navigate relationships more effectively․

The Purpose of Attachment Style Tests

Attachment style tests are designed to help individuals understand their relationship patterns and emotional connections․ The primary purpose is to identify one’s attachment style, such as secure, anxious, avoidant, or disorganized, by assessing how they interact in relationships․ These tests provide insights into strengths and areas for growth, enabling self-awareness and personal development․ By completing an attachment style test, individuals can gain clarity on how their early experiences shape adult relationships․ The results offer a foundation for improving communication, intimacy, and conflict resolution․ The attachment style test PDF serves as a practical tool for self-reflection, guiding users to recognize patterns and work toward healthier, more fulfilling connections․ Ultimately, the goal is to empower individuals to address challenges and cultivate stronger, more meaningful relationships in their lives․

How Attachment Styles Impact Relationships

Attachment styles significantly influence relationship dynamics, shaping how individuals interact with partners, handle conflicts, and experience intimacy․ Securely attached individuals tend to form healthy, balanced relationships, while those with anxious or avoidant styles may struggle with trust, abandonment fears, or emotional distance․ Anxious-preoccupied individuals often seek constant reassurance, which can lead to clinginess, while avoidant individuals may prioritize independence over intimacy, creating emotional barriers․ Disorganized-disoriented attachment, shaped by trauma, can result in unpredictable behaviors, complicating relationship stability․ Understanding these patterns through an attachment style test PDF helps identify potential challenges and opportunities for growth․ By recognizing how attachment styles manifest, individuals can address these tendencies, fostering more empathetic and supportive connections․ This self-awareness is crucial for building lasting, fulfilling relationships and improving overall relational well-being․

Understanding the Different Attachment Styles

Attachment styles, including secure, anxious, avoidant, and disorganized, shape how individuals form and maintain relationships․ A test PDF helps identify these patterns, fostering self-discovery and relational growth․

Secure Attachment Style

A secure attachment style is characterized by emotional resilience, trust, and healthy communication in relationships․ Individuals with this style feel comfortable with intimacy and can maintain independence․ They exhibit confidence in their partner’s support and manage conflicts effectively․ A secure attachment fosters emotional stability and fulfilling connections․ Understanding this style through a test PDF can highlight strengths and provide insights for nurturing relationships․ It emphasizes the importance of mutual respect and open dialogue, contributing to long-term relationship satisfaction and personal well-being․

Anxious-Preoccupied Attachment Style

The anxious-preoccupied attachment style is marked by a deep-seated fear of abandonment and an intense need for closeness․ Individuals with this style often feel insecure in their relationships, worrying about rejection and seeking constant reassurance․ They may become overly dependent on their partners and are highly sensitive to emotional cues․ This attachment style can lead to emotional turmoil and strained relationships․ An attachment style test PDF can help identify these patterns, offering insights into how anxiety impacts relationship dynamics․ By understanding this style, individuals can work on building trust and developing healthier communication habits to foster more balanced and fulfilling connections․

Avoidant Attachment Style

The avoidant attachment style is characterized by a tendency to distance oneself from intimacy and emotional connection․ Individuals with this style often prioritize independence and may feel uncomfortable with closeness or dependence on others․ They might come across as aloof or unresponsive in relationships, which can stem from past experiences that led them to believe emotional needs won’t be met․ An attachment style test PDF can help identify avoidant tendencies, providing clarity on how this style influences relationship dynamics․ Understanding this pattern can encourage individuals to explore the root causes of their avoidance and work toward building trust and emotional vulnerability in their connections․ Recognizing these behaviors is the first step toward fostering healthier, more fulfilling relationships․

Disorganized-Disoriented Attachment Style

The disorganized-disoriented attachment style is often the result of unresolved trauma or inconsistent caregiving in early life․ Individuals with this style may exhibit chaotic or unpredictable behaviors in relationships, struggling with emotional regulation․ They might feel intense fear or confusion, leading to a lack of a coherent strategy for seeking comfort․ An attachment style test PDF can shed light on these tendencies by assessing how past experiences influence current relationship patterns․ This understanding can be the first step toward healing and developing more secure attachment strategies․ Addressing these challenges often requires professional guidance to process underlying issues and foster healthier emotional responses․ By acknowledging this style, individuals can begin to break cycles of dysfunction and work toward more balanced connections․

How to Take an Attachment Style Test

Complete the test honestly, focusing on your feelings and behaviors in relationships․ Answer each question thoughtfully to ensure accurate results․ Download and print the PDF for convenience․

Step-by-Step Instructions for Completing the Test

To complete the attachment style test effectively, start by downloading and printing the PDF version for convenience․ Next, read each question carefully and reflect on your feelings and behaviors in relationships․ Answer honestly, focusing on one significant relationship, ideally with a current or past partner․ For each statement, select the response that best aligns with your feelings or experiences․ After completing all questions, add up your scores for each attachment style category (Secure, Anxious, Avoidant, or Disorganized)․ Compare your totals to determine your predominant style․ Finally, review the interpretation guide to understand your results and how they apply to your relationships․ This process ensures accurate self-assessment and meaningful insights․

Scoring and Interpreting Your Results

After completing the attachment style test PDF, sum your scores for each category: Secure, Anxious, Avoidant, and Disorganized․ The category with the highest total indicates your predominant attachment style․ Review the provided interpretation guide to understand what your score means․ For example, a high Secure score suggests comfort with intimacy and independence, while a high Anxious score may indicate fears of abandonment․ Reflect on how these patterns influence your relationships and consider next steps, such as self-reflection or consulting a mental health professional․ Accurate interpretation is key to gaining meaningful insights and fostering personal growth․ Use the results as a tool to enhance self-awareness and improve relationship dynamics․

Using the Attachment Style Test PDF

The attachment style test PDF is a convenient tool for self-assessment, offering structured questions to identify your attachment style․ Download, print, and complete it for personal insight into your relationship patterns and emotional tendencies, guiding self-reflection and growth․

Downloading and Printing the Test

Downloading and printing an attachment style test PDF is a straightforward process․ Start by accessing the PDF from a reliable online source․ Once downloaded, ensure your device has a PDF reader installed to open the file․ Print the document on standard paper, making sure the text is clear and readable․ Before completing the test, review the instructions carefully․ Focus on answering the questions honestly, reflecting on your past and present relationships․ Consider a significant relationship, ideally with a current or past partner, to provide accurate responses․ After completing the test, take time to review your answers and interpret the results․ This self-reflection can offer valuable insights into your attachment style and how it impacts your relationships․ Printing the test allows for a tangible copy, making it easier to revisit and track personal growth over time․

Self-Reflection and Next Steps After Taking the Test

After completing the attachment style test PDF, take time to reflect on your results and what they reveal about your relationship patterns․ Understanding your attachment style can provide clarity on your strengths and areas for growth․ Consider journaling or meditating on the insights gained, focusing on how your style impacts your interactions with others․ If you identify with an anxious, avoidant, or disorganized style, think about how past experiences may have shaped these tendencies․ Next steps might include setting personal goals, such as improving communication or building trust in relationships․ If needed, seek support from a mental health professional to explore these patterns further․ Embrace this as an opportunity for self-awareness and growth, using the test as a tool to enhance your emotional well-being and relationship dynamics․

Open post

bestway saluspa manual

Safety Instructions

Always ensure safety by following guidelines from the Bestway Saluspa manual. Adult supervision is required for children. The spa is not suitable for children under 8 years. Users with health conditions should consult a medical professional before use. Regularly inspect the spa for damage and ensure proper installation to avoid hazards.Never exceed the recommended water temperature or operate the spa in extreme weather conditions. Always unplug the power cord when not in use or during maintenance. Keep the spa away from direct sunlight to prevent overheating. Ensure the area around the spa is clear of obstacles to prevent accidents. Familiarize yourself with emergency procedures‚ such as shutting off power in case of malfunction. Avoid using the spa if you are under the influence of alcohol or drugs. Never leave the spa unattended while it is in operation. Always follow the manufacturer’s instructions for chemical usage and water maintenance. Be aware of the risks of slipping on wet surfaces near the spa. Use a ground fault circuit interrupter (GFCI) to protect against electrical shock. Keep the spa at least 10 feet away from any overhead power lines. Avoid using the spa during thunderstorms or heavy rain. Do not submerge electrical components in water. If you are unsure about any aspect of the spa’s operation‚ consult the user manual or contact Bestway customer support.

1.1 General Safety Precautions

Always supervise children and ensure users are at least 8 years old. Consult a medical professional before use if you have health conditions. Keep the spa away from direct sunlight to prevent overheating. Install near a floor drain to manage water spills. Use a GFCI to protect against electrical shock. Avoid operating in extreme weather or during thunderstorms. Never submerge electrical components in water. Ensure the area is clear of obstacles to prevent accidents. Avoid using the spa under the influence of alcohol or drugs.

Maintain water temperature above 40°F (4°C) for safe operation. Regularly inspect the spa for damage and follow all manufacturer guidelines; Familiarize yourself with emergency shutdown procedures. Be cautious of slippery surfaces around the spa. Follow the manual’s instructions for safe and enjoyable use.

1.2 Electrical Safety Guidelines

Use a Ground Fault Circuit Interrupter (GFCI) to prevent electrical shock. Ensure all electrical components remain dry and avoid submerging them in water. Keep the spa at least 10 feet away from overhead power lines. Never operate the spa during thunderstorms or heavy rain. Avoid using extension cords and ensure the power cord is undamaged. Always unplug the spa when not in use or during maintenance. Follow the manual’s electrical guidelines to ensure safe operation. Contact Bestway support if you have any electrical concerns.

Installation Requirements

Ensure the spa is placed on a flat‚ stable surface‚ ideally near a floor drain. Indoor installations require ventilation due to humidity. Avoid direct sunlight exposure.

2.1 Indoor Installation Considerations

For indoor installation‚ ensure the area is well-ventilated to manage humidity. Place the spa near a floor drain to handle water spillage. Choose a flat‚ stable surface and keep the surrounding area obstacle-free. Avoid direct sunlight exposure indoors to prevent overheating. Ensure the spa is not installed near overhead power lines. Follow the manual’s guidelines for proper setup and consult Bestway support if unsure. Regularly inspect the installation for safety and stability.

2.2 Outdoor Installation Recommendations

For outdoor installation‚ place the spa on a flat‚ stable surface‚ such as grass or concrete. Ensure proper drainage by positioning it near a floor drain. Avoid direct sunlight to prevent overheating. Do not leave the spa unattended during operation. Use a ground fault circuit interrupter (GFCI) for electrical safety. Keep the area clear of obstacles and overhead power lines. Regularly inspect the setup for stability and safety. Follow the manual’s guidelines for outdoor use and consult Bestway support if unsure.

Operating the Bestway Saluspa

Inflate the spa as per instructions‚ fill with water‚ and heat it to the desired temperature using the control panel. Adjust jets for comfort and relaxation. Always monitor water temperature and ensure it does not exceed safe levels. Regularly check the system for proper function and follow maintenance guidelines to ensure optimal performance and safety. Keep the area clean and dry during operation.

3.1 Setting Up the Spa

Begin by inflating the spa on a flat‚ stable surface‚ ensuring it is placed near a floor drain to manage water spillage. Fill the spa with water‚ taking care not to exceed the recommended level. Use the control panel to heat the water to your desired temperature‚ ideally between 40°F and 104°F. Before use‚ add the recommended chemicals to maintain water quality and safety. Always follow the manufacturer’s guidelines for setup and preparation to ensure a safe and enjoyable experience.

3.2 Adjusting Temperature and Jets

Use the control panel to set your desired temperature‚ ensuring it stays between 40°F and 104°F for optimal comfort. Once the water reaches the set temperature‚ activate the jets to enjoy a soothing massage. Adjust the jet pressure using the control panel to customize your experience. Regularly clean the jet nozzles to maintain proper function. For energy efficiency‚ lower the temperature when not in use. Always follow the manual’s guidance for precise temperature and jet adjustments to enhance your relaxation experience.

Maintenance and Cleaning

Regularly clean the filter to prevent clogging. Drain and refill water monthly. Check chemical levels and adjust as needed. Wipe the spa surface with mild detergent. Ensure all parts are dry after cleaning to prevent damage.

4.1 Regular Cleaning Procedures

  • Clean the filter regularly to ensure proper water circulation and prevent clogs.
  • Drain and refill the spa water monthly to maintain hygiene and clarity.
  • Use a mild detergent to wipe down the spa surface‚ avoiding abrasive materials.
  • Check and balance chemical levels to prevent bacterial growth and maintain safety.
  • Inspect and clean the pump and pipes to ensure optimal performance.
  • After cleaning‚ dry all components thoroughly to prevent damage or mold.

4.2 Chemical Balance and Water Care

Regularly test and adjust the pH and bromine levels to maintain a safe range of 7.2–7.8 for pH and 3–5 ppm for bromine. Use test strips for quick checks and adjust chemicals as needed. Shock the water weekly to eliminate contaminants. Avoid over-chlorination to prevent skin irritation. Always follow the recommended dosage on chemical products. Rinse the filter after cleaning to ensure proper chemical distribution. Drain and refill the spa monthly to maintain water quality and safety.

Troubleshooting Common Issues

Check for leaks by inspecting connections and hoses. Ensure the heater and jets are functioning properly. Refer to the manual for guidance or contact Bestway support.

5.1 Diagnosing and Fixing Leaks

To identify leaks‚ inspect all connections‚ hoses‚ and seams. Turn off the power and drain the spa if a leak is detected. Check for loose fittings or damaged seals. Tighten any loose connections and replace worn-out gaskets or seals. If the leak persists‚ contact Bestway Aftersales Service. Regular inspections can prevent major issues. Always follow safety guidelines when handling electrical components or water.

5.2 Resolving Heating and Jet Problems

To address heating issues‚ ensure the spa is operating within the recommended temperature range. Check the power supply and connections for any disruptions. Review the user manual for specific troubleshooting steps. For jet problems‚ clean or replace the filter if clogged. Adjust jets to ensure proper alignment and water flow. If issues persist‚ contact Bestway Aftersales Service for professional assistance. Always follow safety guidelines when handling electrical components or adjusting spa settings.

Accessories and Enhancements

Enhance your Bestway Saluspa experience with compatible accessories like LED lights‚ inflatable headrests‚ and spa covers. These additions improve comfort‚ safety‚ and overall relaxation‚ ensuring a premium spa experience.

6.1 Recommended Accessories

For an enhanced Bestway Saluspa experience‚ consider adding accessories like LED lights‚ inflatable headrests‚ and premium spa covers. These improve comfort and aesthetics. LED lights add ambiance‚ while headrests provide neck support. Spa covers protect the tub when not in use‚ maintaining cleanliness. Additionally‚ soft cushions and thermal covers can be purchased to retain heat and enhance relaxation. Ground fault circuit interrupter (GFCI) outlets are also recommended for electrical safety. These accessories ensure a safe‚ enjoyable‚ and luxurious spa experience.

6.2 Customizing Your Spa Experience

Enhance your Bestway Saluspa experience by personalizing your setup. Adjust jet intensity for a soothing massage and set the perfect temperature for relaxation. Add ambient LED lighting to create a calming atmosphere. Incorporate aromatherapy with spa-safe essential oils for a therapeutic experience. Position your spa in a scenic outdoor location or create a cozy indoor oasis with plants and decor. Regularly clean and maintain your spa to ensure optimal performance and longevity. Customize your spa experience to match your preferences for ultimate comfort and enjoyment.

Warranty and Support

Bestway offers a limited warranty for the Saluspa‚ covering defects in materials and workmanship. For inquiries or issues‚ contact Bestway’s aftersales service for assistance and support.

7.1 Understanding the Warranty

The Bestway Saluspa warranty covers manufacturing defects in materials and workmanship for a specified period. The warranty duration varies depending on the product component‚ with details outlined in the manual. Proper installation and maintenance are required to validate the warranty. Damage caused by misuse‚ improper maintenance‚ or unauthorized modifications is not covered. For specific terms and conditions‚ refer to the provided warranty document or contact Bestway’s aftersales service. Ensure to review the manual for full warranty details and exclusions.

7.2 Contacting Bestway Aftersales Service

For assistance with your Bestway Saluspa‚ contact the aftersales service team through their official website or support hotline. Visit the Bestway website to find contact details and support options. Ensure to have your product serial number and purchase details ready for efficient service. For troubleshooting or repair requests‚ use the provided contact form or call the designated customer support number. Live chat is also available on their website during business hours for immediate inquiries. Always use authorized service centers to maintain warranty validity.

User Reviews and Feedback

Users praise the Bestway Saluspa for its portability and ease of use‚ while some note areas for improvement in temperature consistency and long-term durability.

8.1 Common Praises and Satisfaction

Many users have expressed high satisfaction with the Bestway Saluspa‚ praising its portability‚ easy setup‚ and comfortable design. The bubble jets and heating system are particularly popular‚ providing a relaxing experience. Owners appreciate the affordability and value for money compared to traditional hot tubs. The user-friendly controls and quick heating function have also received positive feedback. Additionally‚ the spa’s compact size and inflatable design make it ideal for small spaces‚ both indoors and outdoors. Maintenance is reportedly minimal‚ further enhancing user satisfaction. Overall‚ the Saluspa is often recommended for its convenience and enjoyable spa experience.

8.2 Areas for Improvement

Some users have noted that the Bestway Saluspa could improve in a few areas. Issues include temperature fluctuations‚ with the spa sometimes struggling to maintain consistent heat. The pump’s durability has been questioned by a few owners‚ who report occasional malfunctions; Additionally‚ the chemical maintenance process can be time-consuming for some. A few users have also mentioned that customer support could be more responsive and helpful. Overall‚ while the Saluspa is well-liked‚ addressing these areas could enhance the user experience.

Open post

subaru pressure washer ea190v manual

The Subaru EA190V pressure washer manual provides essential guidance for operating and maintaining this robust engine, ensuring optimal performance and longevity for various industrial applications.

Overview of the Subaru EA190V Engine

The Subaru EA190V engine is a robust and efficient 4-stroke, overhead cam (OHC) gasoline engine designed for various industrial applications. Its compact design and air-cooled system ensure reliability and efficiency, making it ideal for powering pressure washers, generators, and water pumps. Equipped with advanced technology, including a transistorized magneto ignition system, this engine delivers consistent starts and smooth operation, suitable for heavy-duty tasks.

Importance of the Manual for Operation and Maintenance

The Subaru EA190V manual is crucial for safe and efficient operation, providing detailed instructions for starting, maintenance, and troubleshooting. It ensures users understand proper procedures, preventing damage and ensuring longevity. The manual’s clear guidelines help users address common issues quickly, making it an indispensable resource for maximizing engine performance and reliability over time.

Engine Specifications and Features

The Subaru EA190V is a compact, air-cooled, 4-stroke OHV engine, designed for high efficiency and durability, making it ideal for pressure washers, generators, and industrial equipment.

Key Components of the Subaru EA190V Engine

The Subaru EA190V engine features a durable air-cooled design, a transistorized magneto ignition system, and a centrifugal governor for consistent performance. It includes a low-oil alert system, a robust crankcase, and a high-quality cylinder head, ensuring reliability and efficient operation across various applications, including pressure washers and industrial equipment.

Design and Technology Behind the EA190V

The Subaru EA190V engine combines advanced technology with a compact, air-cooled design. It features a 4-stroke OHV configuration, a transistorized magneto ignition system, and a centrifugal governor for consistent performance. The engine’s design emphasizes efficiency, reliability, and durability, with a low-oil alert system to protect against damage. This robust architecture ensures smooth operation and excellent fuel economy, making it ideal for powering pressure washers and industrial equipment.

Safety Precautions and Guidelines

Always follow safety measures before operating the Subaru EA190V. Ensure proper handling, wear protective gear, and refer to the manual for essential precautions to prevent accidents and ensure safe usage.

Essential Safety Measures Before Operation

Before operating the Subaru EA190V, ensure all safety precautions are followed. Wear protective gear, ensure the area is clear of obstacles, and verify that all components are securely fastened. Check for loose connections and ensure proper ventilation. Never operate the engine near open flames or sparks. Follow the manual’s guidelines for fuel handling and electrical connections to avoid hazards. Proper preparation ensures safe and efficient operation.

Proper Handling and Storage of the Engine

Properly handle and store the Subaru EA190V to maintain its performance and longevity. Store the engine in a dry, well-ventilated area, away from direct sunlight and flammable materials. Drain fuel and oil before long-term storage. Use a designated engine stand to prevent damage. Regularly inspect for wear or corrosion and address issues promptly. Adhere to the manual’s storage guidelines to ensure the engine remains in optimal condition for future use.

Starting the Engine

Starting the Subaru EA190V engine requires careful preparation and adherence to safety guidelines. Ensure all preliminary checks are completed, the fuel valve is open, and the choke is properly adjusted for optimal starting conditions.

Step-by-Step Guide to Starting the EA190V

Perform all preliminary safety and operational checks. 2. Open the fuel valve and ensure the engine stop switch is in the ON position. 3. Adjust the choke lever based on engine temperature (cold: toward the air filter; warm: toward the fuel tank). 4. Pull the starter handle slowly to the resistance point, then pull quickly. 5. Once started, gradually move the choke to the RUN position and allow the engine to warm up for a few minutes before use.

Troubleshooting Issues Related to Engine Start-Up

If the EA190V engine fails to start, check the spark plug for damage or fouling. Ensure the fuel valve is open and fuel is flowing. Verify the air filter is clean and free of debris. Check the choke position, ensuring it’s correctly set for cold or warm starting conditions. Consult the manual’s troubleshooting section for detailed guidance on resolving start-up issues effectively.

Maintenance and Servicing

Regular servicing ensures the Subaru EA190V engine runs efficiently. Check the air filter, spark plug, and oil levels frequently; Follow the manual’s maintenance schedule for optimal performance and longevity.

Routine Maintenance Procedures

Regular maintenance ensures optimal performance and longevity of the Subaru EA190V engine. Drain engine oil, reinstall the drain plug with the specified torque, and check the air cleaner. Inspect the spark plug and fuel valve for proper function. Refer to the service manual for detailed steps and schedules. These procedures maximize efficiency and prevent potential issues, ensuring reliable operation.

Oil Change and Lubrication Guidelines

Regular oil changes are crucial for the Subaru EA190V engine. Drain the oil by removing the drain plug, then reinstall it securely with a torque of 20-24N.m. Use high-quality oil meeting the engine’s specifications. Replace the oil filter if necessary. Always consult the manual for recommended oil types and viscosity levels to ensure optimal engine performance and longevity.

Troubleshooting Common Issues

Identify common issues like engine not starting or low pressure by checking fuel, spark plugs, and air filters. Consult the manual for detailed diagnostic steps.

Diagnosing Problems with the Engine

Diagnosing issues with the Subaru EA190V engine involves checking common faults like unstable speed or low cylinder pressure. Refer to the manual’s troubleshooting section for step-by-step guidance. Check fuel flow, spark plug condition, and air filter cleanliness. Ensure proper oil levels and inspect for blockages in fuel lines or mufflers. Addressing these common issues can resolve most engine problems efficiently, ensuring optimal performance and longevity.

Repair and Resolution of Common Faults

Resolving common faults in the Subaru EA190V engine often involves replacing worn or damaged components. Replace spark plugs if fouled, clean or replace the air filter, and check fuel lines for blockages. If low oil levels trigger the automatic shutdown, refill with recommended oil. For persistent issues, consult the manual or contact an authorized Subaru service center to ensure proper repairs and maintain engine performance.

Understanding the Governor System

The governor system regulates engine speed, preventing over-revving and maintaining optimal performance under varying loads, ensuring reliable operation for your Subaru EA190V pressure washer.

Function and Purpose of the Governor

The governor in the Subaru EA190V engine is designed to regulate engine speed automatically, ensuring it operates within a safe and efficient range. This mechanism prevents over-revving, which could damage the engine or connected equipment like pressure washers. By maintaining consistent RPM levels, the governor enhances fuel efficiency and reduces wear on internal components, providing smooth and reliable performance across various applications.

Adjusting and Maintaining the Governor

Regular maintenance of the Subaru EA190V governor ensures consistent engine performance. Check the governor linkage for proper connection and cleanliness. Adjustments should be made according to the manual’s specifications to maintain the correct RPM range. Cleaning the governor components and ensuring no debris obstructs its operation is crucial. Proper maintenance prevents speed fluctuations and ensures reliable operation of the pressure washer and other connected equipment.

Fuel and Lubrication Recommendations

Ensure the Subaru EA190V operates efficiently by using unleaded gasoline with an octane rating of at least 86 and SAE 10W-30 oil for lubrication.

Recommended Fuel Types and Specifications

For optimal performance, use unleaded gasoline with a minimum octane rating of 86 in the Subaru EA190V. Avoid ethanol-blended fuels to prevent corrosion and phase separation. Ensure the fuel is fresh and stored properly to maintain engine reliability and efficiency. Always refer to the manual for specific guidelines to avoid damage and ensure proper engine operation.

Oil and Lubricant Requirements

The Subaru EA190V requires SAE 10W-30 oil for optimal performance. Regular oil changes are essential, with a recommended interval of every 20 to 50 hours of operation. Use high-quality detergent oil to ensure engine longevity. Avoid using synthetic oil, as it may not be compatible with the engine’s design. Always refer to the manual for specific lubrication guidelines to maintain engine health and efficiency.

Warranty and Service Information

The Subaru EA190V is backed by a comprehensive warranty covering repairs and replacements for manufacturing defects. Authorized service centers provide expert support and genuine parts, ensuring reliable maintenance and extending the engine’s lifespan.

Warranty Coverage and Conditions

The Subaru EA190V engine is covered by a warranty that addresses manufacturing defects, offering repair or replacement services. Coverage periods vary based on usage, with specific terms for private and commercial applications. Regular maintenance by authorized service centers is required to uphold warranty validity. Detailed conditions and exclusions are outlined in the manual, ensuring clarity for users.

Authorized Service Centers and Support

The Subaru EA190V engine is supported by a network of authorized service centers, ensuring genuine parts and expert technicians. These centers handle warranty repairs, maintenance, and troubleshooting, providing reliable support. Trained technicians use genuine Subaru parts and specialized tools to ensure accurate repairs and maintain performance. Users can locate authorized centers through Subaru’s official website or contact customer support for assistance.

Manual Structure and Key Sections

The manual is organized into clear sections, including engine specs, safety tips, startup guides, maintenance routines, troubleshooting, and warranty details, ensuring easy navigation and quick reference.

Navigation and Organization of the Manual

The Subaru EA190V manual is structured for easy navigation, with a clear table of contents and numbered pages. Key sections include engine specifications, safety guidelines, startup procedures, maintenance schedules, and troubleshooting tips. Detailed diagrams and step-by-step instructions enhance clarity. The manual also features a comprehensive index, allowing users to quickly locate specific information. Its organized layout ensures seamless access to critical operational and maintenance details.

Important Sections for Quick Reference

The manual includes key sections like Troubleshooting, Maintenance, and Safety Precautions for quick access. The Troubleshooting guide helps diagnose common issues, while Maintenance outlines routine checks. Safety Precautions ensure secure operation, and Engine Specifications provide technical details. These sections are designed for rapid problem-solving and routine care, making them indispensable for efficient use of the Subaru EA190V pressure washer.

Accessing the Manual Digitally

The Subaru EA190V manual is available for free download as a PDF from the Subaru Power Global website or platforms like ManualsLib and Manualzz for easy digital access.

Downloading the PDF Version

The Subaru EA190V manual can be downloaded as a PDF from platforms like Manualzz or Subaru Power Global. Visit the website, search for “Subaru EA190V manual,” and click the download link. Ensure you select the correct version for your engine. The PDF is optimized for easy navigation, with bookmarks and a table of contents for quick access to specific sections. Printing selected pages is also supported for convenience.

Printing and Referencing the Manual

Printing the Subaru EA190V manual allows for easy offline access. Users can print specific pages or the entire document from the PDF version. Referencing the manual is straightforward due to its clear structure and detailed index. Keep a printed copy handy for quick consultations during maintenance or troubleshooting, ensuring you never miss critical information for optimal engine performance and longevity.

The Subaru EA190V manual is a vital resource for maximizing engine performance and longevity. By following its guidelines, users can ensure proper operation, maintenance, and troubleshooting, extending the engine’s lifespan and reliability.

Final Tips for Using the Manual Effectively

For optimal use of the Subaru EA190V manual, review key sections regularly, reference diagrams for clarity, and adhere to maintenance schedules. Always follow safety guidelines and troubleshooting steps to resolve issues promptly. Keep the manual handy for quick access and consult authorized service centers for complex repairs. Proper use ensures longevity and peak performance of your engine.

Maximizing the Lifespan of Your Subaru EA190V

Regular oil changes, proper storage, and adhering to maintenance schedules ensure the Subaru EA190V’s longevity. Always use recommended fuel and lubricants, and address issues promptly. Following the manual’s guidelines helps prevent wear and tear, ensuring reliable operation and extending the engine’s lifespan for years of efficient performance.

Posts navigation

1 2
Scroll to top