Open post

heatnbond instructions

Understanding HeatnBond: A Comprehensive Guide

HeatnBond offers versatile adhesive solutions for various fabric projects‚ including applique‚ quilting‚ and creating fusible bias tape‚ simplifying no-sew applications effectively․

Numerous online resources‚ like YouTube tutorials from 2018‚ 2021‚ and 2025‚ demonstrate HeatnBond’s ease of use with different fabric types and techniques․

Despite lost instructions‚ as discussed on DISboards․com in 2010‚ readily available guides detail proper application for projects like curtains and beyond․

HeatnBond’s FeatherLite‚ Lite‚ and Ultrahold variations cater to diverse needs‚ offering varying levels of adhesion for optimal project outcomes consistently․

What is HeatnBond?

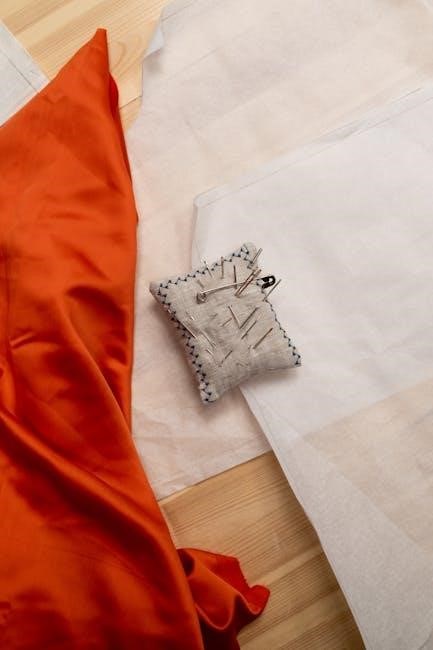
HeatnBond is a brand of fusible adhesive web‚ essentially a heat-activated glue that bonds fabrics together without the need for traditional sewing․ It’s a remarkably versatile tool for crafters and quilters‚ simplifying numerous projects and opening up creative possibilities․ Different types exist‚ including FeatherLite‚ Lite‚ and Ultrahold‚ each offering varying degrees of adhesion strength to suit different fabric weights and project requirements․

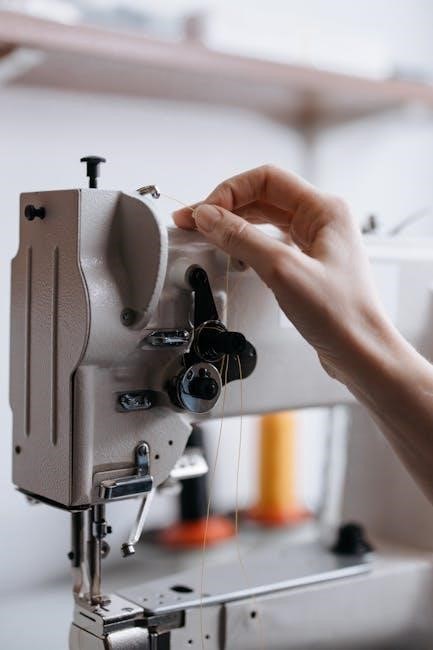
The core function of HeatnBond revolves around its adhesive properties‚ activated by the heat of an iron․ This allows you to temporarily or permanently join fabrics‚ creating designs for applique‚ embellishments‚ or even entire quilted pieces․ Online resources‚ like tutorials available since 2018‚ showcase how easily it adheres fabrics‚ even for those who’ve misplaced original instructions‚ as noted in a 2010 forum discussion․

Essentially‚ HeatnBond acts as a temporary or permanent substitute for stitching‚ making it ideal for quick projects‚ intricate designs‚ or situations where sewing isn’t practical․ It’s a cornerstone product for many crafting enthusiasts‚ offering a clean and efficient bonding solution․

Types of HeatnBond Fusible Web

HeatnBond offers a range of fusible webs tailored to specific project needs․ HeatnBond Lite and FeatherLite are ideal for lighter-weight fabrics and applications requiring a softer hand‚ often used in quilting and delicate applique․ These provide a gentle‚ flexible bond‚ perfect for projects needing drape and movement․ Resources from 2018 and 2025 highlight their suitability for various fabric types․

Conversely‚ HeatnBond Ultrahold delivers a stronger‚ more permanent bond‚ suitable for heavier fabrics and projects demanding durability․ This is particularly useful for items needing frequent washing or experiencing significant wear․ A 2021 YouTube tutorial demonstrates its effectiveness for no-sew applications‚ showcasing its robust adhesive qualities․

Understanding these distinctions is crucial for selecting the appropriate HeatnBond for your project․ Choosing the right type ensures optimal adhesion‚ longevity‚ and overall project success‚ as emphasized by crafting guides and user experiences shared online․

Preparing Your Fabrics for HeatnBond Application

Fabrics must be clean and ironed before applying HeatnBond‚ ensuring optimal adhesion and a smooth finish for successful project outcomes consistently․

Proper preparation maximizes the bonding process‚ preventing issues like bubbling or lifting‚ as demonstrated in various online tutorials readily available․

Washing and Ironing Fabrics

Prior to HeatnBond application‚ thoroughly washing your fabrics is crucial for removing sizing‚ finishes‚ or any potential contaminants that could hinder proper adhesion․ Use a mild detergent and a gentle cycle to avoid damaging delicate materials․ After washing‚ allow the fabrics to dry completely – do not attempt to apply HeatnBond to damp fabric!

Ironing is equally important․ A crisp‚ smooth surface ensures maximum contact between the fabric and the fusible web․ Use the appropriate iron setting for your fabric type‚ referencing the fabric’s care label․ Test a small‚ inconspicuous area first to confirm the heat won’t cause damage or discoloration․ Iron both sides of the fabric‚ paying close attention to wrinkles and creases․ A well-ironed fabric will yield a much cleaner and more professional-looking result when using HeatnBond․

Remember‚ pre-treating fabrics properly sets the foundation for a successful and long-lasting bond‚ preventing issues like peeling or shifting later on․

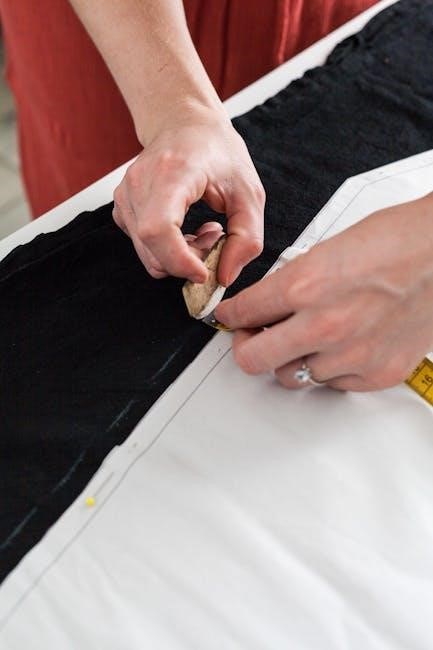
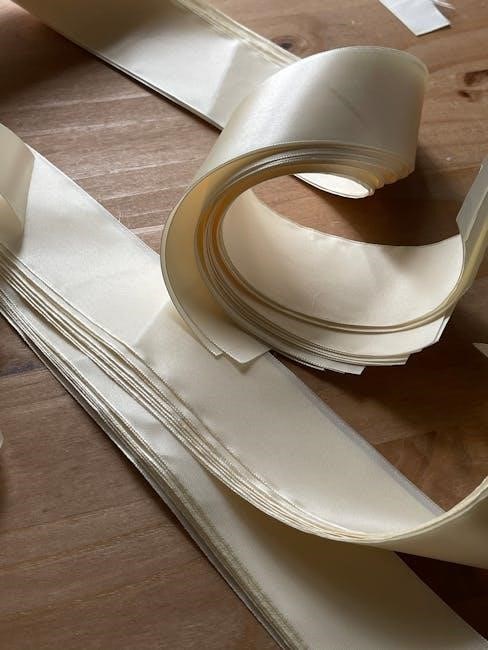
Cutting Fabrics for HeatnBond

Precise cutting is essential when working with HeatnBond‚ as the fusible web adheres to the edges of your fabric pieces․ Use sharp scissors or a rotary cutter and mat to achieve clean‚ accurate cuts․ For applique‚ cut slightly inside your desired shape to prevent the adhesive from being visible around the edges of the design․

Consider the type of HeatnBond you’re using․ Ultrahold‚ being a sheet adhesive‚ requires careful cutting to match the fabric shape exactly․ Lite and Featherlite‚ often used for layering‚ allow for a bit more flexibility in cutting․ Always cut your fabric and HeatnBond to the same size and shape for optimal results;

Accuracy minimizes bubbling and ensures a smooth‚ professional finish․ Double-check your cuts before fusing‚ and don’t hesitate to re-cut if necessary․ A little extra time spent on precise cutting will save you frustration later!

Applying HeatnBond: Step-by-Step Instructions

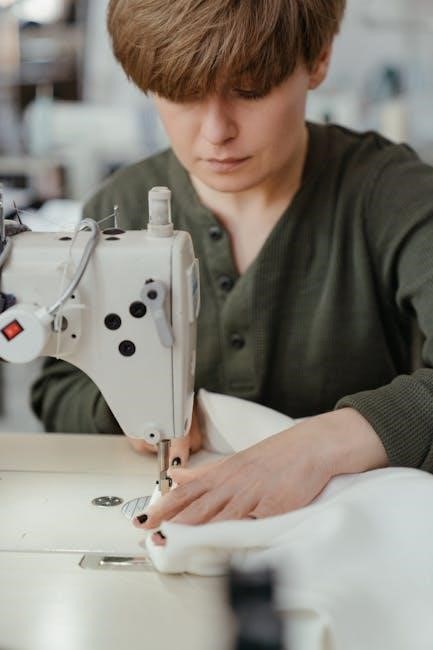
HeatnBond application involves fusing the web to fabric‚ then bonding pieces together with an iron‚ as demonstrated in numerous online tutorials readily available․

Ultrahold requires a no-sew approach‚ while Lite & Featherlite benefit from precise ironing for secure adhesion‚ enhancing project durability consistently․

Using HeatnBond Lite & Featherlite

HeatnBond Lite & Featherlite are ideal for projects needing a softer hand and lighter bond‚ perfect for delicate fabrics and intricate applique designs․ Begin by placing the fusible side of the HeatnBond web onto the wrong side of your fabric․

Use a household iron on a cotton or linen setting – avoid steam! – and press firmly for several seconds‚ ensuring complete adhesion across the entire surface․ Allow the fabric to cool completely before handling or cutting․

When applying pieces together‚ position them accurately on your base fabric․ Cover with a pressing cloth and iron again‚ using the same settings‚ for approximately 10-15 seconds․

These lighter-weight webs are excellent for projects where flexibility is key‚ like quilts or garments․ Remember to always test a small scrap first to determine the optimal iron temperature and pressing time for your specific fabric combination‚ guaranteeing a flawless finish․

Using HeatnBond Ultrahold

HeatnBond Ultrahold provides a permanent‚ no-sew bond‚ making it excellent for heavier fabrics and projects requiring exceptional durability‚ as demonstrated in various YouTube tutorials․ Begin by placing the adhesive sheet‚ fusible side down‚ onto your fabric․

Utilize a dry iron set to the cotton or linen setting‚ applying firm‚ even pressure for approximately 30-60 seconds․ Cooling is crucial; allow the fabric to cool completely before proceeding․

For bonding layers‚ position accurately and cover with a pressing cloth․ Iron again‚ maintaining consistent pressure for another 30-60 seconds․ This creates a strong‚ lasting hold․

Ultrahold is particularly useful for projects like bags‚ home décor‚ and items needing frequent washing․ Always test on scraps to confirm compatibility and optimal settings‚ ensuring a secure and professional result every time․

No-Sew Applications with HeatnBond

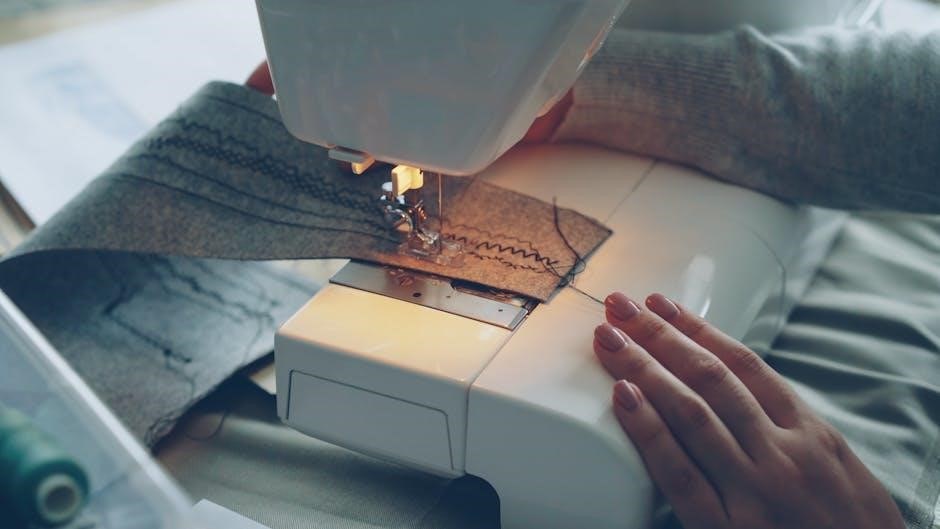
HeatnBond truly shines in no-sew applications‚ offering a quick and easy way to create projects without a needle and thread․ Perfect for embellishments‚ quick gifts‚ or simple home décor‚ the process is remarkably straightforward․

Cut your desired shapes or designs from fabric․ Apply HeatnBond to the wrong side of the fabric‚ ensuring complete coverage․ Peel away the paper backing and position the fabric onto your base material․

Cover with a pressing cloth and iron using the appropriate temperature setting (typically cotton or linen)․ Apply firm‚ even pressure for the recommended time – usually 30-60 seconds – to activate the adhesive․

Allow to cool completely before handling․ This method is ideal for appliques‚ patches‚ or attaching fabric to various surfaces‚ offering a clean and professional finish without any sewing required․

Iron Settings and Temperature Control

HeatnBond requires precise temperature control; generally‚ cotton or linen settings work best‚ but always test a scrap to prevent scorching or adhesion failures․

Recommended Iron Temperatures

HeatnBond products generally recommend utilizing a cotton or linen iron setting for optimal adhesion‚ typically equating to around 300-330°F (149-166°C)․ However‚ these are merely starting points‚ and variations exist based on the specific HeatnBond type – Lite‚ Featherlite‚ or Ultrahold – and the fabric composition․

For HeatnBond Lite and Featherlite‚ a medium-hot‚ dry iron is usually sufficient․ Conversely‚ HeatnBond Ultrahold‚ designed for a stronger‚ permanent bond‚ often benefits from a slightly higher temperature within the cotton setting range․ Delicate fabrics necessitate a lower temperature‚ potentially utilizing a silk or synthetic setting‚ alongside a pressing cloth to shield the material․

Always consult the specific product packaging for the manufacturer’s precise temperature recommendations․ Remember that iron temperatures can fluctuate‚ so consistent testing is crucial for achieving a secure and lasting bond without damaging your fabrics․ Prioritize caution and gradual temperature increases․

Testing Iron Temperature

Before applying HeatnBond to your project fabric‚ conducting a test on scrap pieces is absolutely essential․ This simple step prevents potential scorching or inadequate adhesion‚ safeguarding your final creation․ Begin with the recommended iron temperature – typically cotton or linen setting – and apply pressure for the suggested duration‚ usually 8-10 seconds․

Allow the test piece to cool completely before gently attempting to separate the HeatnBond and fabric․ If the bond is weak‚ incrementally increase the iron temperature‚ retesting after each adjustment․ Conversely‚ if you observe any signs of fabric discoloration or melting‚ immediately reduce the temperature․

A pressing cloth acts as a protective barrier during testing and application‚ mitigating the risk of direct heat exposure․ Consistent testing ensures the ideal temperature for your specific fabric and HeatnBond product‚ guaranteeing a successful and visually appealing outcome․

Troubleshooting Common HeatnBond Issues

HeatnBond problems like poor adhesion‚ scorching‚ or residue are solvable! Adjust iron settings‚ use a pressing cloth‚ and re-apply for optimal results consistently․

Adhesive Not Sticking

If your HeatnBond isn’t adhering properly‚ several factors could be at play․ First‚ ensure you’re using the correct iron temperature – refer to the product packaging or online guides for specific recommendations․ Insufficient heat is a primary culprit‚ preventing the adhesive from fully bonding to the fabric․

Secondly‚ verify adequate pressure is being applied during ironing․ A firm‚ even press is crucial; avoid gliding the iron as you would for regular ironing․ Consider using a pressing cloth to protect delicate fabrics while still maximizing heat transfer․

Furthermore‚ confirm the fabrics are clean and free of any finishes or sizing that might create a barrier․ Washing and ironing fabrics beforehand‚ as recommended in preparation guides‚ can significantly improve adhesion․ Finally‚ double-check that you’re applying the adhesive to the correct sides of the fabric‚ as indicated in the HeatnBond instructions․

If issues persist‚ a second application of HeatnBond might be necessary‚ following the same careful steps․

Fabric Scorching

Preventing fabric scorching when using HeatnBond is paramount‚ especially with delicate materials․ Always begin by testing the iron temperature on a scrap piece of fabric identical to your project material․ This ensures the heat level is appropriate and won’t cause damage․

Utilizing a pressing cloth – a thin cotton fabric placed between the iron and your project – acts as a protective barrier‚ diffusing the heat and minimizing the risk of scorching․ Avoid using steam during application‚ as moisture can exacerbate heat-related damage․

Employ consistent‚ short bursts of heat rather than prolonged pressing․ Move the iron continuously‚ applying firm pressure but avoiding dwelling in one spot․ If you notice any discoloration or singeing‚ immediately reduce the iron temperature and adjust your technique․

Remember‚ lower temperatures and careful monitoring are key to preserving your fabrics while achieving a strong HeatnBond adhesion․

Residue on Iron or Fabric

Dealing with HeatnBond residue on your iron or fabric requires gentle methods to avoid further damage․ If adhesive appears on your iron’s soleplate‚ never use abrasive cleaners or scouring pads‚ as these can scratch the surface․

Instead‚ while the iron is cool‚ gently wipe the soleplate with a soft cloth dampened with distilled white vinegar․ For stubborn residue‚ a specialized iron cleaner may be necessary‚ following the product’s instructions carefully․

On fabric‚ avoid harsh solvents․ A cool iron with a clean pressing cloth can sometimes lift the residue․ Alternatively‚ a very gentle application of Goo Gone (tested on a hidden area first!) might help‚ followed by careful washing․

Prevention is key: using a pressing cloth consistently minimizes residue transfer․ Regular iron cleaning also helps maintain optimal performance and prevents buildup․

HeatnBond for Specific Projects

HeatnBond excels in applique‚ quilting‚ and fusible bias tape creation‚ offering strong adhesion for intricate designs and simplifying projects with its versatile applications․

Tutorials demonstrate its effectiveness for various crafts‚ enabling quick and easy no-sew solutions for diverse creative endeavors consistently․

From curtains to quilts‚ HeatnBond provides reliable bonding‚ making it ideal for both beginners and experienced crafters alike effectively․

Applique with HeatnBond

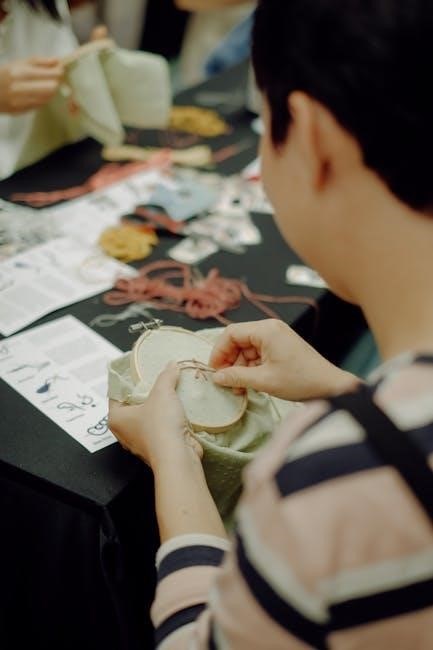
HeatnBond significantly simplifies the applique process‚ allowing for precise fabric placement without the need for pins or tedious hand-basting․ Begin by cutting your applique shapes from fabric‚ then adhere a piece of HeatnBond to the wrong side of each shape․

Using a household iron‚ fuse the HeatnBond to the applique fabric according to the manufacturer’s temperature recommendations – testing is crucial! Carefully peel away the paper backing‚ revealing the adhesive side․

Position the applique onto your base fabric‚ adhesive side down‚ and iron again to permanently bond the pieces․ Different HeatnBond types‚ like FeatherLite or Ultrahold‚ offer varying degrees of adhesion‚ impacting washability and durability․

For intricate designs‚ HeatnBond Ultrahold is recommended for its strong‚ permanent bond‚ while Lite or FeatherLite are suitable for projects requiring repositionability or a softer feel․ Remember to always follow the specific instructions for your chosen HeatnBond product․

Quilting with HeatnBond

HeatnBond offers quilters a convenient method for creating quick and accurate quilt blocks‚ particularly useful for English Paper Piecing or foundation paper piecing techniques․ Apply HeatnBond to the wrong side of your fabric pieces‚ fusing it with an iron according to the product’s temperature guidelines․

This creates a stable‚ adhesive layer allowing you to precisely position and bond fabric to paper templates or foundation pieces‚ eliminating the need for pinning or basting․ HeatnBond Lite or FeatherLite are often preferred for quilting due to their repositionable nature․

Once the fabric is bonded to the foundation‚ sew the pieces together as usual․ After sewing‚ carefully remove the paper foundation‚ leaving a securely pieced quilt block․

HeatnBond Ultrahold can be used for more permanent bonding‚ but consider its impact on fabric drape and washability․ Always test your iron temperature to prevent scorching and ensure a strong‚ lasting bond․

Creating Fusible Bias Tape

HeatnBond simplifies the creation of fusible bias tape‚ eliminating the need for traditional fusing methods․ Begin by cutting fabric strips on the bias – diagonally across the grain – for maximum flexibility․ Apply HeatnBond Lite or FeatherLite to the wrong side of these strips‚ ensuring even coverage․

Fuse the adhesive to the fabric using an iron set to the appropriate temperature‚ as indicated on the HeatnBond packaging․ This creates a stable‚ fusible strip ready for application․ Fold the strip in half lengthwise‚ with the wrong sides together‚ and press again to create a neat fold․

This fusible bias tape can then be applied to curved edges‚ necklines‚ or armholes‚ providing a clean and professional finish without sewing․ It’s ideal for lightweight fabrics or projects where a minimal seam allowance is desired․

Remember to test the adhesion before applying to your final project‚ and always follow the manufacturer’s instructions for optimal results․

Caring for HeatnBond Projects

HeatnBond projects benefit from gentle washing‚ inside-out‚ on a delicate cycle‚ and low heat drying to maintain long-term adhesion effectively․

Avoid harsh detergents or bleach‚ as these can compromise the adhesive bond‚ ensuring your creations remain beautiful for years consistently․

Washing Instructions

HeatnBond projects‚ while offering a durable bond‚ require careful washing to preserve their integrity and appearance over time․ Always turn your finished project inside out before placing it in the washing machine; this minimizes abrasion and direct contact with the adhesive․

Utilize a gentle cycle with cold water․ Avoid hot water at all costs‚ as heat can weaken the adhesive and cause peeling․ When selecting a detergent‚ opt for a mild‚ color-safe formula‚ steering clear of harsh chemicals‚ bleach‚ or fabric softeners‚ which can degrade the fusible web․

After washing‚ it’s best to air dry your HeatnBond project․ If you must use a dryer‚ select the lowest heat setting and a delicate cycle․ Excessive heat is the primary enemy of fusible adhesion․ Removing the item promptly once dry will also help prevent any potential issues․ Following these guidelines will ensure your creations remain vibrant and securely bonded for a long time․

Long-Term Adhesion

Maintaining the longevity of HeatnBond’s adhesion relies on proper initial application and consistent care․ While HeatnBond provides a strong bond‚ factors like repeated washing‚ high heat exposure‚ and fabric type can influence its durability over extended periods․

To maximize long-term adhesion‚ ensure fabrics are thoroughly cleaned and ironed before applying HeatnBond․ Consistent‚ even heat during fusion is crucial; insufficient heat weakens the bond‚ while excessive heat can damage fabrics․ Selecting the appropriate HeatnBond type – Lite‚ Featherlite‚ or Ultrahold – for your project’s demands is also vital․

Avoid stretching or distorting the fused fabric‚ as this can stress the adhesive․ Gentle handling and storage are recommended․ Periodic re-ironing (on a low setting‚ with a pressing cloth) can sometimes revitalize the bond‚ but prevention through careful initial application and washing is key to lasting results․

Open post

singer sewing machine operation manual

Singer Sewing Machine Operation Manual: A Comprehensive Guide

This manual, dated 03/26/2026, serves as your partner for success, offering detailed instructions for operation and maintenance of Singer models, like the 99K.

Singer sewing machines have a rich history, becoming household names synonymous with quality and innovation in the world of garment construction and creative textiles. For generations, these machines have empowered individuals to design, create, and repair clothing and various fabric projects. This operation manual aims to guide both novice and experienced users through the intricacies of operating your Singer machine effectively and safely.

Whether you’re embarking on simple mending tasks or complex quilting endeavors, understanding your machine’s capabilities is paramount. This guide, referencing resources dated March 26, 2026, and models like the 99K, will unlock the full potential of your Singer, ensuring a rewarding and successful sewing experience. Remember, safety is always the first consideration when operating any mechanical device.

Understanding Your Specific Singer Model

Each Singer sewing machine model, even within the same family, possesses unique features and operational nuances. While this manual provides general guidance applicable to many machines – referencing information available as of March 26, 2026, and including models like the 99K – it’s crucial to familiarize yourself with the specifics of your particular machine.

Locate the model number, typically found on a plate affixed to the machine. Consult supplemental documentation, if available, or explore Singer’s official website for detailed information pertaining to your model. Understanding the specific stitch patterns, adjustable settings, and recommended needle types will optimize performance and prevent potential issues. Recognizing these distinctions ensures a tailored and efficient sewing experience.

Safety Precautions

Prioritizing safety is paramount when operating your Singer sewing machine, as emphasized in the user manual dated March 26, 2026. Always disconnect the power supply before performing any maintenance, including needle replacement or cleaning. Keep fingers away from the needle while the machine is running; accidental contact can cause injury.

Never force the fabric under the needle. Use appropriate needles for the fabric type to prevent breakage and potential hazards. Ensure the machine is stable and placed on a level surface during operation. Supervise children closely when they are near the sewing machine. Regularly inspect the power cord for damage and avoid using it if frayed. Following these precautions ensures a safe and enjoyable sewing experience.

Machine Components & Their Functions

Understanding each part – from the power switch to the feed dogs – is crucial for effective operation, as detailed in the Singer manual collection.

Power Switch & Foot Control

The power switch initiates operation, while the foot control governs sewing speed; gentle pressure yields slower stitching, and increased pressure delivers faster results. Familiarize yourself with the switch’s location – typically on the machine’s housing – and ensure it’s in the ‘off’ position when not in use.

The foot control, often resembling a pedal, provides nuanced speed control, essential for intricate work or beginner practice. Proper foot control technique minimizes errors and enhances sewing precision. Always disconnect the machine from the power source before any maintenance or component adjustments. Understanding these controls is fundamental, as highlighted in Singer manuals, for safe and efficient operation. Consistent practice will build confidence and skill.

Spool Pin & Bobbin Winder

The spool pin securely holds the thread spool, allowing smooth unwinding during sewing. Different Singer models may feature variations in spool pin design – vertical or horizontal – but the function remains consistent. Ensure the spool rotates freely to prevent thread tangling.

The bobbin winder is crucial for preparing the lower thread. Engage the bobbin winder mechanism, following the manual’s specific instructions for your model, and guide the thread correctly. Proper winding ensures even thread distribution on the bobbin, preventing uneven stitches. Disengage the winder once the bobbin is full. Refer to your Singer manual for detailed diagrams and troubleshooting tips related to the bobbin winder, ensuring optimal performance and preventing common issues.

Thread Guides & Tension Discs

Thread guides are essential components directing the upper thread’s path from the spool to the needle, ensuring consistent and controlled thread flow. These guides minimize friction and prevent thread breakage. Always follow the threading path illustrated in your Singer sewing machine manual precisely.

Tension discs regulate the upper thread’s tightness, crucial for forming balanced stitches. Incorrect tension leads to looping or puckering. Adjust the tension dial based on the fabric type and thread weight. Experiment with slight adjustments to achieve optimal stitch quality. A properly adjusted tension ensures the upper and lower threads interlock correctly within the fabric, creating a strong and aesthetically pleasing seam. Consult your manual for specific tension settings recommendations.

Needle & Presser Foot

The needle, a critical component, penetrates the fabric, forming stitches when combined with the bobbin thread. Selecting the correct needle type and size is paramount for optimal sewing performance. Different fabrics require different needle points and thicknesses – universal, ballpoint, or sharp needles are common choices. Regularly replace the needle to maintain stitch quality and prevent fabric damage.

The presser foot holds the fabric firmly against the feed dogs, ensuring even feeding during stitching. Various presser feet are available for specialized tasks, such as zipper insertion, buttonholes, or quilting. Ensure the presser foot is securely attached and adjusted to the appropriate pressure for the fabric being sewn. Proper presser foot pressure is vital for consistent stitch formation and preventing fabric slippage.

Feed Dogs & Stitch Length Dial

Feed dogs are the toothed metal pieces beneath the presser foot that advance the fabric during sewing. They work in coordination with the presser foot to ensure consistent and even fabric movement, creating uniform stitches. Ensuring the feed dogs are clean and free of lint is crucial for smooth operation; accumulated debris can cause skipped stitches or uneven fabric feeding.

The stitch length dial controls the distance between individual stitches. A shorter stitch length is ideal for delicate fabrics or intricate details, while a longer stitch length is suitable for heavier fabrics or quicker sewing. Adjusting the stitch length allows for customization based on the project requirements and desired aesthetic. Experimenting with different stitch lengths is key to achieving professional-looking results.

Threading the Singer Sewing Machine

Proper threading, both upper and lower, is essential for successful sewing; this guide details the procedures for optimal tension and smooth operation.

Upper Threading Procedure

Begin by raising the presser foot to disengage the tension discs, ensuring smooth thread flow. Place the spool of thread onto the spool pin, securing it with a spool cap if necessary. Guide the thread through the first thread guide, typically located on the top of the machine.

Next, follow the threading path indicated by arrows or numbers on your specific Singer model – these paths vary! Ensure the thread passes through all required thread guides and tension discs, applying gentle pressure. Continue threading the take-up lever, ensuring it’s in its highest position. Finally, thread the needle from front to back (or as directed by your manual), using the needle threader if needed. A correctly threaded machine is crucial for consistent stitch quality and preventing issues like thread breakage or skipped stitches.

Lower Threading (Bobbin) Procedure

First, ensure the machine is turned off for safety. Locate the bobbin winder, typically on the top or side of the machine. Place the bobbin onto the bobbin winder spindle and engage the winder mechanism. Wind the bobbin with thread, following your machine’s specific instructions for thread guidance and stopping point.

Once wound, disengage the bobbin winder and remove the bobbin. Open the bobbin case cover, usually located beneath the needle plate. Insert the bobbin into the bobbin case, ensuring the thread unwinds in the correct direction – consult your manual for specifics; Finally, guide the thread through the tension spring of the bobbin case and back up through the slot, preparing for the upper threading process. Proper bobbin threading is vital for balanced stitch formation.

Correct Thread Tension Adjustment

Achieving balanced thread tension is crucial for quality stitches. Incorrect tension leads to looping, puckering, or thread breakage. Begin by threading the machine correctly, both upper and lower threads. Test sew on a scrap fabric similar to your project material. Observe the stitch formation – ideally, the top and bottom threads should interlock evenly within the fabric layers.

If the bobbin thread pulls to the top, loosen the upper tension dial. Conversely, if the upper thread pulls to the bottom, tighten the upper tension. Make small adjustments, testing after each change. Remember that fabric weight and thread type influence optimal tension. Refer to your machine’s manual for specific tension guidelines and troubleshooting tips.

Basic Sewing Operations

Mastering fundamental techniques—winding the bobbin, inserting it correctly, starting/stopping, straight and zigzag stitching—unlocks your Singer’s potential for diverse sewing projects.

Winding the Bobbin

Preparing the bobbin is crucial for smooth sewing. Begin by placing the spool of thread onto the spool pin, securing it with a spool cap to prevent unwinding. Next, guide the thread through the designated thread guides leading to the bobbin winder.

Ensure the bobbin is correctly positioned on the bobbin winder spindle. Engage the bobbin winder mechanism, typically by pushing it to the right. Gently depress the foot control to start the machine, allowing the bobbin to wind evenly.

Monitor the winding process, stopping when the bobbin is nearly full to avoid overflow. Disengage the bobbin winder and remove the filled bobbin. Proper winding ensures consistent tension and prevents thread breakage during sewing, contributing to a successful project outcome.

Inserting the Bobbin

Correct bobbin insertion is vital for consistent stitch formation. Locate the bobbin case, typically found beneath the needle plate. Gently open the bobbin case cover. Insert the wound bobbin into the bobbin case, ensuring the thread unwinds in the correct direction – usually clockwise or as indicated by diagrams on the machine.

Guide the thread through the tension spring of the bobbin case. This ensures proper tension control. Close the bobbin case cover securely. Finally, draw up a few inches of the bobbin thread through the opening, ready for threading the upper thread.

A properly inserted bobbin guarantees balanced thread tension, preventing looping or puckering of the fabric during sewing, and ultimately, a professional finish to your creations.

Starting & Stopping the Machine

Initiating sewing requires a gentle touch. Ensure the machine is properly threaded and the fabric is positioned correctly under the presser foot. Begin by pressing the foot control pedal slowly and steadily. The machine will start to sew at a controlled speed, allowing for precision.

To stop the machine, simply release the foot control pedal. The needle will come to a complete stop in its current position. Never force the machine to stop; this can damage internal components. Always lift the presser foot before pulling the fabric away to avoid breaking the needle or distorting the stitches.

Consistent, controlled starting and stopping are key to achieving clean, accurate sewing results.

Straight Stitching

Mastering the straight stitch is fundamental to sewing. Select the straight stitch setting on your Singer machine – typically indicated by a straight line on the stitch selection dial. Ensure the stitch length is appropriate for your fabric; a medium length (around 2.5mm) is a good starting point for general sewing.

Begin sewing slowly, guiding the fabric gently with both hands. Avoid pulling or pushing the fabric, allowing the feed dogs to move it smoothly under the presser foot. Maintain a consistent seam allowance by using the markings on the needle plate as a guide.

Practice makes perfect! Consistent speed and gentle guidance will yield beautiful, even straight stitches.

Zigzag Stitching

The zigzag stitch offers versatility beyond straight sewing. Select the zigzag stitch setting on your Singer machine, adjusting the stitch width and length using the corresponding dials. A narrower width is ideal for reinforcing seams, while a wider width creates decorative effects. Experiment with different settings to achieve desired results.

Begin sewing slowly, guiding the fabric as with a straight stitch. The zigzag stitch allows for stretch and prevents fabric fraying, making it perfect for knit fabrics or finishing raw edges. Observe how the stitch forms, ensuring consistent tension for a balanced appearance.

Practice varying the width and length to unlock the full potential of this adaptable stitch!

Advanced Sewing Techniques

Explore stitch adjustments, diverse presser feet, and fabric-specific methods to overcome challenges and unlock your Singer machine’s full creative potential.

Adjusting Stitch Length & Width

Mastering stitch customization is key to versatile sewing. The stitch length dial directly controls the distance between each stitch, impacting fabric strength and appearance. Shorter stitches are ideal for delicate fabrics and curves, providing greater control and preventing puckering. Conversely, longer stitches are suited for basting, gathering, or heavier materials where flexibility is desired.

Width adjustments, typically controlled by a separate dial or lever, determine the side-to-side extent of stitches like zigzag. A narrower width creates a denser stitch, while a wider width offers greater stretch and decorative potential. Experimentation is crucial; always test stitch settings on scrap fabric mirroring your project material; Incorrect settings can lead to skipped stitches, thread breakage, or fabric distortion. Refer to your specific Singer model’s manual for precise dial markings and recommended settings for various fabrics and techniques.

Using Different Presser Feet

Expanding your sewing capabilities relies on utilizing the correct presser foot. The standard foot excels at straight and zigzag stitching on woven fabrics. However, specialized feet unlock a world of possibilities. A zipper foot facilitates close-stitch applications along zippers and cording. A buttonhole foot automates precise buttonhole creation, ensuring consistent results.

For delicate fabrics, a walking foot evenly feeds layers, preventing shifting and puckering. A rolled hem foot creates professional-looking narrow hems on lightweight materials. Understanding each foot’s function and proper attachment is vital. Incorrect foot selection can damage fabric or produce unsatisfactory stitches. Always consult your Singer manual for foot compatibility and recommended applications. Regularly inspect feet for damage and ensure secure attachment before each sewing session.

Sewing Different Fabric Types

Successfully sewing diverse fabrics requires adjustments to your Singer machine. Lightweight fabrics, like chiffon, demand a finer needle (size 60/8 or 70/10) and reduced presser foot pressure to prevent puckering. Increase stitch length slightly. For medium-weight cottons and linens, a universal needle (size 80/12) and standard settings generally suffice.

Heavier fabrics, such as denim or canvas, necessitate a stronger needle (size 90/14 or 100/16) and potentially increased presser foot pressure. Reduce sewing speed. Always test stitch settings on a scrap piece of the fabric before beginning your project. Consider using a walking foot for slippery or multiple layers. Proper needle and thread selection are crucial for optimal results and preventing machine damage.

Troubleshooting Common Sewing Problems

Encountering issues? Thread bunching often indicates incorrect threading or tension. Re-thread both the upper and lower threads, ensuring proper engagement of tension discs. Skipped stitches can stem from a dull or incorrect needle; replace it with the appropriate size and type for your fabric. If the fabric puckers, reduce presser foot pressure or adjust stitch length.

Persistent problems might involve the timing of the machine, requiring professional servicing. A broken needle necessitates immediate machine stoppage and replacement. Always unplug the machine before attempting any repairs. Consult your manual for specific troubleshooting guidance related to your Singer model. Regular maintenance, as outlined in the care section, prevents many issues.

Maintenance & Care

Regular upkeep ensures longevity; cleaning, oiling, needle replacement, and belt checks are vital for optimal performance of your Singer sewing machine.

Cleaning the Machine

Consistent cleaning is paramount to maintaining your Singer sewing machine’s smooth operation and extending its lifespan. Before any cleaning procedure, always disconnect the machine from the power source to ensure safety. Begin by removing the bobbin case and any accumulated lint from the bobbin area using a small brush – a dedicated sewing machine brush is ideal.

Dust and lint can build up around the feed dogs and needle plate, hindering fabric movement; carefully brush these areas as well. For more stubborn lint, a vacuum cleaner with a brush attachment can be used, employing low suction. Wipe down the exterior surfaces of the machine with a soft, slightly damp cloth. Avoid using harsh chemicals or abrasive cleaners, as these can damage the finish. Pay particular attention to areas where oil may accumulate, as dust tends to cling to oil. Regular cleaning prevents malfunctions and ensures consistently high-quality sewing results.

Oiling the Machine

Proper lubrication is crucial for the longevity and performance of your Singer sewing machine. Refer to your specific model’s manual for designated oiling points, as locations can vary. Generally, key areas include the bobbin race, the shuttle hook, and any moving parts identified in the diagram within your manual.

Use only sewing machine oil – never use oil intended for other purposes, as it may be too thick or contain additives that can damage the machine. Apply oil sparingly, using an oiler or a small brush to target the specific points. Avoid over-oiling, as excess oil can attract dust and create a sticky residue. After oiling, run the machine briefly to distribute the oil evenly. Regular oiling, combined with consistent cleaning, will ensure smooth, quiet operation and prevent wear and tear on vital components.

Replacing the Needle

A dull or damaged needle can cause skipped stitches, fabric puckering, and even damage to your machine. Regularly inspect your needle for bends, burrs, or a blunt tip. To replace the needle, always power off and unplug the sewing machine. Loosen the needle clamp screw, remove the old needle, and insert a new needle with the flat side facing the back of the machine.

Ensure the needle is fully inserted into the clamp and tighten the screw securely. Use the correct needle type and size for your fabric – a universal needle works for many fabrics, but specialized needles are available for knits, denim, and other materials. Proper needle replacement is a simple maintenance task that significantly impacts sewing quality and prevents potential machine issues.

Belt Replacement

A broken or worn belt will prevent your sewing machine from operating. Replacement requires accessing the internal mechanism, so proceed with caution. First, disconnect the power supply. Remove any access panels to expose the handwheel and belt. Carefully note the belt’s routing before removal – a photograph can be helpful! Gently remove the old belt from the motor pulley and the handwheel.

Install the new belt, ensuring it’s properly seated on both pulleys. The belt should have the correct tension; not too loose, nor overly tight. Reattach the access panels and test the machine. A correctly installed belt will allow smooth, consistent operation of your Singer sewing machine, restoring its functionality.

Open post

the words i wish i said pdf

The Words I Wish I Said: A Comprehensive Overview

Caitlin Kelly’s impactful collection, readily available as a PDF download from sources like Z-lib.org, explores deeply personal and often controversial themes with raw honesty.

Caitlin Kelly is a prolific writer known for her unflinching exploration of personal experiences and societal issues. Her work frequently delves into the complexities of human emotion, often tackling difficult and sensitive subjects with remarkable candor. “The Words I Wish I Said” continues this trend, offering readers a deeply intimate glimpse into the author’s inner world.

This collection, widely accessible as a PDF, builds upon themes established in her previous book, “The Perks of Solitude.” Kelly’s writing style is characterized by its raw honesty and vulnerability, inviting readers to confront uncomfortable truths alongside her. The readily available PDF versions, found on platforms like Z-lib.org, have broadened the reach of her impactful narratives, sparking conversations and providing solace to those who resonate with her experiences.

The Core Themes of the Collection

“The Words I Wish I Said”, easily found as a PDF download, centers around the power of unspoken thoughts and the weight of unexpressed emotions. The collection grapples with regret, vulnerability, and the courage – or lack thereof – to articulate one’s true feelings. A recurring theme is the internal conflict between what is said and what remains silently held within.

The PDF reveals Kelly’s willingness to confront controversial subjects, sparking dialogue about difficult realities. The book also explores the intimacy of these unwritten words, suggesting they often hold more significance than those publicly voiced. Readers accessing the PDF version will find a tapestry of reflections, acknowledging both the desire for expression and the fear of its consequences, making it a profoundly relatable work.

Exploring the Content of “The Words I Wish I Said”

The Words I Wish I Said, accessible as a PDF, delves into personal reflections, controversial topics, and the author’s intimate, often regretful, inner world.

Unspoken Thoughts and Self-Expression

Caitlin Kelly’s work, frequently found as a readily downloadable PDF, centers on the powerful tension between what is said and what remains unsaid. The collection, as evidenced by summaries available online, unpacks a wealth of internal dialogues and suppressed emotions.

The book’s core lies in exploring the weight of unspoken thoughts – the words we rehearse in our minds but often lack the courage to vocalize. Readers encounter a tapestry of reflections, revealing secrets and regrets. The PDF versions circulating highlight Kelly’s willingness to confront difficult truths about herself and the world around her, offering a space for readers to contemplate their own unexpressed feelings. It’s a raw exploration of self-expression, or the lack thereof.

The Intimacy of Unwritten Words

Caitlin Kelly’s “The Words I Wish I Said,” often accessed as a PDF, delves into the surprisingly potent intimacy found within silence and unwritten communication. The book reveals how the things not said can carry immense emotional weight, shaping relationships and self-perception.

The readily available PDF versions showcase Kelly’s exploration of secrets held close and the vulnerability inherent in acknowledging unspoken desires and regrets. These unwritten words become a private landscape, a space where honesty and self-deception coexist. The collection suggests that these internal narratives are profoundly personal, yet universally relatable, fostering a unique connection between author and reader. It’s a testament to the power of internal life.

Controversial Subjects Addressed in the Book

Caitlin Kelly’s “The Words I Wish I Said,” frequently found as a PDF download, doesn’t shy away from difficult and potentially triggering topics. Online commentary explicitly warns readers that the book tackles a multitude of controversial subjects, demanding a sensitive approach.

The accessible PDF versions reveal explorations of deeply personal experiences, potentially including themes of regret, vulnerability, and challenging societal norms. The author’s willingness to confront these issues head-on contributes to the book’s raw and honest tone. Readers should be prepared for content that may evoke strong emotional responses, as Kelly’s work aims to provoke thought and discussion, even when uncomfortable.

Analyzing Caitlin Kelly’s Writing Style

Kelly’s style, evident in the widely available PDF, is characterized by unflinching honesty and emotional depth, creating a uniquely vulnerable and impactful reading experience.

Raw and Honest Reflections

Caitlin Kelly’s work, easily accessible as a PDF, distinguishes itself through remarkably candid self-reflection. The collection, often downloaded from platforms like Z-lib.org, doesn’t shy away from difficult or controversial subjects. Readers consistently note the author’s willingness to expose vulnerabilities and grapple with complex emotions.

This honesty isn’t presented as polished prose, but rather as a stream of consciousness, mirroring the internal struggles she explores. The PDF version allows for close examination of this unfiltered style. She openly admits to thoughts and feelings she wishes she hadn’t expressed, creating a powerful connection with readers who recognize similar internal conflicts. The book’s impact stems from this genuine portrayal of the human experience, making it a compelling and often unsettling read.

Vulnerability and Emotional Depth

“The Words I Wish I Said,” available as a PDF download, is characterized by profound emotional depth and a striking vulnerability. The author, Caitlin Kelly, doesn’t merely touch upon sensitive topics; she dives into them with unflinching honesty, as evidenced in the readily available PDF versions found online.

This willingness to expose her inner world resonates deeply with readers, fostering a sense of intimacy and shared experience. The PDF format allows for revisiting passages and absorbing the nuances of her emotional landscape. The book tackles themes of regret, unspoken desires, and the weight of unsaid words, creating a powerful and often heartbreaking narrative. It’s a testament to Kelly’s skill that she conveys such raw emotion with authenticity and grace.

The Author’s Note and Motivation

Caitlin Kelly’s author’s note, accessible within the PDF of “The Words I Wish I Said,” reveals a compelling motivation behind the collection. She details a desire to explore the complexities of self-expression and the often-painful consequences of silence. The readily available PDF versions highlight her intention to confront difficult truths, both personal and societal.

Kelly explains that many of these reflections were initially private, words she hesitated to commit to paper, even in a PDF document. Her motivation stemmed from a need to process past experiences and offer a space for readers to confront their own unspoken thoughts. The PDF allows readers intimate access to this deeply personal explanation, understanding the genesis of this vulnerable work.

Reception and Impact of the Book

“The Words I Wish I Said” PDF receives varied responses, with 19,103 views and 2,978 downloads, sparking discussion on its controversial yet honest content.

Reader Responses and Reviews

Reader reactions to “The Words I Wish I Said” PDF are notably diverse, reflecting the book’s willingness to tackle sensitive and challenging subjects. Many appreciate Kelly’s brutal honesty and vulnerability, finding resonance in her raw reflections on unspoken thoughts and difficult experiences. However, the controversial nature of the content also elicits strong criticism from some, who may find the material unsettling or triggering.

Online platforms reveal a spectrum of opinions, with discussions centering on the author’s courage to expose personal struggles. The readily available PDF format has facilitated widespread access, contributing to increased engagement and debate. Reviews often highlight the book’s emotional depth and its ability to provoke introspection, even while acknowledging its potentially disturbing themes. The book’s impact lies in its capacity to initiate conversations about difficult topics.

Critical Analysis of the Collection

“The Words I Wish I Said,” particularly in its PDF form, presents a compelling case study in confessional literature. Critics acknowledge Kelly’s skillful navigation of intensely personal territory, though some question the necessity of detailing such vulnerable experiences. The collection’s strength lies in its unflinching portrayal of internal conflict and the weight of unspoken truths.

Analysis reveals a deliberate stylistic choice towards rawness, foregoing polished prose for immediate emotional impact. The PDF’s accessibility amplifies the work’s reach, prompting discussions about boundaries and self-exposure. While lauded for its honesty, the book also faces scrutiny regarding its potential to sensationalize trauma. Ultimately, the collection’s merit rests on its ability to foster empathy and encourage self-reflection.

Download Availability and Online Access (2026)

As of March 16, 2026, obtaining a PDF copy of “The Words I Wish I Said” remains readily accessible through various online platforms. Z-lib.org continues to host the file, offering a convenient download option. Several archive sites also maintain copies, ensuring broader accessibility. However, users should exercise caution regarding download sources, verifying legitimacy to avoid malware.

Links circulating on platforms like blogspot.com and fileunlimited.club provide direct access, though their stability may vary. The PDF version, as evidenced by flip PDF versions on sites like z-lib.org, is widely circulated. It’s crucial to be mindful of copyright and DMCA regulations when downloading and sharing the material.

Related Works by Caitlin Kelly

Caitlin Kelly’s other notable work, “The Perks of Solitude,” complements “The Words I Wish I Said,” exploring similar themes of introspection and vulnerability.

“The Perks of Solitude”

“The Perks of Solitude”, another work by Caitlin Kelly, delves into the empowering aspects of being alone and finding strength within oneself. While “The Words I Wish I Said” focuses on unexpressed thoughts and regrets, “The Perks of Solitude” actively champions the benefits of intentional isolation and self-discovery.

Both books, often found as PDF downloads online, share a common thread of honest self-reflection. However, where the former grapples with past communications, the latter embraces present-day independence. Readers exploring “The Words I Wish I Said” may find “The Perks of Solitude” a complementary read, offering a pathway towards self-acceptance and a celebration of personal space. Both titles demonstrate Kelly’s skill in navigating complex emotional landscapes.

Connections Between Kelly’s Books

Caitlin Kelly’s works, including “The Words I Wish I Said” – frequently accessible as a PDF – demonstrate recurring themes of vulnerability, honesty, and the complexities of human emotion. A key connection lies in her unflinching exploration of difficult subjects. Both her books invite readers to confront uncomfortable truths about themselves and society.

While “The Words I Wish I Said” centers on unspoken regrets and missed opportunities, her other writings often echo this sentiment, examining the weight of past actions and the desire for different outcomes. The availability of these books as PDF downloads facilitates wider access to her introspective narratives, fostering a community of readers engaged with similar emotional landscapes.

Resources and Support Networks Mentioned

“The Words I Wish I Said,” often found as a PDF, acknowledges sensitive topics and provides vital resources like the Suicide Hotline (800-273-8255) and Sexual Assault Hotline (800-656-4673).

Suicide Hotline Information (800-273-8255)

Caitlin Kelly’s work, including readily accessible PDF versions of “The Words I Wish I Said,” frequently delves into challenging and emotionally resonant subject matter. Recognizing the potential impact on readers, the author and distributors prominently feature support resources.

The National Suicide Prevention Lifeline, reachable at 800-273-8255, is a crucial resource for individuals experiencing suicidal thoughts or emotional distress. This lifeline provides confidential support 24/7, offering a safe space to talk through difficult feelings. It’s a vital connection point for those needing immediate help, and its inclusion alongside the book underscores a commitment to reader well-being.

Accessing the book as a PDF doesn’t diminish the importance of these resources; in fact, it highlights their accessibility alongside the potentially triggering content. Seeking help is a sign of strength, and this information is provided with care and intention.

Sexual Assault Hotline Information (800-656-4673)

Caitlin Kelly’s deeply personal collection, often found as a PDF download, courageously addresses sensitive and potentially triggering topics, including experiences related to sexual assault. Acknowledging the difficult nature of this content, vital support resources are consistently provided alongside the book.

The National Sexual Assault Hotline, available 24/7 at 800-656-4673, offers confidential support, advocacy, and resources to survivors of sexual assault. Trained staff provide a safe and non-judgmental space to discuss experiences and explore options. This hotline is a critical lifeline for those in need.

Whether accessing “The Words I Wish I Said” in print or as a PDF, readers are encouraged to prioritize their well-being and utilize these resources if the content evokes difficult emotions or memories. Help is available, and you are not alone.

PDF Availability and Online Archives

“The Words I Wish I Said” by Caitlin Kelly is accessible as a PDF via platforms like Z-lib.org and various online archives for easy access.

Z-lib.org and PDF Downloads

Z-lib.org emerges as a prominent platform for accessing “The Words I Wish I Said” in PDF format. Numerous users have successfully downloaded the book from this digital library, evidenced by over 2,978 downloads as of recent reports. The site provides a convenient avenue for readers seeking immediate access to Caitlin Kelly’s work, bypassing traditional purchasing methods.

However, it’s crucial to acknowledge potential copyright implications associated with downloading PDFs from such sources. While offering accessibility, these platforms often operate in a legal gray area. Users should be mindful of DMCA regulations and understand the risks involved. The availability of the PDF on Z-lib.org fluctuates, and links may become outdated, requiring users to search for updated access points.

PDF Archive Links and Accessibility

Several online archives host PDF versions of “The Words I Wish I Said” by Caitlin Kelly, enhancing its accessibility. PDF archive websites, like pdfarchive.in, offer a readily available copy, categorized under “Art & Entertainment.” These archives often present the book in a flip PDF format, allowing for a more traditional reading experience.

However, accessibility can vary. Some links may be temporary or become inactive over time. Users may encounter differing versions or incomplete files. The Z-lib.org version, frequently referenced, also functions as an archive. It’s advisable to utilize multiple sources to ensure a complete and functional PDF download. Always exercise caution and verify the file’s integrity before opening it, considering potential security risks.

Copyright and DMCA Considerations

Downloading the PDF of “The Words I Wish I Said” from unauthorized sources may infringe on Caitlin Kelly’s copyright; report violations promptly.

Understanding Copyright Issues

Copyright law protects Caitlin Kelly’s original work, “The Words I Wish I Said,” granting her exclusive rights to reproduce, distribute, and display it. Unauthorized PDF downloads from platforms lacking proper licensing agreements constitute copyright infringement.

Sharing or distributing illegally obtained PDF copies violates these rights, potentially leading to legal consequences. While online archives like Z-lib.org may offer access, users must verify the legality of the source. Respecting copyright encourages authors and supports the creation of future literary works.

Always seek legitimate purchasing options or utilize library resources to access the book legally, ensuring fair compensation for the author’s intellectual property. Understanding these issues is crucial for ethical reading practices.

Reporting DMCA Violations

If you encounter unauthorized PDF copies of “The Words I Wish I Said” online, particularly on sites offering free downloads without proper licensing, you can report a Digital Millennium Copyright Act (DMCA) violation. This helps protect Caitlin Kelly’s copyright.

Most platforms, including those hosting file-sharing services and online archives like Z-lib.org, have designated procedures for submitting DMCA takedown notices. These notices require specific information, including details about the copyrighted work and the infringing material’s location.

Reporting infringements supports authors and encourages respect for intellectual property rights. By actively addressing unauthorized distribution of the PDF, you contribute to a fair and legal online environment for literary works.

Open post

honeywell home t6 pro programmable thermostat manual

Honeywell Home T6 Pro Programmable Thermostat Manual: A Comprehensive Guide

This manual provides detailed instructions for the Honeywell T6 Pro, covering setup, operation, troubleshooting, and app integration. It’s designed to maximize your smart home experience,
including energy-saving features and remote control capabilities.

The Honeywell Home T6 Pro Programmable Thermostat represents a significant advancement in home climate control, offering a blend of user-friendly operation and sophisticated smart features. This thermostat is designed to provide precise temperature management, enhancing comfort and potentially reducing energy consumption. It’s a versatile solution suitable for various heating and cooling systems.

Unlike traditional thermostats, the T6 Pro allows for customized scheduling, enabling you to set different temperatures for different times of the day, aligning with your lifestyle and occupancy patterns. Furthermore, its compatibility with the Honeywell Home app unlocks remote control capabilities, allowing adjustments from anywhere with an internet connection. The T6 Pro isn’t just about convenience; it’s about intelligent energy management.

This guide will walk you through every aspect of the T6 Pro, from initial setup and Wi-Fi connectivity to advanced features like geofencing and learning. Whether you’re a first-time smart thermostat user or an experienced homeowner, this manual will empower you to fully utilize the potential of your Honeywell T6 Pro.

Unboxing and Component Overview

Upon opening your Honeywell Home T6 Pro package, you’ll find several key components essential for installation and operation. These typically include the T6 Pro thermostat unit itself, a mounting base plate, screws and wall anchors for secure attachment, and wire labels to simplify the wiring process. A quick start guide is also included for a simplified initial setup.

Carefully inspect all components to ensure nothing is missing or damaged. The thermostat features a sleek, modern design with a clear, backlit display. The mounting base plate is designed to accommodate standard wall wiring configurations. The included wire labels are crucial for correctly identifying and connecting the wires from your existing heating and cooling system.

Before proceeding with installation, familiarize yourself with each component and its purpose. Refer to the detailed wiring diagrams later in this manual to understand how the wires connect to the thermostat. Proper identification and connection of these wires are vital for ensuring correct operation and preventing damage to your system.

Thermostat Display and Interface

The Honeywell T6 Pro thermostat boasts a user-friendly interface centered around a vibrant, backlit LCD display. This display clearly presents the current room temperature, set temperature, operating mode (heat, cool, auto, off), and time. Navigation is primarily achieved through a responsive touchscreen, allowing for intuitive control of all thermostat functions.

The main screen provides quick access to temperature adjustments, mode selection, and schedule settings. Swiping across the screen reveals additional options, such as fan control (auto, on) and system settings. Icons are used to represent different functions, making the interface easy to understand even for first-time users. A menu button provides access to more advanced settings and configuration options.

The display also indicates Wi-Fi connectivity status and alerts you to any system errors or warnings. Brightness can be adjusted to suit your preferences and ambient lighting conditions. The intuitive design ensures effortless control over your home’s climate, maximizing comfort and energy efficiency.

Initial Setup and Registration with Honeywell Home App

To unlock the full potential of your Honeywell T6 Pro, begin by downloading the Honeywell Home app from your device’s app store (iOS or Android). Once installed, create an account or log in if you already have one. The app guides you through a straightforward setup process, initiating thermostat registration.

During registration, the app will prompt you to connect your thermostat to your home’s Wi-Fi network – a crucial step for remote control and smart features. Follow the on-screen instructions carefully, ensuring you select the correct network and enter the password accurately. The app may ask for permission to access location services for geofencing functionality.

Once connected, the app automatically detects your thermostat model. You’ll be asked to name your thermostat and assign it to a specific room. This allows for zone-based control if you have multiple Honeywell Home devices. Successful registration grants access to remote control, scheduling, and advanced features within the Honeywell Home ecosystem.

Connecting to Wi-Fi Network

Establishing a stable Wi-Fi connection is paramount for utilizing the smart features of your Honeywell T6 Pro. Begin by ensuring your home network is operational and you have the network name (SSID) and password readily available. On the thermostat display, navigate to the network settings – typically found within the menu options.

The thermostat will scan for available Wi-Fi networks. Select your network from the list. If your network is hidden, you may need to manually enter the SSID. Carefully input the correct password, paying attention to capitalization. The thermostat will attempt to connect, displaying a progress indicator.

If the connection fails, double-check the password and ensure the thermostat is within range of your router. Restarting both the thermostat and router can often resolve connectivity issues. A lost Wi-Fi signal will trigger an error message on the display, prompting you to reconnect or select an alternative network.

Manual Programming: Setting Schedules

The Honeywell T6 Pro allows for customized heating and cooling schedules directly on the thermostat, independent of the app. Access the programming mode through the main menu. You’ll typically define separate schedules for weekdays and weekends, or create a unique 7-day program.

For each period (Wake, Leave, Return, Sleep), you can set a desired temperature. The thermostat will automatically adjust to these temperatures at the programmed times. Consider your daily routine when setting these periods – for example, lower the temperature while you’re away at work or asleep.

To edit a schedule, select the period you wish to modify and adjust the time and temperature. You can temporarily override the schedule by manually adjusting the temperature; the thermostat will revert to the programmed schedule at the next scheduled period. Remember to save your changes after making adjustments.

Smart Features: Geofencing and Learning

The Honeywell T6 Pro elevates comfort and efficiency with intelligent features. Geofencing utilizes your smartphone’s location to adjust the temperature automatically; Define a virtual perimeter around your home; when you leave, the thermostat enters an energy-saving away mode. Upon your return, it pre-heats or pre-cools to your preferred temperature.

The thermostat’s learning capability observes your temperature adjustments and schedule preferences over time. It then suggests optimized schedules to maximize energy savings without sacrificing comfort. This adaptive learning refines the heating and cooling patterns based on your actual usage.

These smart features are configured and managed through the Honeywell Home app. Ensure location services are enabled on your smartphone for geofencing to function correctly. Regularly review the suggested schedules to confirm they align with your lifestyle and preferences.

Remote Control via Honeywell Home App

The Honeywell Home app provides comprehensive remote control of your T6 Pro thermostat. After successful registration and Wi-Fi connection, you can adjust the temperature, change modes (heat, cool, auto, off), and view current system status from anywhere with an internet connection.

The app mirrors the thermostat’s interface, allowing you to create and modify schedules, override settings, and access energy usage reports. You can also receive alerts for extreme temperatures or system malfunctions, ensuring prompt attention to potential issues.

Geofencing and learning features are fully managed through the app, offering granular control over their settings. Multiple users can be granted access to control the thermostat, providing convenience for all household members. Regular app updates ensure optimal performance and access to the latest features.

Understanding Error Messages and Troubleshooting

The Honeywell T6 Pro displays error messages to indicate system issues. Common alerts include “Connection Lost,” signaling Wi-Fi disruption, and messages related to sensor malfunctions or wiring problems. Consult the app or thermostat display for specific error codes.

Troubleshooting begins with verifying the power supply and wiring connections. Ensure the thermostat is securely mounted and the breaker is active. For Wi-Fi issues, reboot your router and re-establish the connection through the Honeywell Home app.

If error messages persist, refer to the detailed troubleshooting section within the app or the full manual. Common fixes include resetting the thermostat to factory defaults (use caution!), checking battery levels (if applicable), and verifying compatibility with your HVAC system. If problems continue, contact Honeywell Home support for assistance.

Lost Wi-Fi Connection Issues

A frequent concern with smart thermostats is a lost Wi-Fi connection. The Honeywell T6 Pro will display a “Connection Lost” message, impacting remote control and scheduling features. Initial steps involve checking your home’s internet service and router functionality. Ensure other devices connect successfully.

Restarting both the thermostat and your Wi-Fi router is often effective. Within the Honeywell Home app, attempt to reconnect the thermostat to your network, re-entering your password if necessary. Verify the Wi-Fi signal strength at the thermostat’s location; weak signals can cause intermittent disconnections.

If issues persist, check for firmware updates for both the thermostat and the Honeywell Home app. Interference from other devices can also be a factor. Consider relocating the router or thermostat for improved signal clarity. Contact Honeywell support if reconnection attempts repeatedly fail.

Manual vs. Auto Mode Operation

The Honeywell T6 Pro offers both Manual and Auto modes, providing flexibility in temperature control. In Manual mode, you directly set the desired temperature, and the thermostat maintains that setting continuously, overriding any programmed schedule. This is ideal for temporary adjustments or when a consistent temperature is needed regardless of time.

Auto mode utilizes the programmed schedule you’ve created within the thermostat or Honeywell Home app. The thermostat automatically adjusts the temperature based on the time of day and your pre-defined settings, optimizing comfort and energy efficiency. Switching between modes is typically done directly on the thermostat’s interface.

Remember to verify the mode setting if you notice unexpected temperature changes. For example, if the temperature isn’t changing as expected, confirm the thermostat isn’t inadvertently in Manual mode. Understanding these modes allows for tailored climate control based on your lifestyle and preferences.

Temperature Range and Operating Limits (T6)

The Honeywell T6 Pro thermostat is designed to operate within specific temperature ranges to ensure optimal performance and prevent damage. The typical operating temperature range for the T6 model is 20°C to 40°C (4°F to 104°F). However, the storage temperature range is broader, spanning from 20°C to 70°C (4°F to 158°F).

Operating outside the specified range may lead to inaccurate readings, reduced efficiency, or potential malfunction. It’s crucial to consider these limits, especially in extreme climates. The thermostat is engineered to maintain consistent temperature control within its defined boundaries, providing reliable comfort.

Exceeding these limits during storage could also affect the thermostat’s lifespan. Always refer to the complete manual for detailed specifications and safety guidelines. Understanding these parameters ensures the longevity and proper functioning of your Honeywell T6 Pro thermostat.

Energy Meter Functionality (525 Model)

The Honeywell T6 Pro, specifically the 525 model, incorporates an energy meter feature designed to track and display your heating and cooling usage. This valuable tool provides insights into your energy consumption patterns, allowing you to identify opportunities for savings and optimize your home’s energy efficiency.

The energy meter displays data in a user-friendly format, often showing historical usage trends over days, weeks, or months. This information can be accessed directly through the thermostat’s interface or remotely via the Honeywell Home app. By monitoring your energy usage, you can make informed decisions about your thermostat settings and overall energy habits.

This feature empowers you to reduce your carbon footprint and lower your utility bills. The 525 model’s energy meter is a key component in promoting responsible energy management within your smart home ecosystem, offering a practical approach to sustainability.

Wiring Diagrams and Installation Considerations

Proper installation of the Honeywell T6 Pro is crucial for optimal performance and safety. The manual provides detailed wiring diagrams catering to various HVAC system configurations, including conventional and heat pump systems. Carefully review these diagrams before commencing any wiring work, ensuring compatibility with your existing setup.

Important considerations include identifying the correct wiring terminals for power (Rh/Rc), heating (W), cooling (Y), and common (C). A ‘C’ wire is often required for consistent power to the thermostat. If a C-wire isn’t present, a C-wire adapter may be necessary. Always disconnect power to your HVAC system at the breaker before handling any wiring.

Safety first! If you are uncomfortable with electrical work, consult a qualified HVAC technician. Incorrect wiring can damage your thermostat or HVAC system. The manual emphasizes adherence to local electrical codes and provides guidance on safely removing and disposing of any mercury-containing thermostats if replacing an older model.

Replacing Mercury-Containing Thermostats

If your Honeywell T6 Pro is replacing an older thermostat containing mercury, extreme caution is required. Mercury is a hazardous substance, and improper disposal poses environmental and health risks. The manual provides explicit instructions on how to safely handle and dispose of these older units.

Do not discard the old thermostat in regular household trash. Instead, contact your local waste management authority for specific disposal guidelines. Many communities have designated collection programs for mercury-containing devices. The manual may also provide links to resources for finding nearby recycling centers.

Carefully remove the old thermostat and seal it in a plastic bag to prevent mercury leakage. Avoid breaking the glass tube containing the mercury. Follow all local, state, and federal regulations regarding mercury disposal. Prioritize environmental responsibility when upgrading to the T6 Pro, ensuring a safe and compliant replacement process.

Storage Temperature Specifications

Proper storage of your Honeywell T6 Pro thermostat is crucial to maintain its functionality and longevity. The manual details specific temperature ranges to ensure the device remains undamaged when not in use. Exposing the thermostat to extreme temperatures can compromise its internal components and affect its performance.

For the T6 model, the recommended storage temperature range is 20°C to 40°C (4°F to 104°F). However, extended storage outside of operational temperatures, up to 20°C to 70°C (4°F to 158°F), is permissible without causing permanent damage. Avoid storing the thermostat in direct sunlight, near heat sources, or in areas with high humidity.

Before reinstalling after storage, allow the thermostat to acclimate to room temperature for at least 30 minutes. This prevents condensation buildup and ensures accurate temperature readings. Adhering to these storage guidelines will help preserve the integrity of your Honeywell T6 Pro and guarantee reliable operation when you need it.

Coolant Recirculation and Radiator Cooling (Pro Series)

The Honeywell Pro Series thermostats extend beyond typical home heating and cooling, offering advanced features like coolant recirculation and radiator cooling. These functionalities are particularly beneficial for maintaining precise engine temperatures in specialized applications, going beyond standard HVAC systems.

Coolant recirculation ensures consistent temperature regulation by continuously circulating coolant, preventing overheating or undercooling. This is vital for optimal performance and longevity of the associated equipment. Radiator cooling, conversely, actively manages heat dissipation, preventing excessive temperatures during peak operation.

These Pro Series capabilities are ideal for environments requiring strict temperature control, such as industrial machinery or specialized vehicles. The thermostat package includes components designed to regulate these processes effectively. While not applicable to all T6 Pro models, this feature highlights the versatility and advanced engineering of the Honeywell Pro line, offering solutions beyond conventional home comfort.

Open post

brooks brothers size guide

Brooks Brothers Size Guide: A Comprehensive Overview (Updated 03/05/2026)

Brooks Brothers offers a range of sizes, including shirts (15H 32/33), suits (L, M, S, XL, XS, XXL), and various product lines like polo shirts and outerwear.
Access to replay services, like France TV REPLAY via Orange,
can be limited, sometimes to just five days, and may experience technical issues.

Brooks Brothers has cultivated a legacy of classic American style, and understanding their sizing is crucial for achieving a refined fit. Navigating their offerings requires attention, as variations exist across different product categories – from shirts and suits to pants and shoes. Recent reports from March 5th, 2026, indicate ongoing technical challenges with replay services like France TV REPLAY on Orange TV, mirroring potential complexities in accessing detailed size charts online.

The brand provides a comprehensive range, including sizes like 15H 32/33 for shirts and a spectrum from XS to XXL for suits and blazers. However, users have reported issues with accessing these resources, highlighting the need for a clear, independent guide. Furthermore, the five-day replay limit and search function disruptions on Orange’s platform emphasize the importance of having readily available sizing information. Brooks Brothers sizing isn’t always straightforward, and this guide aims to demystify the process, ensuring a confident and accurate shopping experience.

II. Understanding Brooks Brothers Fit

Brooks Brothers offers distinct fits designed to cater to varying body types and style preferences. Recognizing these nuances is key to selecting garments that complement your physique. The core fits include Classic, Slim, and Extra Slim, each offering a different silhouette. While navigating sizing, remember recent reports (March 5th, 2026) detail disruptions with France TV REPLAY on Orange, suggesting potential difficulties in accessing official fit guides online.

Classic Fit provides a traditional, comfortable silhouette with more room throughout the chest and waist. Slim Fit offers a more modern, tailored look, closer to the body without feeling restrictive. Extra Slim Fit is the most contemporary, designed for a sleek, streamlined appearance; Understanding these distinctions, alongside size ranges (XS-XXL for suits), is vital. Like the intermittent access to replay services and search issues on Orange’s platform, finding the perfect fit requires careful consideration. Brooks Brothers’ commitment to quality extends to their fit, but informed selection is paramount.

II.A. Classic Fit

Brooks Brothers’ Classic Fit is the cornerstone of their sizing philosophy, representing a timeless and comfortable silhouette. This fit is characterized by a generous cut through the chest, waist, and shoulders, providing ample room for movement and a relaxed appearance. It’s ideal for individuals who prefer a traditional look and prioritize comfort over a highly tailored aesthetic. Think of it as a more forgiving fit, suitable for various body types.

While navigating sizing, remember recent reports (March 5th, 2026) mention issues with France TV REPLAY, potentially impacting access to detailed size charts. Classic Fit garments typically feature a fuller sleeve and a slightly straighter cut. Size availability spans a broad range, including options like 15H 32/33 for shirts. It’s a reliable choice for those seeking a sophisticated yet unrestrictive style, mirroring the enduring appeal of Brooks Brothers’ heritage. Consider this fit a foundational element of their wardrobe offerings.

II.B. Slim Fit

Brooks Brothers’ Slim Fit offers a more contemporary silhouette, designed to provide a closer, more tailored look. This fit is cut closer to the body through the chest, waist, and shoulders, creating a streamlined appearance. It’s a popular choice for those who prefer a modern aesthetic and a more defined shape. Unlike the Classic Fit, the Slim Fit emphasizes a trimmer profile, appealing to a younger demographic or those seeking a sharper style.

When referencing sizing, be aware of potential disruptions, as noted on March 5th, 2026, regarding access to online replay services like France TV REPLAY, which might affect chart availability. Slim Fit shirts and suits often feature a narrower sleeve and a more tapered waist. Sizes range to accommodate various builds, including options like L, M, S, XL, XS, and XXL. It’s crucial to consult the specific size chart for each garment, as Slim Fit can vary slightly between product lines. This fit provides a polished and sophisticated look, ideal for both business and casual occasions.

II.C. Extra Slim Fit

Brooks Brothers’ Extra Slim Fit represents the most modern and tailored silhouette available. This fit is designed for a very close-to-the-body appearance, emphasizing a sharp, athletic build. It’s significantly more tapered than the Slim Fit, offering a streamlined and contemporary aesthetic. The Extra Slim Fit is ideal for individuals who prefer a highly fitted garment and a distinctly fashionable look.

Considering current online access issues, as reported on March 5th, 2026, regarding platforms like France TV REPLAY, verifying size charts directly on the Brooks Brothers website is essential; Extra Slim Fit garments feature a very narrow cut through the chest, waist, and shoulders, with a tapered sleeve and a minimized silhouette; Available sizes include a range to suit different body types, such as L, M, S, XL, XS, and XXL. It’s vital to carefully review measurements, as this fit runs smaller than Classic or Slim Fits. This style is perfect for making a bold fashion statement and showcasing a modern, sophisticated image.

III. Men’s Shirts Size Guide

Brooks Brothers men’s shirts are available in a comprehensive range of sizes to ensure a perfect fit. A key component is understanding neck and sleeve measurements. Neck size, typically ranging from 14 to 18 inches, should be measured at the base of the neck, keeping the tape measure comfortably snug. Sleeve length is determined by measuring from the center back of the neck, over the shoulder, and down to the wrist bone.

A specific example, as of today’s date (03/05/2026), includes shirts sized 15H 32/33. Collar style also influences sizing; button-down collars may require slightly more room than spread collars. Given recent reports of online service disruptions, like those experienced with France TV REPLAY, it’s crucial to consult the official Brooks Brothers website for the most up-to-date charts. Variations exist between shirt types – dress shirts, polo shirts, and casual shirts may have slightly different sizing conventions. Accurate measurements are paramount for achieving a polished and comfortable look.

III.A. Neck Size Measurement

Determining your correct neck size is fundamental for a well-fitting Brooks Brothers shirt. Begin by standing upright and ensuring your posture is relaxed. Use a flexible measuring tape, and position it snugly – but not tightly – around the base of your neck. The tape should sit approximately one inch below your Adam’s apple.

Maintain a natural breathing pattern while taking the measurement; avoid pulling the tape too tight or leaving it too loose. Record the measurement in inches. If your measurement falls between sizes, it’s generally recommended to round up to the next half-inch. Remember, a properly fitted collar should allow you to comfortably insert two fingers between your neck and the collar.

Considering recent reports of online access issues, similar to those with France TV REPLAY, always double-check your measurements against the official Brooks Brothers size chart available on their website. This ensures accuracy and avoids potential sizing discrepancies.

III.B. Sleeve Length Measurement

Accurately measuring sleeve length is crucial for achieving a polished look with your Brooks Brothers shirts. Begin by bending your elbow slightly – approximately 90 degrees. Have a friend or family member assist you for the most precise measurement. Place the measuring tape at the center back of your neck, where the shoulder seam would typically fall.

Extend the tape measure along your shoulder, over your elbow, and down to your wrist bone. Ensure the tape remains straight and doesn’t curve with your arm. Record the measurement in inches. As with neck size, if your measurement falls between sizes, rounding up to the nearest half-inch is advisable.

Keep in mind that, like accessing online replay services (as reported with Orange TV), consistent access to accurate sizing information is vital. Always verify your measurements against the official Brooks Brothers size chart to account for potential variations and ensure a perfect fit.

III.C. Collar Style & Size Variations

Brooks Brothers offers a variety of collar styles, each influencing the overall aesthetic and requiring consideration when determining your ideal size. Common styles include classic, button-down, and spread collars. Collar size is intrinsically linked to your neck size, but subtle variations exist.

A classic collar typically pairs well with a traditional tie knot, while a spread collar accommodates larger knots. Button-down collars offer a more casual appearance. When selecting a collar size, consider how you intend to wear the shirt – with or without a tie.

Similar to troubleshooting issues with replay services like France TV (where access can be intermittent), finding the right collar fit may require some experimentation. Brooks Brothers’ size charts provide guidance, but individual preferences and body types play a role. Remember, a properly fitted collar should allow comfortable movement without feeling restrictive.

IV. Men’s Suit & Blazer Size Guide

Brooks Brothers suit and blazer sizing centers around two primary measurements: chest size and waist size. Your chest size dictates the suit jacket size, while your waist measurement determines the trouser size. It’s crucial to measure accurately, as a poorly fitted suit detracts from its overall appearance.

Suit jacket sizes typically correspond to chest measurements, but variations can occur. Blazers often offer a more relaxed fit. Brooks Brothers provides suit lengths in Regular, Long, and Extra Long to accommodate different heights. Similar to resolving access issues with replay platforms like France TV, a precise fit requires attention to detail;

Trouser sizes are determined by both waist and inseam measurements. Consider the desired break – the amount of fabric that rests on your shoes. Sizes range from XS to XXL, mirroring availability in other product lines. A well-fitted suit enhances confidence and style.

IV.A. Chest Size & Suit Jacket Size

Determining your suit jacket size at Brooks Brothers begins with accurately measuring your chest circumference. Use a flexible measuring tape, keeping it level and comfortably snug – not tight – across the fullest part of your chest. This measurement is the foundation for selecting the correct jacket size.

Brooks Brothers generally correlates chest size directly with jacket size, but it’s not a one-to-one correspondence. A 40-inch chest typically corresponds to a 40R (Regular) jacket, but individual builds vary. Consider your body type; broader shoulders might necessitate a slightly larger size.

Remember that suit jackets are designed to be worn over shirts and potentially sweaters. Allow for comfortable movement. Like troubleshooting replay access on platforms like Orange TV, a precise fit requires careful consideration. Refer to the detailed Brooks Brothers size chart for specific conversions and recommendations. A well-fitted jacket enhances your silhouette and overall appearance.

IV.B. Waist Size & Trouser Size

Finding the correct trouser size at Brooks Brothers relies on an accurate waist measurement. Use a measuring tape to measure around your natural waistline, ensuring the tape is comfortably snug and level. Do not pull the tape too tight, nor leave it too loose. This measurement, in inches, is your starting point.

Brooks Brothers trouser sizes generally align with waist measurements, but variations exist. A 34-inch waist typically corresponds to a size 34 trouser. However, consider the desired fit – classic, slim, or extra slim – as this impacts sizing. Like resolving issues with France TV REPLAY, precision is key.

Trouser sizes also include length, determined by inseam. Brooks Brothers offers various lengths (Regular, Long, Extra Long) to accommodate different heights. A proper fit ensures both comfort and a polished appearance. Always consult the official Brooks Brothers size chart for detailed guidance and conversions, ensuring a perfect fit every time.

IV.C. Brooks Brothers Suit Lengths (Regular, Long, Extra Long)

Brooks Brothers suit lengths are crucial for achieving a well-proportioned and flattering silhouette. They offer three primary lengths: Regular, Long, and Extra Long, catering to diverse body types and heights. Determining the correct length ensures the jacket sleeves fall appropriately, typically covering the wrist bone with about half an inch of shirt cuff visible.

Regular length suits are designed for individuals of average height. Long lengths add approximately 2-3 inches to the jacket and trouser length, accommodating taller frames; Extra Long lengths provide even more length, suitable for those significantly above average height. Like troubleshooting access to France TV REPLAY, finding the right fit requires attention to detail.

Consider your height and build when selecting a suit length. A properly fitted suit enhances your overall appearance and comfort. Refer to the Brooks Brothers size chart for specific measurements and guidance. Remember, alterations can further refine the fit, ensuring a truly bespoke look.

V. Men’s Pants & Trousers Size Guide

Brooks Brothers men’s pants and trousers sizing focuses on two primary measurements: waist and inseam. Accurate measurements are key to a comfortable and stylish fit, much like resolving issues with accessing replay services like France TV REPLAY. Begin by measuring your natural waistline – typically just above your hip bones – using a flexible measuring tape. Ensure the tape is snug but not tight.

Next, determine your inseam. This is measured from the crotch to the bottom of the pant leg, ideally while wearing shoes similar to those you’ll pair with the trousers. Brooks Brothers offers various rise options – Low, Mid, and High – influencing where the waistband sits on your waist.

Consult the Brooks Brothers size chart, correlating your waist and inseam measurements to find your corresponding size. Remember that sizing can sometimes vary slightly between styles. Don’t hesitate to utilize their online resources or seek assistance from a sales associate for personalized guidance.

V.A. Waist Measurement

Determining your accurate waist measurement is the foundational step in finding the perfect fit in Brooks Brothers men’s pants and trousers. Unlike troubleshooting access to replay services like France TV REPLAY, this is a straightforward process. Use a flexible measuring tape, ensuring it’s neither too tight nor too loose around your natural waistline.

Your natural waist typically sits just above your hip bones – this is where you should position the measuring tape. Stand relaxed, with your weight evenly distributed, and breathe normally. Avoid sucking in your stomach or expanding your chest, as this will distort the measurement.

Wrap the tape around your waist, keeping it parallel to the floor. Record the measurement in inches. If your measurement falls between sizes on the Brooks Brothers size chart, it’s generally recommended to size up for a more comfortable fit. Remember, consistent waist measurements are crucial for a well-fitting garment.

V.B. Inseam Measurement

Accurately measuring your inseam is vital for achieving the correct length in Brooks Brothers pants and trousers, avoiding the need for alterations. Unlike resolving issues with accessing replay features on platforms like Orange TV, this measurement requires a bit of assistance.

Ideally, have a friend help you with this step. Stand straight with your shoes on – the shoes you intend to wear with the trousers. Measure from the crotch (where your pants meet your legs) down to the top of your heel. Ensure the measuring tape follows the natural curve of your leg and isn’t pulled taut.

Record the measurement in inches. Brooks Brothers typically offers various inseam lengths, such as 30, 32, 34, and longer. If your measurement falls between sizes, consider your preference for a break – the amount of fabric that folds over your shoes. A full break is more traditional, while a clean break is more modern.

V.C. Rise Options (Low, Mid, High)

Understanding the rise of Brooks Brothers pants is crucial for both comfort and achieving a flattering silhouette. The rise refers to the distance from the crotch seam to the top of the waistband, significantly impacting how the trousers sit on your waist.

Low-rise pants sit below the natural waist, offering a more modern, relaxed fit. Mid-rise is the most common and versatile option, landing around the natural waistline. High-rise trousers sit above the natural waist, providing a more classic, sophisticated look and often elongating the legs.

Consider your body type and personal preference when selecting a rise. Like troubleshooting access to France TV REPLAY, finding the right fit requires some experimentation. Higher rises can be particularly flattering for those with shorter torsos, while lower rises suit those with longer legs. Brooks Brothers generally offers a selection of each rise, so explore what feels best for you.

VI. Brooks Brothers Shoe Size Guide

Finding the perfect fit in Brooks Brothers footwear requires understanding their sizing system. While they primarily utilize standard US shoe sizes, variations can occur between brands and styles. It’s always recommended to consult the specific size chart for each shoe you’re considering.

US Shoe Sizes are the foundation of their sizing, ranging from whole and half sizes for men. However, width is equally important – options typically include Narrow, Medium, and Wide. Accurate measurement is key, as foot size can change over time, much like troubleshooting issues with online replay services.

International Shoe Size Conversions are available on the Brooks Brothers website to assist customers outside the US. These conversions are approximate, and it’s best to prioritize foot length measurement for the most accurate fit. Remember, a comfortable shoe is essential, and taking the time to find the right size will ensure a pleasurable wearing experience.

VI.A. US Shoe Sizes

Brooks Brothers predominantly employs US shoe sizing for its footwear offerings, catering to a broad customer base. Men’s sizes generally begin at 6 and extend up to 16, encompassing both whole and half sizes – crucial for achieving a precise fit. However, simply knowing your numerical size isn’t always sufficient.

Width is a critical component often overlooked. Brooks Brothers typically provides options for Narrow (N), Medium (M), and Wide (W) widths, accommodating varying foot shapes. A shoe that’s the correct length but the wrong width can lead to discomfort and even foot problems. Consider the specific style of shoe; dress shoes may fit differently than casual sneakers.

Accurate measurement is paramount. Utilize a Brannock device, if available, or carefully measure your foot length and width at home. Remember that foot size can fluctuate, similar to the intermittent access issues reported with France TV REPLAY. Prioritize comfort and allow for some wiggle room, especially in warmer months.

VI.B. International Shoe Size Conversions

For customers outside the United States, navigating Brooks Brothers’ shoe sizing requires understanding international conversions. While the brand primarily lists sizes in US measurements, accurate translation is vital for a comfortable fit. European (EU) sizes, for example, generally run smaller than US sizes; a US size 9 might equate to a EU size 42 or 43, depending on the manufacturer.

UK sizes also differ, typically being a half size smaller than US sizes. Therefore, a US size 10 would likely correspond to a UK size 9.5. However, these are generalizations, and variations exist between brands and shoe styles. Always consult a specific size chart, as inconsistencies can occur, much like the reported issues with accessing replay features on Orange TV.

Brooks Brothers may provide conversion charts on their website or through customer service. When in doubt, it’s best to err on the side of caution and potentially order two sizes to ensure the perfect fit. Remember to consider width alongside length during the conversion process for optimal comfort.

VII. Size Charts for Specific Brooks Brothers Products

Brooks Brothers offers diverse product lines, each potentially requiring a unique size chart for optimal fit. While general guides exist, variations are common. Polo shirts, for instance, may differ in sizing from dress shirts, necessitating a dedicated chart focusing on chest and length measurements. Similarly, sweaters and knitwear often have size charts based on chest, sleeve length, and body length, accounting for different knit densities and styles.

Outerwear, including jackets and coats, requires charts detailing chest, waist, sleeve length, and overall length. These charts are crucial, given the layering often involved with outerwear. It’s important to note that, like accessing replay services on platforms like France TV REPLAY, finding the correct size can sometimes be frustrating.

Brooks Brothers frequently updates these charts, so referencing the most current version on their website is essential. Always prioritize product-specific charts over general guides to avoid sizing errors and ensure customer satisfaction.

VII.A. Polo Shirts

Brooks Brothers polo shirts require careful attention to sizing, differing from traditional dress shirt measurements. The primary measurements for a proper fit are chest size and body length. Chest size dictates the width across the fullest part of the chest, while body length is measured from the high point of the shoulder to the hem.

Brooks Brothers typically offers polo shirts in sizes ranging from XS to XXL, with numerical sizes also available (e.g., 15.5, 16.5). It’s crucial to consult the specific size chart for the polo shirt style, as variations exist between classic, slim, and performance fits.

Similar to troubleshooting access issues with services like France TV REPLAY, finding the perfect polo shirt size may require some trial and error. Consider your build – a broader chest may necessitate sizing up, while a shorter torso might benefit from sizing down. Always check customer reviews for insights into fit consistency.

VII.B. Sweaters & Knitwear

Brooks Brothers sweaters and knitwear sizing focuses primarily on chest and sleeve length, though fit – classic, slim, or extra slim – significantly impacts the overall feel. Unlike collared shirts, sweater sizes are less standardized, demanding a closer look at the product-specific size chart. Sizes generally range from XS to XXL, and sometimes include larger options.

Chest measurement remains key; measure around the fullest part of your chest, keeping the tape measure level. Sleeve length is measured from the center back of the neck, over the shoulder, and down to the wrist. Pay attention to whether the sweater is intended for layering, as this will influence the desired fit.

Troubleshooting fit issues with knitwear can be akin to resolving replay access problems – sometimes a simple adjustment (like sizing up) is all that’s needed. Consider the knit’s gauge; a finer gauge knit will generally fit closer to the body than a chunkier knit. Always review customer feedback for real-world fit insights.

VII.C. Outerwear (Jackets, Coats)

Brooks Brothers outerwear – encompassing jackets and coats – requires considering chest size, sleeve length, and shoulder width for a proper fit. Unlike shirts with neck sizes, outerwear sizing centers around accommodating layers comfortably. Sizes typically span from XS to XXL, with some styles offering extended sizes.

Chest measurement is crucial; measure around the fullest part of your chest while wearing a typical layering garment. Sleeve length is measured similarly to shirts, from the center back of the neck to the wrist. Shoulder width impacts how the jacket sits, so ensure a comfortable range of motion.

Coat lengths (regular, long, extra long) are also vital, influencing overall silhouette and warmth. Similar to troubleshooting replay issues on Orange TV, finding the right outerwear fit may involve some trial and error. Consider the intended use – a heavier winter coat will require more room for layering than a lighter jacket.

VIII. Brooks Brothers Size Consistency & Variations

Brooks Brothers generally maintains consistent sizing across its product lines, but subtle variations can occur, particularly between different fits (Classic, Slim, Extra Slim) and specific garment types. These inconsistencies aren’t unique to Brooks Brothers; similar issues can arise with accessing replay services like France TV REPLAY via Orange, where technical glitches disrupt expected functionality.

Fit plays a significant role. A Slim Fit shirt will naturally run smaller than a Classic Fit in the same stated size. Furthermore, seasonal collections or collaborations might exhibit slight adjustments to accommodate current fashion trends.

Pay attention to product descriptions, as they often detail any specific sizing recommendations. Customer reviews can also provide valuable insights into how a particular item runs. If you’re between sizes, it’s generally advisable to size up, especially for tailored garments. Consistent measurement and comparing to the official size charts are always recommended to minimize returns.

IX. Tips for Accurate Measurements

Achieving the perfect fit with Brooks Brothers clothing begins with accurate self-measurement. Use a flexible measuring tape, not a metal one. For shirts, measure your neck circumference and sleeve length while standing naturally. Ensure the tape is snug but not constricting. When measuring your chest, keep the tape level and breathe normally.

For suits and trousers, measure your chest, waist, and inseam. It’s best to have a friend assist for greater accuracy. Stand straight and avoid hunching. When measuring inseam, wear shoes similar to those you’d wear with the trousers. Remember, accessing services like France TV REPLAY can also require troubleshooting – similar to getting a perfect fit!

Record your measurements and compare them to the Brooks Brothers size charts. Don’t assume your usual size will always fit; sizes can vary. Consider your body shape and preferred fit (Classic, Slim, etc.) when selecting a size. Double-check all measurements before placing your order.

X. Where to Find Detailed Size Charts on the Brooks Brothers Website

Brooks Brothers provides comprehensive size charts directly on their official website to ensure a precise fit for every customer. These charts are typically located on each product page, beneath the size selection options. Look for a link labeled “Size Guide” or “Fit Guide” – it’s usually positioned near the available sizes.

The website offers separate size charts for men’s shirts, suits, trousers, shoes, and other categories. Each chart details specific measurements needed, such as neck, sleeve length, chest, waist, and inseam. Brooks Brothers also provides guidance on understanding their different fits: Classic, Slim, and Extra Slim.

Navigating the site is similar to troubleshooting access to replay services like France TV REPLAY; a little exploration can resolve issues. If you encounter difficulties locating a specific chart, utilize the website’s search function or contact their customer service team for assistance. Remember to check for updated charts, as sizing can occasionally evolve.

Scroll to top