
Honeywell Home T6 Pro Programmable Thermostat Manual: A Comprehensive Guide
This manual provides detailed instructions for the Honeywell T6 Pro, covering setup, operation, troubleshooting, and app integration. It’s designed to maximize your smart home experience,
including energy-saving features and remote control capabilities.
The Honeywell Home T6 Pro Programmable Thermostat represents a significant advancement in home climate control, offering a blend of user-friendly operation and sophisticated smart features. This thermostat is designed to provide precise temperature management, enhancing comfort and potentially reducing energy consumption. It’s a versatile solution suitable for various heating and cooling systems.
Unlike traditional thermostats, the T6 Pro allows for customized scheduling, enabling you to set different temperatures for different times of the day, aligning with your lifestyle and occupancy patterns. Furthermore, its compatibility with the Honeywell Home app unlocks remote control capabilities, allowing adjustments from anywhere with an internet connection. The T6 Pro isn’t just about convenience; it’s about intelligent energy management.
This guide will walk you through every aspect of the T6 Pro, from initial setup and Wi-Fi connectivity to advanced features like geofencing and learning. Whether you’re a first-time smart thermostat user or an experienced homeowner, this manual will empower you to fully utilize the potential of your Honeywell T6 Pro.
Unboxing and Component Overview
Upon opening your Honeywell Home T6 Pro package, you’ll find several key components essential for installation and operation. These typically include the T6 Pro thermostat unit itself, a mounting base plate, screws and wall anchors for secure attachment, and wire labels to simplify the wiring process. A quick start guide is also included for a simplified initial setup.
Carefully inspect all components to ensure nothing is missing or damaged. The thermostat features a sleek, modern design with a clear, backlit display. The mounting base plate is designed to accommodate standard wall wiring configurations. The included wire labels are crucial for correctly identifying and connecting the wires from your existing heating and cooling system.
Before proceeding with installation, familiarize yourself with each component and its purpose. Refer to the detailed wiring diagrams later in this manual to understand how the wires connect to the thermostat. Proper identification and connection of these wires are vital for ensuring correct operation and preventing damage to your system.
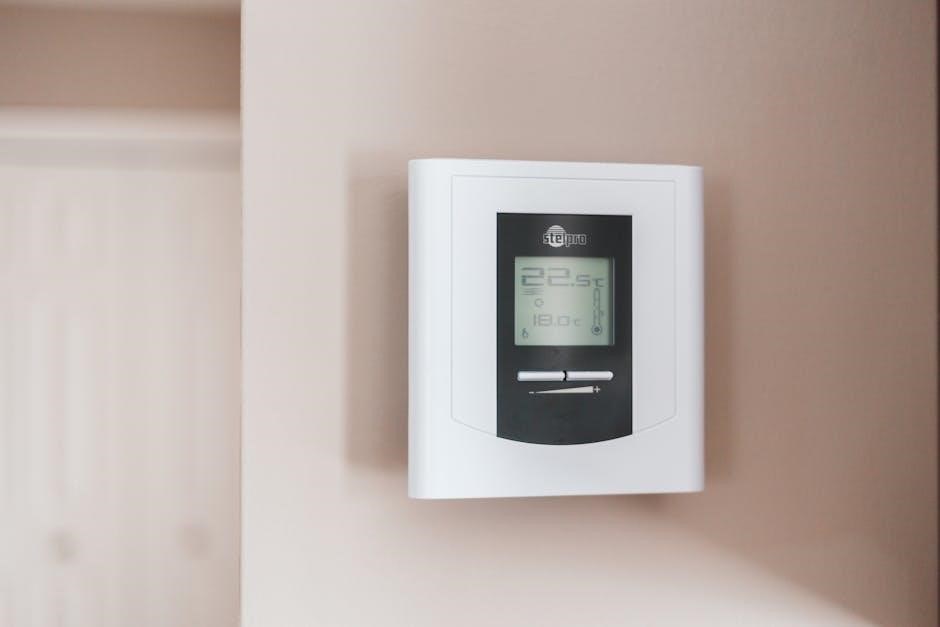
Thermostat Display and Interface
The Honeywell T6 Pro thermostat boasts a user-friendly interface centered around a vibrant, backlit LCD display. This display clearly presents the current room temperature, set temperature, operating mode (heat, cool, auto, off), and time. Navigation is primarily achieved through a responsive touchscreen, allowing for intuitive control of all thermostat functions.
The main screen provides quick access to temperature adjustments, mode selection, and schedule settings. Swiping across the screen reveals additional options, such as fan control (auto, on) and system settings. Icons are used to represent different functions, making the interface easy to understand even for first-time users. A menu button provides access to more advanced settings and configuration options.
The display also indicates Wi-Fi connectivity status and alerts you to any system errors or warnings. Brightness can be adjusted to suit your preferences and ambient lighting conditions. The intuitive design ensures effortless control over your home’s climate, maximizing comfort and energy efficiency.
Initial Setup and Registration with Honeywell Home App
To unlock the full potential of your Honeywell T6 Pro, begin by downloading the Honeywell Home app from your device’s app store (iOS or Android). Once installed, create an account or log in if you already have one. The app guides you through a straightforward setup process, initiating thermostat registration.
During registration, the app will prompt you to connect your thermostat to your home’s Wi-Fi network – a crucial step for remote control and smart features. Follow the on-screen instructions carefully, ensuring you select the correct network and enter the password accurately. The app may ask for permission to access location services for geofencing functionality.
Once connected, the app automatically detects your thermostat model. You’ll be asked to name your thermostat and assign it to a specific room. This allows for zone-based control if you have multiple Honeywell Home devices. Successful registration grants access to remote control, scheduling, and advanced features within the Honeywell Home ecosystem.

Connecting to Wi-Fi Network
Establishing a stable Wi-Fi connection is paramount for utilizing the smart features of your Honeywell T6 Pro. Begin by ensuring your home network is operational and you have the network name (SSID) and password readily available. On the thermostat display, navigate to the network settings – typically found within the menu options.
The thermostat will scan for available Wi-Fi networks. Select your network from the list. If your network is hidden, you may need to manually enter the SSID. Carefully input the correct password, paying attention to capitalization. The thermostat will attempt to connect, displaying a progress indicator.
If the connection fails, double-check the password and ensure the thermostat is within range of your router. Restarting both the thermostat and router can often resolve connectivity issues. A lost Wi-Fi signal will trigger an error message on the display, prompting you to reconnect or select an alternative network.

Manual Programming: Setting Schedules

The Honeywell T6 Pro allows for customized heating and cooling schedules directly on the thermostat, independent of the app. Access the programming mode through the main menu. You’ll typically define separate schedules for weekdays and weekends, or create a unique 7-day program.
For each period (Wake, Leave, Return, Sleep), you can set a desired temperature. The thermostat will automatically adjust to these temperatures at the programmed times. Consider your daily routine when setting these periods – for example, lower the temperature while you’re away at work or asleep.
To edit a schedule, select the period you wish to modify and adjust the time and temperature. You can temporarily override the schedule by manually adjusting the temperature; the thermostat will revert to the programmed schedule at the next scheduled period. Remember to save your changes after making adjustments.
Smart Features: Geofencing and Learning
The Honeywell T6 Pro elevates comfort and efficiency with intelligent features. Geofencing utilizes your smartphone’s location to adjust the temperature automatically; Define a virtual perimeter around your home; when you leave, the thermostat enters an energy-saving away mode. Upon your return, it pre-heats or pre-cools to your preferred temperature.
The thermostat’s learning capability observes your temperature adjustments and schedule preferences over time. It then suggests optimized schedules to maximize energy savings without sacrificing comfort. This adaptive learning refines the heating and cooling patterns based on your actual usage.

These smart features are configured and managed through the Honeywell Home app. Ensure location services are enabled on your smartphone for geofencing to function correctly. Regularly review the suggested schedules to confirm they align with your lifestyle and preferences.
Remote Control via Honeywell Home App
The Honeywell Home app provides comprehensive remote control of your T6 Pro thermostat. After successful registration and Wi-Fi connection, you can adjust the temperature, change modes (heat, cool, auto, off), and view current system status from anywhere with an internet connection.
The app mirrors the thermostat’s interface, allowing you to create and modify schedules, override settings, and access energy usage reports. You can also receive alerts for extreme temperatures or system malfunctions, ensuring prompt attention to potential issues.
Geofencing and learning features are fully managed through the app, offering granular control over their settings. Multiple users can be granted access to control the thermostat, providing convenience for all household members. Regular app updates ensure optimal performance and access to the latest features.
Understanding Error Messages and Troubleshooting

The Honeywell T6 Pro displays error messages to indicate system issues. Common alerts include “Connection Lost,” signaling Wi-Fi disruption, and messages related to sensor malfunctions or wiring problems. Consult the app or thermostat display for specific error codes.
Troubleshooting begins with verifying the power supply and wiring connections. Ensure the thermostat is securely mounted and the breaker is active. For Wi-Fi issues, reboot your router and re-establish the connection through the Honeywell Home app.
If error messages persist, refer to the detailed troubleshooting section within the app or the full manual. Common fixes include resetting the thermostat to factory defaults (use caution!), checking battery levels (if applicable), and verifying compatibility with your HVAC system. If problems continue, contact Honeywell Home support for assistance.

Lost Wi-Fi Connection Issues
A frequent concern with smart thermostats is a lost Wi-Fi connection. The Honeywell T6 Pro will display a “Connection Lost” message, impacting remote control and scheduling features. Initial steps involve checking your home’s internet service and router functionality. Ensure other devices connect successfully.
Restarting both the thermostat and your Wi-Fi router is often effective. Within the Honeywell Home app, attempt to reconnect the thermostat to your network, re-entering your password if necessary. Verify the Wi-Fi signal strength at the thermostat’s location; weak signals can cause intermittent disconnections.
If issues persist, check for firmware updates for both the thermostat and the Honeywell Home app. Interference from other devices can also be a factor. Consider relocating the router or thermostat for improved signal clarity. Contact Honeywell support if reconnection attempts repeatedly fail.
Manual vs. Auto Mode Operation
The Honeywell T6 Pro offers both Manual and Auto modes, providing flexibility in temperature control. In Manual mode, you directly set the desired temperature, and the thermostat maintains that setting continuously, overriding any programmed schedule. This is ideal for temporary adjustments or when a consistent temperature is needed regardless of time.
Auto mode utilizes the programmed schedule you’ve created within the thermostat or Honeywell Home app. The thermostat automatically adjusts the temperature based on the time of day and your pre-defined settings, optimizing comfort and energy efficiency. Switching between modes is typically done directly on the thermostat’s interface.
Remember to verify the mode setting if you notice unexpected temperature changes. For example, if the temperature isn’t changing as expected, confirm the thermostat isn’t inadvertently in Manual mode. Understanding these modes allows for tailored climate control based on your lifestyle and preferences.
Temperature Range and Operating Limits (T6)
The Honeywell T6 Pro thermostat is designed to operate within specific temperature ranges to ensure optimal performance and prevent damage. The typical operating temperature range for the T6 model is 20°C to 40°C (4°F to 104°F). However, the storage temperature range is broader, spanning from 20°C to 70°C (4°F to 158°F).
Operating outside the specified range may lead to inaccurate readings, reduced efficiency, or potential malfunction. It’s crucial to consider these limits, especially in extreme climates. The thermostat is engineered to maintain consistent temperature control within its defined boundaries, providing reliable comfort.
Exceeding these limits during storage could also affect the thermostat’s lifespan. Always refer to the complete manual for detailed specifications and safety guidelines. Understanding these parameters ensures the longevity and proper functioning of your Honeywell T6 Pro thermostat.
Energy Meter Functionality (525 Model)
The Honeywell T6 Pro, specifically the 525 model, incorporates an energy meter feature designed to track and display your heating and cooling usage. This valuable tool provides insights into your energy consumption patterns, allowing you to identify opportunities for savings and optimize your home’s energy efficiency.
The energy meter displays data in a user-friendly format, often showing historical usage trends over days, weeks, or months. This information can be accessed directly through the thermostat’s interface or remotely via the Honeywell Home app. By monitoring your energy usage, you can make informed decisions about your thermostat settings and overall energy habits.
This feature empowers you to reduce your carbon footprint and lower your utility bills. The 525 model’s energy meter is a key component in promoting responsible energy management within your smart home ecosystem, offering a practical approach to sustainability.
Wiring Diagrams and Installation Considerations
Proper installation of the Honeywell T6 Pro is crucial for optimal performance and safety. The manual provides detailed wiring diagrams catering to various HVAC system configurations, including conventional and heat pump systems. Carefully review these diagrams before commencing any wiring work, ensuring compatibility with your existing setup.
Important considerations include identifying the correct wiring terminals for power (Rh/Rc), heating (W), cooling (Y), and common (C). A ‘C’ wire is often required for consistent power to the thermostat. If a C-wire isn’t present, a C-wire adapter may be necessary. Always disconnect power to your HVAC system at the breaker before handling any wiring.
Safety first! If you are uncomfortable with electrical work, consult a qualified HVAC technician. Incorrect wiring can damage your thermostat or HVAC system. The manual emphasizes adherence to local electrical codes and provides guidance on safely removing and disposing of any mercury-containing thermostats if replacing an older model.
Replacing Mercury-Containing Thermostats

If your Honeywell T6 Pro is replacing an older thermostat containing mercury, extreme caution is required. Mercury is a hazardous substance, and improper disposal poses environmental and health risks. The manual provides explicit instructions on how to safely handle and dispose of these older units.

Do not discard the old thermostat in regular household trash. Instead, contact your local waste management authority for specific disposal guidelines. Many communities have designated collection programs for mercury-containing devices. The manual may also provide links to resources for finding nearby recycling centers.
Carefully remove the old thermostat and seal it in a plastic bag to prevent mercury leakage. Avoid breaking the glass tube containing the mercury. Follow all local, state, and federal regulations regarding mercury disposal. Prioritize environmental responsibility when upgrading to the T6 Pro, ensuring a safe and compliant replacement process.
Storage Temperature Specifications
Proper storage of your Honeywell T6 Pro thermostat is crucial to maintain its functionality and longevity. The manual details specific temperature ranges to ensure the device remains undamaged when not in use. Exposing the thermostat to extreme temperatures can compromise its internal components and affect its performance.
For the T6 model, the recommended storage temperature range is 20°C to 40°C (4°F to 104°F). However, extended storage outside of operational temperatures, up to 20°C to 70°C (4°F to 158°F), is permissible without causing permanent damage. Avoid storing the thermostat in direct sunlight, near heat sources, or in areas with high humidity.
Before reinstalling after storage, allow the thermostat to acclimate to room temperature for at least 30 minutes. This prevents condensation buildup and ensures accurate temperature readings. Adhering to these storage guidelines will help preserve the integrity of your Honeywell T6 Pro and guarantee reliable operation when you need it.
Coolant Recirculation and Radiator Cooling (Pro Series)
The Honeywell Pro Series thermostats extend beyond typical home heating and cooling, offering advanced features like coolant recirculation and radiator cooling. These functionalities are particularly beneficial for maintaining precise engine temperatures in specialized applications, going beyond standard HVAC systems.
Coolant recirculation ensures consistent temperature regulation by continuously circulating coolant, preventing overheating or undercooling. This is vital for optimal performance and longevity of the associated equipment. Radiator cooling, conversely, actively manages heat dissipation, preventing excessive temperatures during peak operation.
These Pro Series capabilities are ideal for environments requiring strict temperature control, such as industrial machinery or specialized vehicles. The thermostat package includes components designed to regulate these processes effectively. While not applicable to all T6 Pro models, this feature highlights the versatility and advanced engineering of the Honeywell Pro line, offering solutions beyond conventional home comfort.